I know you discovered windows were going to be prohibitively expensive.
Have you thought about installing some windows in the sides of the slide that wouldn't be seen when the slide is in?
That just looks like a lot of dark without any windows.
1935 Chevy school bus
Moderator: TMAX
-
Mark R. Obtinario
- Seasoned Nomadicista
- Posts: 340
- Joined: Mon Jun 13, 2005 12:19 am
- Location: Winlock, WA
- Contact:
Re: 1935 Chevy school bus
Portholes!
Re: 1935 Chevy school bus
NOOOOOOOOOOO!  Actually the slide out is only about 32"deep and is intended for night time use by my feet while they are all tucked in. There is plenty of day time light as the pop up above the walkway is made of UV blocking translucent (white) polycarbonate. That gives a swatch of light eight feet by three feet right down the center of the bus--I'll probably have to issue welding helments to folks as they enter my bus to keep them from going blind Jack
Re: 1935 Chevy school bus
Hello All. I've begun work on my water tanks and discovered I'll have to add and delete pipe fittings to get my used tanks to work. I talked to a couple of RV repair shops locally about "spin welding" some new fittings. The fittings themselves ranged from a dollar to $3.50 each which is cheap enough. The catch is that they charge between $20 and $25 each to do the weld--special equipt. etc. While they agreed to sell me the fittings they assured me that I'd have to have the proper tool to install them--so of course I lied and told them I had the tool 
My water tanks are made of a waxy polyethelene plastic that nothing will stick to glue wise. The tanks themselves are cast plastic and the various fittings are welded using friction generated heat to melt the fittings to the tank. Basically what they do is spin the fittings against a pre-drilled hole until the friction melts both the fitting and the tank--and then let it cool. How hard could that be? Besides, I've never liked being told "you can't" .
Let me preface the rest of this tale by saying I wouldn't recommend doing what I did and while I made it work I didn't get away scott free
I knew that I'd have to get the fittings spinning at a pretty good rate in order to generate enough friction to make the weld. I doug around in my tool box and came up with an old 1 1/2 HP 1/4" shank router. I chose threaded fittings because I figured I'd be able to use a series of reducers to finally arrive at the 1/4" shank to fit the router. Here are some of the do's and don't's:
Do make sure the pilot hole in the tank is very close to the outside diameter of the fitting boss--or it will wander all over.
Do clean the oxidation and dirt off the tank and fitting where the weld is to take place.
Do make sure that the runout on the adapter you have made is very slight--or the fitting/router will jump all over the place and piss you off.
Do stop the router before you melt completely through the tank.
Do wait patiently for the weld to cool before trying to remove the various fittings used to install the part.
Do wear eye and ear protection.
DON"T wear a tank top and short sleeves while you try this out--no matter how hot and muggy it may be in your shop! I, after the fact, looked at the RPM of my router (25000 RPM) and it began to make sense that I recieved a spray of moltent plastic across my chest and forearms about two seconds after I hit the switch Oh well, I've never learned things the easy way and the blisters are small--and tear drop shaped
Jack
Cool so far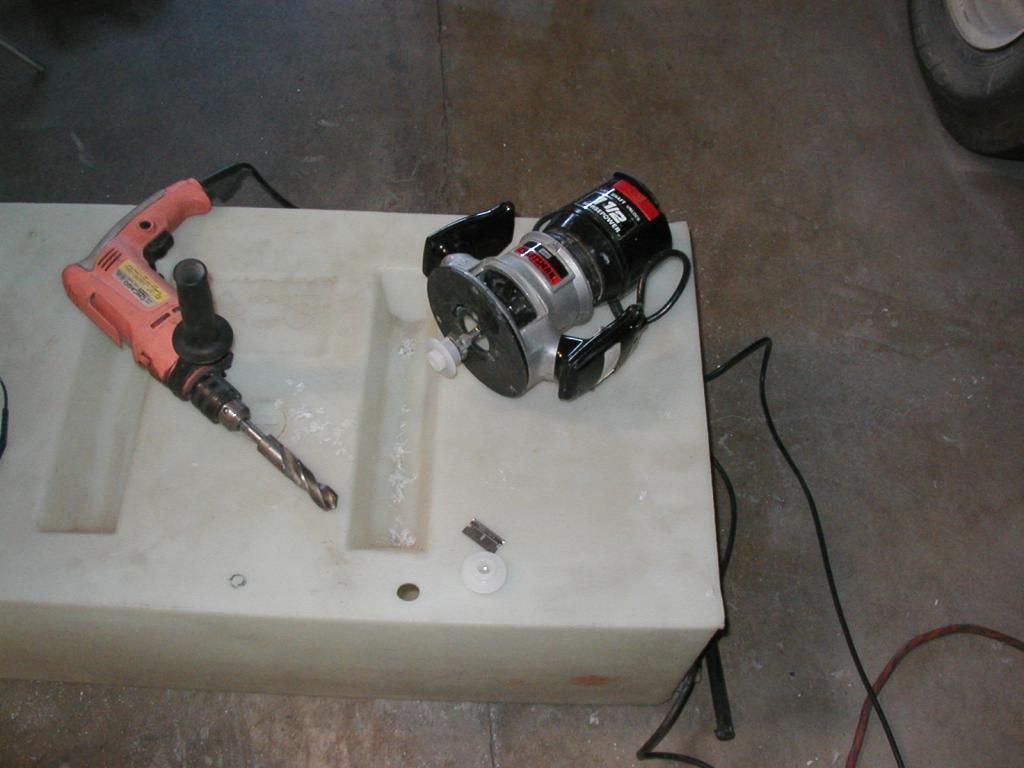
Final product.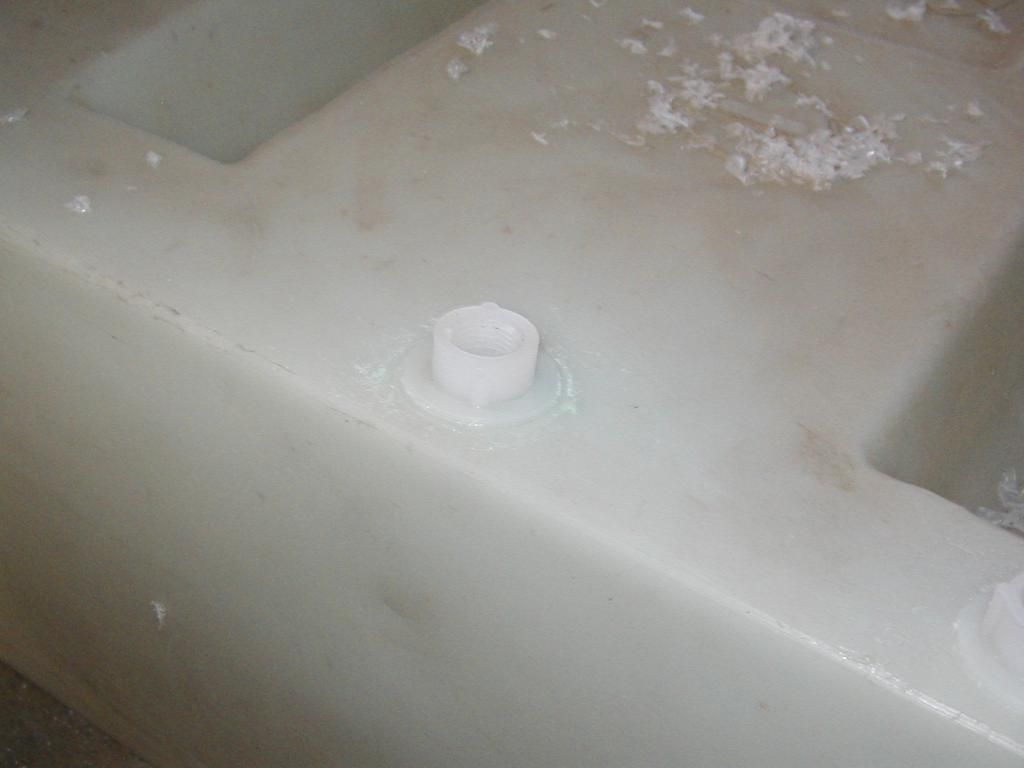
My water tanks are made of a waxy polyethelene plastic that nothing will stick to glue wise. The tanks themselves are cast plastic and the various fittings are welded using friction generated heat to melt the fittings to the tank. Basically what they do is spin the fittings against a pre-drilled hole until the friction melts both the fitting and the tank--and then let it cool. How hard could that be? Besides, I've never liked being told "you can't" .
Let me preface the rest of this tale by saying I wouldn't recommend doing what I did and while I made it work I didn't get away scott free
I knew that I'd have to get the fittings spinning at a pretty good rate in order to generate enough friction to make the weld. I doug around in my tool box and came up with an old 1 1/2 HP 1/4" shank router. I chose threaded fittings because I figured I'd be able to use a series of reducers to finally arrive at the 1/4" shank to fit the router. Here are some of the do's and don't's:
Do make sure the pilot hole in the tank is very close to the outside diameter of the fitting boss--or it will wander all over.
Do clean the oxidation and dirt off the tank and fitting where the weld is to take place.
Do make sure that the runout on the adapter you have made is very slight--or the fitting/router will jump all over the place and piss you off.
Do stop the router before you melt completely through the tank.
Do wait patiently for the weld to cool before trying to remove the various fittings used to install the part.
Do wear eye and ear protection.
DON"T wear a tank top and short sleeves while you try this out--no matter how hot and muggy it may be in your shop! I, after the fact, looked at the RPM of my router (25000 RPM) and it began to make sense that I recieved a spray of moltent plastic across my chest and forearms about two seconds after I hit the switch
Jack
Cool so far

Final product.

Re: 1935 Chevy school bus
I am sooo glad you got that worked out. For a while there I thought we might not be able to add "spin welding" to your list of skills! Now, about those theoretical anti-gravity equations...
Re: 1935 Chevy school bus
Tango. HA HA. Oh by the way, I took my propane tank to the propane place and they told me that because the filler was at the bottom of the tank the auto shut off dealie wouldn't work for the remote fill so I guess I'll just have to live with one tank. Where is the fill port on your new tank?
Jack
Jack
Re: 1935 Chevy school bus
I can just see you dancing around when that molten plastic starts flying!
Glad it's not just me that does stuff like that. I've had some interesting moments while trying to re-purpose some random tool for something nature never intended.
Turns out, I DO have a router........Hmmmmmmm
Glad it's not just me that does stuff like that. I've had some interesting moments while trying to re-purpose some random tool for something nature never intended.
Turns out, I DO have a router........Hmmmmmmm
-
somewhereinusa

- Posts: 323
- Joined: Sat Feb 12, 2011 2:44 pm
- Location: Andrews, Indiana
- Contact:
Re: 1935 Chevy school bus
Good job Jack

Of course another way is to try to charge me waaaaay to much for your product.
I also find that no one seems to build anything the way I have it envisioned.
That's the surest way to get me to figure out how to do somethingI've never liked being told "you can't" .
Of course another way is to try to charge me waaaaay to much for your product.
I also find that no one seems to build anything the way I have it envisioned.
I would say that technically, you didn't lie. You had a tool, and you got the job done. It just wasn't the tool they were talking aboutI lied and told them I had the tool
Re: 1935 Chevy school bus
I spent the day redecoraing the USED black tank for my bus. I've used up 50 gallons of hot water and two bars of Dial soap and am now heading out to the granny flat to use up another 30 gallons of hot water and another bar of Dial---get the picture? Jack
-
Stealth Camper
- Posts: 826
- Joined: Fri Apr 09, 2010 5:17 pm
- Location: Oklahoma
- Contact:
Re: 1935 Chevy school bus
There's no car wash near by?ol trunt wrote:I spent the day redecoraing the USED black tank for my bus. I've used up 50 gallons of hot water and two bars of Dial soap and am now heading out to the granny flat to use up another 30 gallons of hot water and another bar of Dial---get the picture? Jack
Re: 1935 Chevy school bus
Ha! I'm not smart enough to have thought of that (car wash) so I hauled multiple loads of "brown bombers" to the toilet in a 2'X3' plastic tub. The contents of the tank had a clay like consistency and had to be encouraged a good bit to keep a flow going. I did get a stress crack repaired, the original toilet entry hole plugged and a new toilet entry cut after I got the tank cleaned out. I'm now designing the holding straps to hold the tank under my bus. I'm not planning to repeat this process again any time soon.
Re: 1935 Chevy school bus
Hello All. I'm back to playing hop scotch again on my build. All the tanks are ready for permanent installation but I can't finish them up until the insulation and wiring are completed in the walls--which requires that the new "skin" panels be completed because they are welded to the outer walls which must be done before the foam insulation goes in. ETC. ETC.
Some time ago I made body dyes for the lower third of the body and had sheet metal stamped at a local steel fabrication shop. I have now installed the panels on the left side of the bus and am very happy with their fit and finish. The material is heavy enough that I didn't have a problem with warpage as I welded them in.
I had to re-route the filler tube for the diesel tank because the original filler would have ended up in the shower stall. I had a bunch of 2" aluminized exhaust pipe bent up and cut and pasted it across the frame in and out of a rail and then up through the body to a new filler neck on the side of the bus.
I also got the propane tank installed and the rough gas line done. I took pics of the install to the local propane dealer along with a bunch of measurements in hopes of getting his blessing on the install. I was afraid he'd say that I had to have a door in the side of the bus to access the propane tank but to my relief he said he could easily fill the tank from under the bus--no problem. I guess thats it for now.
Jack
Propane tank installed.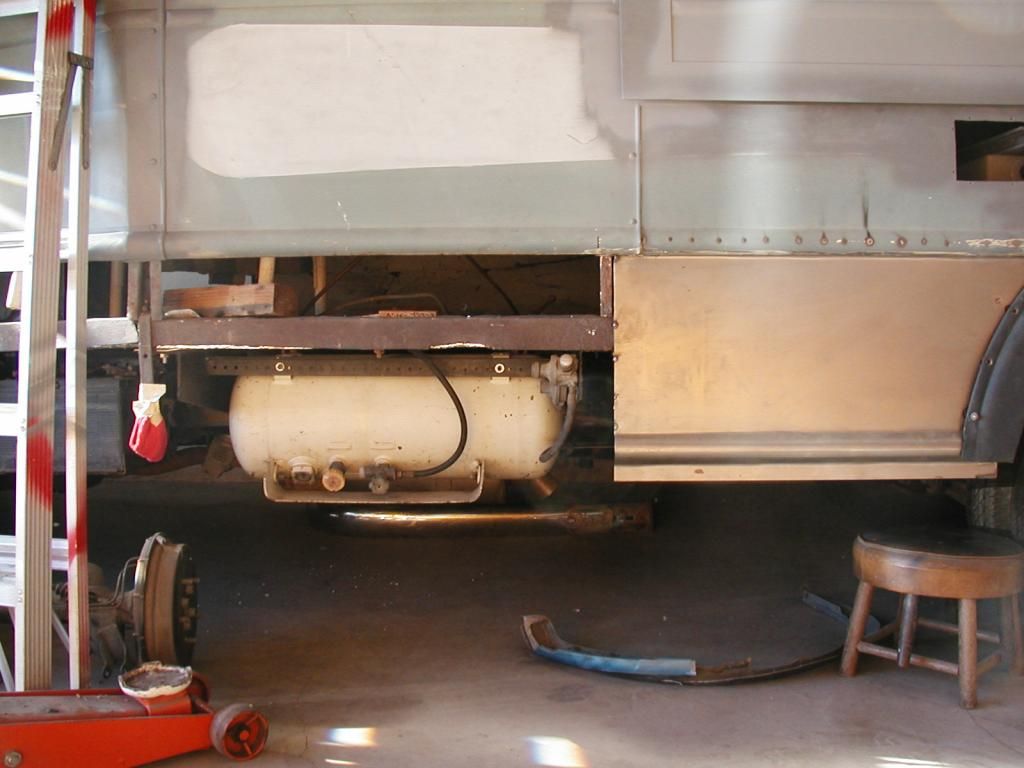
Pic of diesel filler in frame. It is the brown pipe. The pic was taken through the hole in the floor where ths sunken bath will be.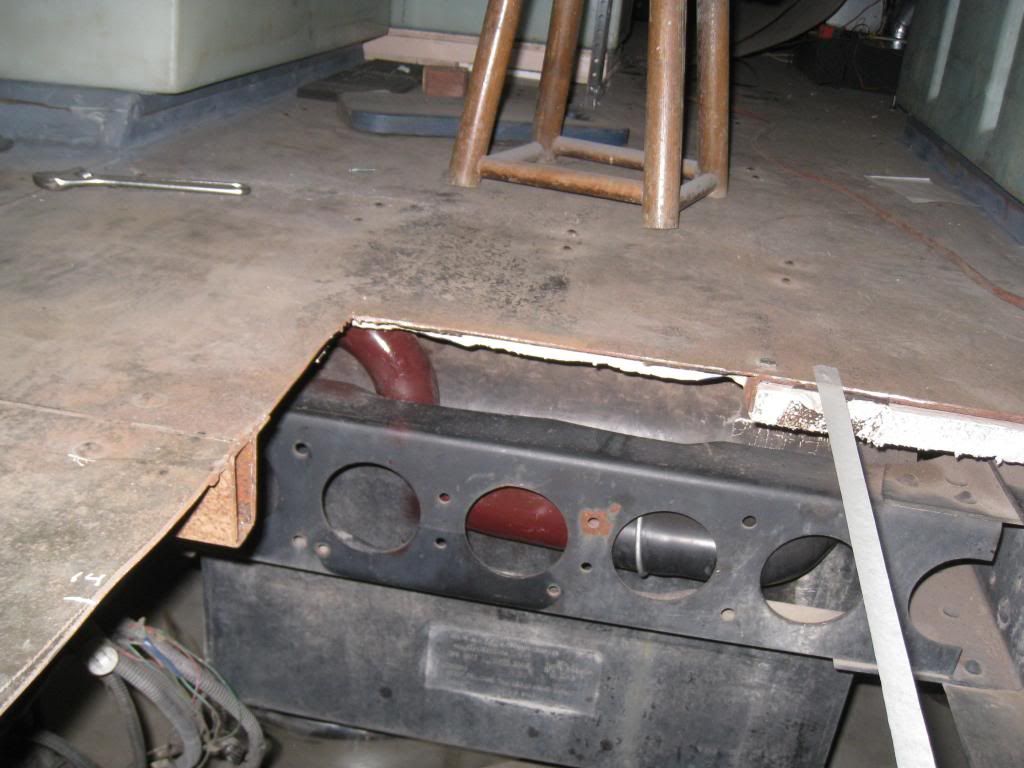
View of diesel filler as it goes out the side of the bus. The water tanks fit under the slide out and bed.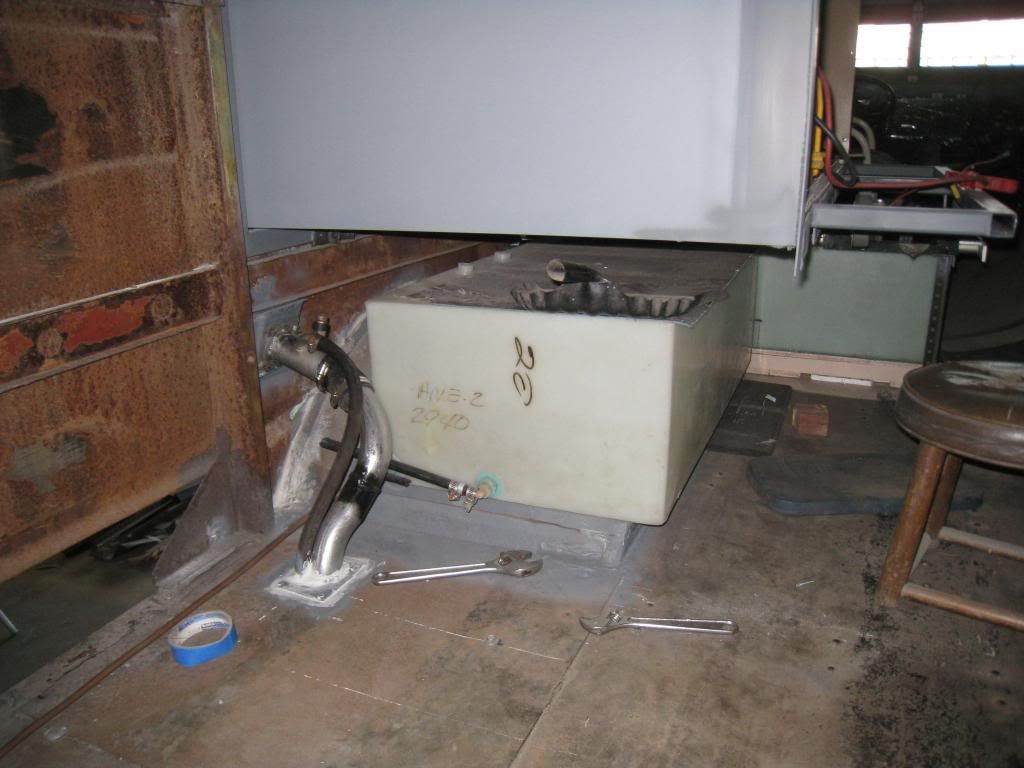
View of grey water tank which will be under the stove/oven.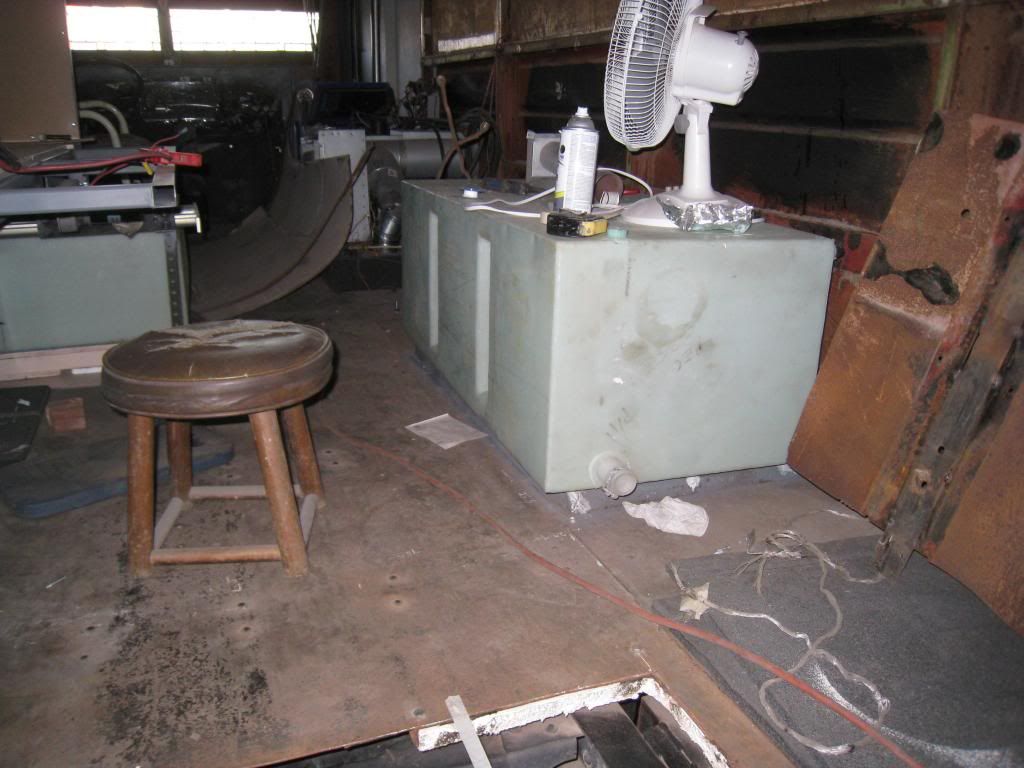
View of the completed lower body panels.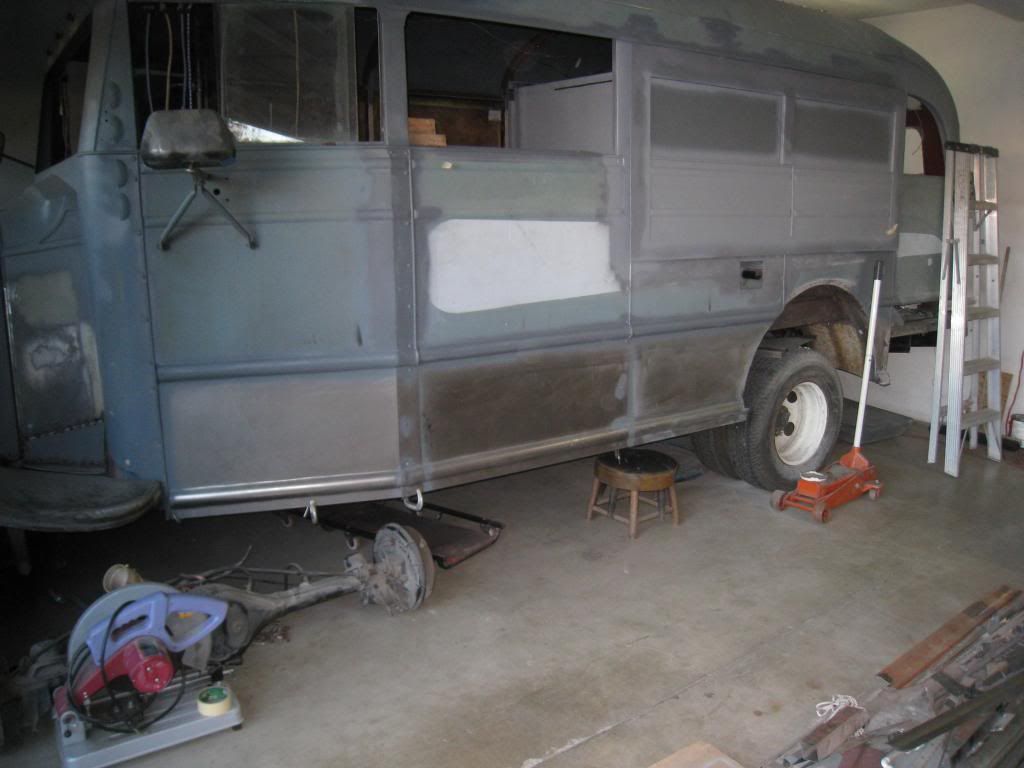
Some time ago I made body dyes for the lower third of the body and had sheet metal stamped at a local steel fabrication shop. I have now installed the panels on the left side of the bus and am very happy with their fit and finish. The material is heavy enough that I didn't have a problem with warpage as I welded them in.
I had to re-route the filler tube for the diesel tank because the original filler would have ended up in the shower stall. I had a bunch of 2" aluminized exhaust pipe bent up and cut and pasted it across the frame in and out of a rail and then up through the body to a new filler neck on the side of the bus.
I also got the propane tank installed and the rough gas line done. I took pics of the install to the local propane dealer along with a bunch of measurements in hopes of getting his blessing on the install. I was afraid he'd say that I had to have a door in the side of the bus to access the propane tank but to my relief he said he could easily fill the tank from under the bus--no problem.
Jack
Propane tank installed.

Pic of diesel filler in frame. It is the brown pipe. The pic was taken through the hole in the floor where ths sunken bath will be.

View of diesel filler as it goes out the side of the bus. The water tanks fit under the slide out and bed.

View of grey water tank which will be under the stove/oven.

View of the completed lower body panels.

-
stuartcnz

- Site Admin
- Posts: 875
- Joined: Fri Dec 19, 2008 8:05 pm
- Location: Aotearoa, New Zealand
- Contact:
Re: 1935 Chevy school bus
Jack, I don't think you are building a bus. looking at that last series of photos, I think you are really building a Tardis.
You don't really expect us to believe you can fit that much stuff inside a bus do you?
You don't really expect us to believe you can fit that much stuff inside a bus do you?
https://stuartcrawfordmedia.com/
https://nomadichome.org/
https://ethicallogistics.com/ Challenging the way you think.
JID:stuart@nomadicista.nz
https://nomadichome.org/
https://ethicallogistics.com/ Challenging the way you think.
JID:stuart@nomadicista.nz
Re: 1935 Chevy school bus
Stuart, What I'm afraid of is that my bus will turn into a Sidrat rather than a Tardis--bigger on the outside and smaller on the inside.
Jack
Jack
-
somewhereinusa
- Posts: 323
- Joined: Sat Feb 12, 2011 2:44 pm
- Location: Andrews, Indiana
- Contact:
Re: 1935 Chevy school bus
Who is online
Users browsing this forum: No registered users and 50 guests