Page 6 of 55
Re: 1935 Chevy school bus
Posted: Sun Apr 14, 2013 1:53 pm
by ol trunt
Hey Tango and all. I don't really have anything new to post but I thought I'd share a couple of pics of the shore power from the back side so you have a visual of the adaptor and the 180 degree issue.
Tango, bring me up to date on youe engine/tranny instal. Any luck finding a PS box etc? I know what you mean about the "ABC's" of building. I realized today that my pneumatic door will swing back and hit the awning support unless I shorten the awning--lets see was that Q or W on the list, I can't remember. Maybe I'll use the Spanish alphabet 'cause it is missing a couple of letters of the English alphabet--might hurry things up!

Jack
Here is how I ended up with the 180 degree pigtail I needed. 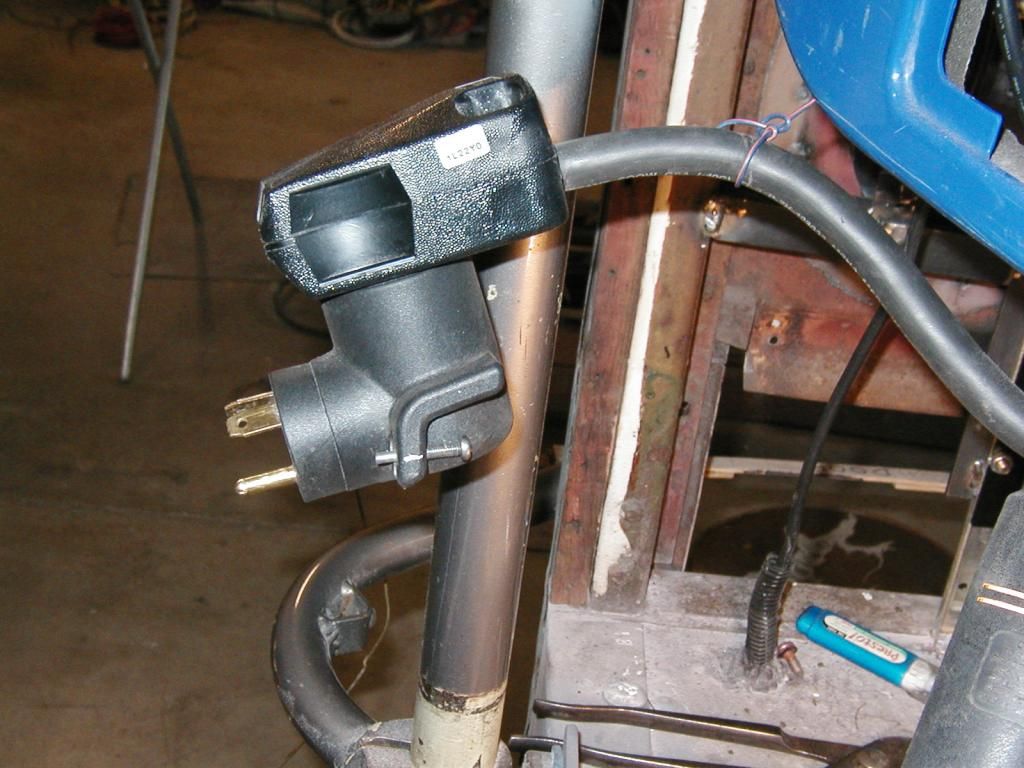 I drilled holes in the ears of the adaptor and fastened it to the bus body. With the male plug so supported it is easy to plug in the extension cord.
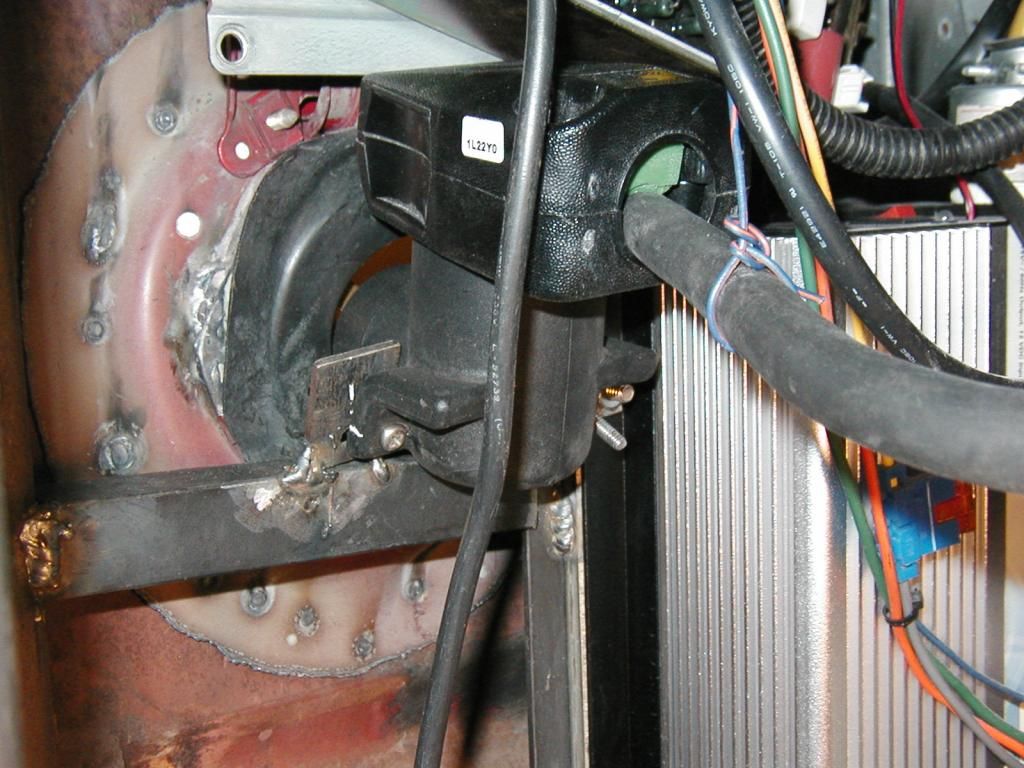 I painted around the shore power hookup so I could finish up the weatherproofing. The color looks pink--it's not.
Re: 1935 Chevy school bus
Posted: Mon Apr 15, 2013 4:45 am
by tango
Howdy Jack --- The only movement on the engine/tranny install is that I've ordered the iron necessary to build a rolling A-frame hoist. Just couldn't bring myself to trust the leaky Chinese hydraulic rig that I have with this package. Will pick up the steel on Monday and start melting & bolting it together. Problem now is that I still don't know how I'm gonna raise the dang thing once it's together. Seems I may need a hoist to raise my hoist.
Re: 1935 Chevy school bus
Posted: Tue Apr 16, 2013 10:38 am
by rlaggren
Just a stray thought on material. Around here we can get 1-1/2" light weight nylon web in the HVAC row of the box stores. Used to hang ducting and isolates vibrations better than metal strap. Clearly for light weight applications though.
Rufus
Re: 1935 Chevy school bus
Posted: Fri Apr 19, 2013 10:25 am
by Mark R. Obtinario
I like your build. It has a lot of neat ideas incorporated into the design.
One problem I see with your shore power connection is the location.
Every RV pedestal I have ever seen has had the pedestal oriented to line up with the driver's side of the RV.
Your shore power cord is going to have to be seriously long in order to reach the shore power plug unless you pull in backwards into the spot. Which would then put your front door facing the front door of the RV in the next spot--not bad if family or friends but it could be awkward for strangers.
Re: 1935 Chevy school bus
Posted: Fri Apr 19, 2013 2:36 pm
by ol trunt
Hello All. Riaggren, thanks for the tip on the strap material--you must have seen the bow tie knot in the pic of the wiring. That was only temporary while I finished up the rough electric and I agree that the strap material you suggest is the way to go.
Mark, I know that the electric usually is on the drivers side (left) and with a larger bus that is where I would put it. I should be OK as I have 42' of shore line and while I'll have to toss it under the bus, having the port on the right allows me to use otherwise lost space. With only 10 or 11 feet of bus body and the fact that the slide out and the water and propane tanks will be located on the left I really didn't feel I had much choice.
I traded some labor with a friend for an 18' long awning. The hardware is in pretty good shape but I'll be looking for new material. I cut the awning down to 6' and mounted it on the bus (wish it could be longer but that is all the room I have) and I ended up using only one of the torsion springs so I will be able to fabricate a cover for the slide out with the spare parts. The timing was good because I had removed the inner roof to weld in a couple of nuts to support the overhead cabinets as well as as a blind nut for a gantry to lift the genny from its drawer should it becone necessary. I want to complete all the welding in the roof area (and wiring) before I do the spray foam insulation. While I welded the awning brackets to the roof, the awning track will be installed with sheet metal screws and LOTS of Dum Dum. Jack
This is the rear awning bracket ( I'll remove the aftermarket light as the bus is not required in California to have marker lights because it is under 8' wide and it didn't have them from the factory).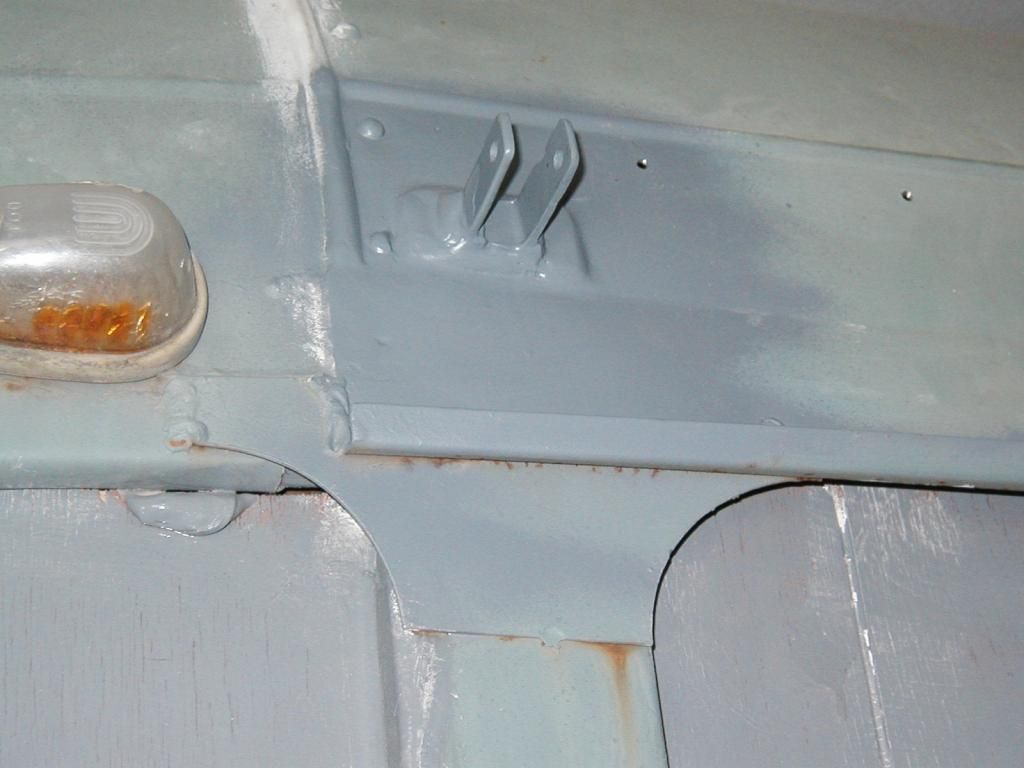 This pic shows the awning track.
 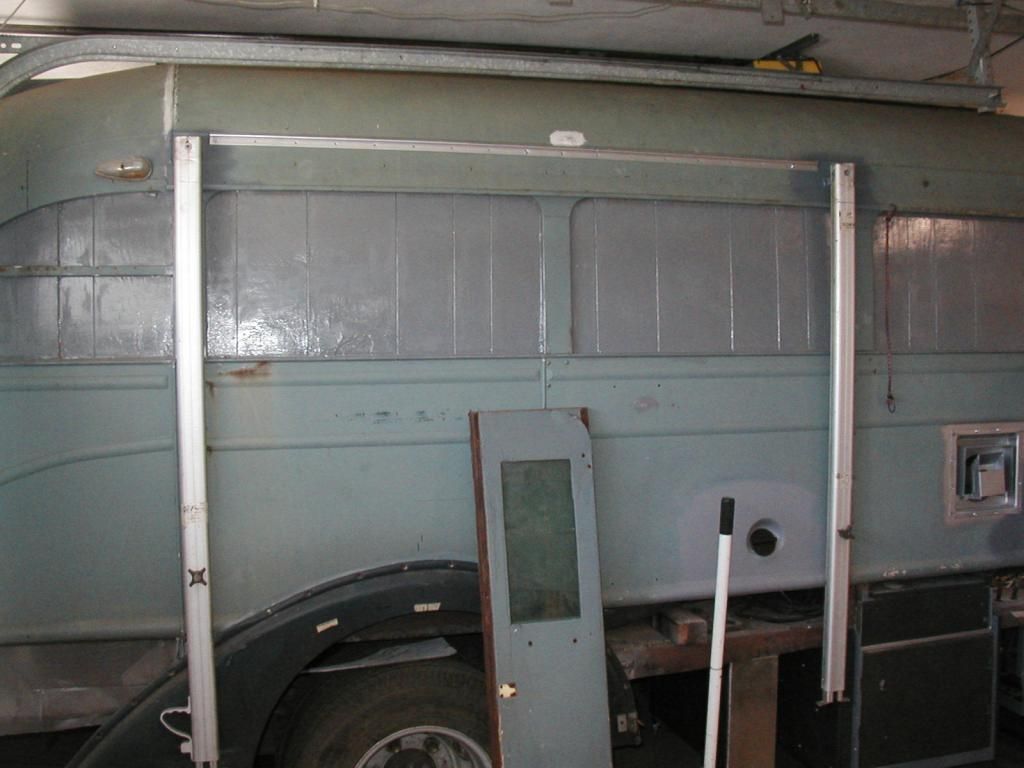 [/b[
[/b[
Here is a pic of the awning roller tube. The horizontal bar will be installed in the vertical supports rather than the way it is now. 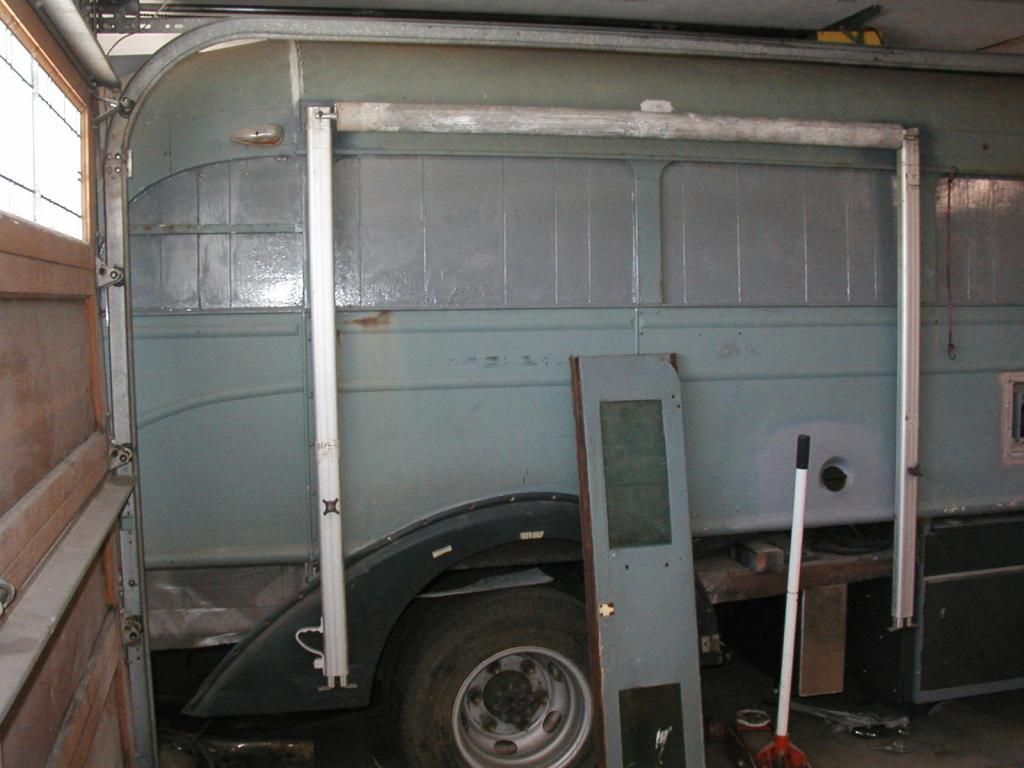
Re: 1935 Chevy school bus
Posted: Sat Apr 20, 2013 1:48 pm
by ol trunt
Hello All. I don't know where my pics went in my last couple of posts. I'll try to figure it out later.
I got to play with my bus all day today.Some time ago I put my genny in a pull out drawer on the side of the bus. Unfortunately, the space between the frame and the outer bus body left the genny box sticking out of the side about 1 1/2". I have been trying to figure out how best to design a cover for the protrusion that would'nt be too ugly. An extra long hot shower last night seems to have provided the answer--lets see what you all think. I'll show you where I got to today and hopefully by weekends end I'll have the whole thing buttoned up. Jack
The bus body has several stamped half round body lines. One is just above the genny box and another is near the bottom. A while back I made a die to stamp new side body panels so I'll use one of them as the face of the cover. In this pic you can see several holes drilled in the bus body. I'll use them to plug weld in a "U" shaped channel which will serve to secure the top of the cover.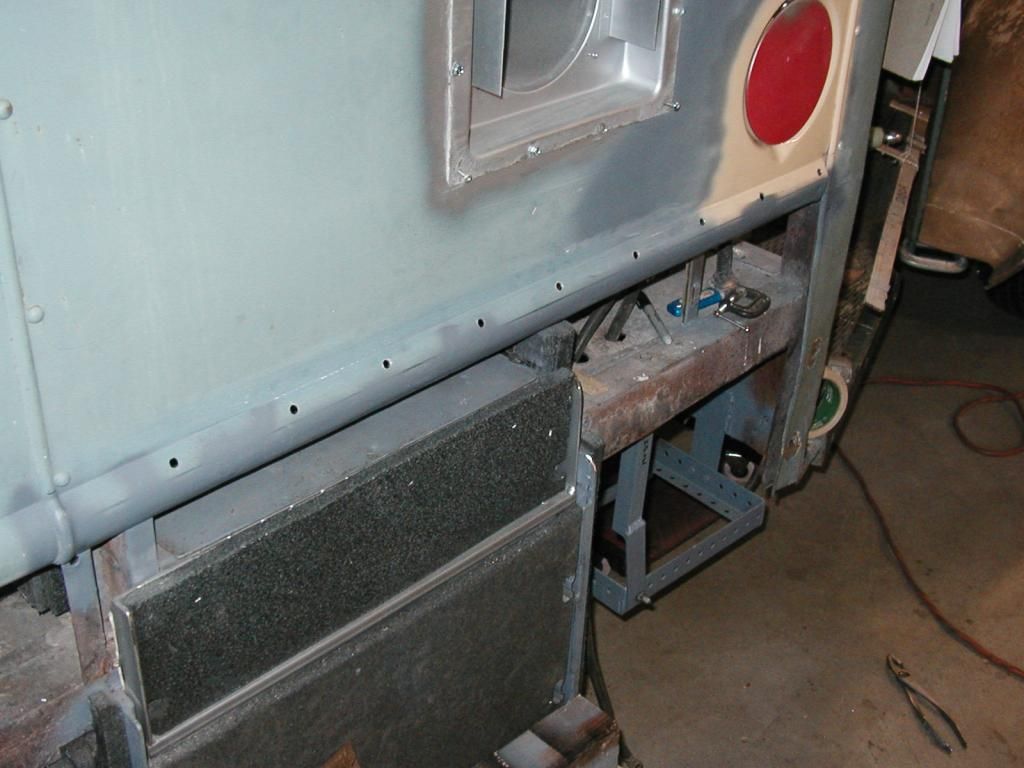 Here is a pic of my mock-up of the "U" channel with a section of the stamped replacement panel inserted.
 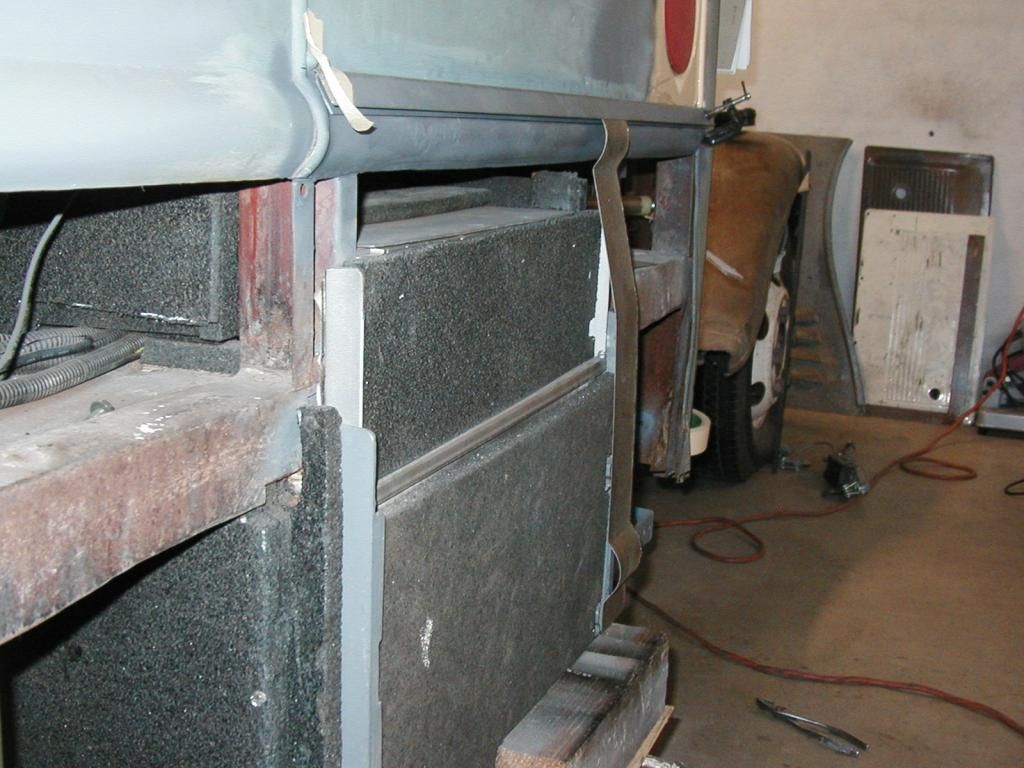 This is a pic of the stamped panel ready to be cut to fit.
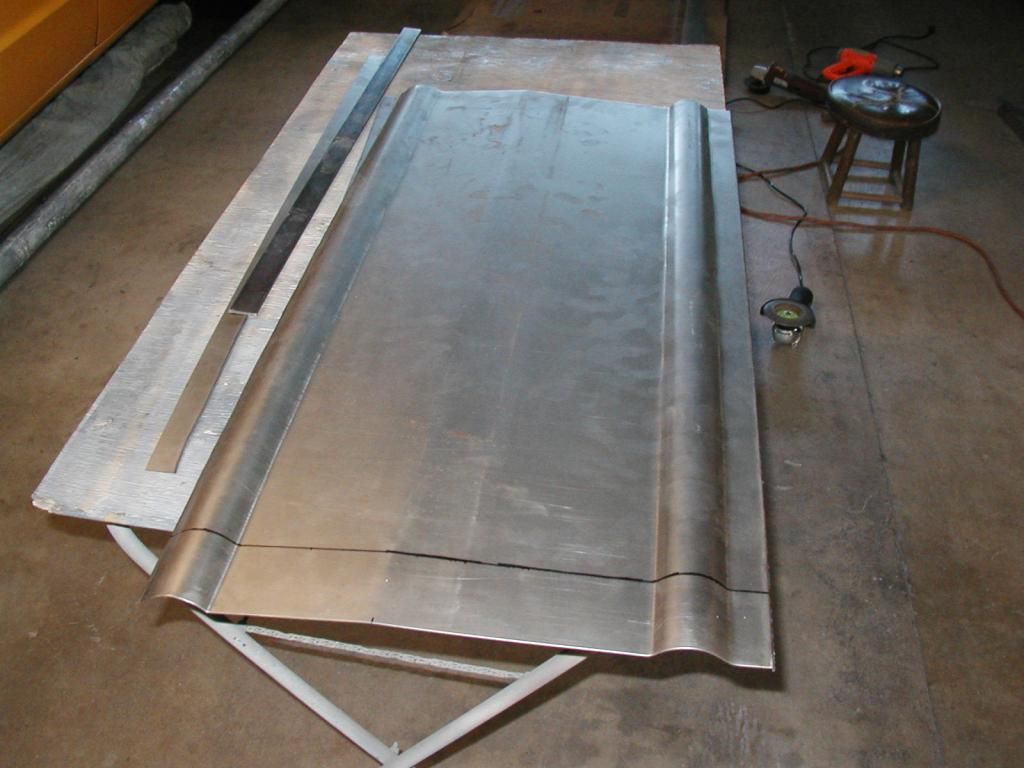
Re: 1935 Chevy school bus
Posted: Sat Apr 20, 2013 11:41 pm
by somewhereinusa
The panel looks good. Do you have to remove that panel to slide the genny out? What I'm seeing is the panel slips into the "U" and then is secured somehow at the bottom?
Re: 1935 Chevy school bus
Posted: Sun Apr 21, 2013 3:00 am
by ol trunt
Hey Dick, you are right on both counts. Since both the genny input and output are remotely controlled I shouldn't have to be sliding the drawer in and out except for service. I considered a paino hinge affair but because I want to be able to use the gantry mounted to the side of the bus to remove the genny from the drawer for service (rather than having to find a place to set up a cherry picker) a hinged door would be in the way. Jack
Re: 1935 Chevy school bus
Posted: Mon Apr 22, 2013 1:59 pm
by ol trunt
Re: 1935 Chevy school bus
Posted: Tue Apr 23, 2013 12:48 am
by somewhereinusa
I like the louvered look. Makes it look like something is there instead of something black that is trying to hide.
Re: 1935 Chevy school bus
Posted: Tue Apr 23, 2013 2:09 pm
by ol trunt
Hello All. Somewhere, thanks for the well expressed thought on the louvers--louvers it will be!
For todays activity I decided that since the genny cover is mostly done, the "B" pillar repaired and the entry step repaired (welded) I had nothing more to keep me from completing the entry door. Some time ago I installed the pneumatic motor/hinge post for the door but needed to get the compressor and tank in before continuing--that is done. I'm saving the original bi-fold door in an effort to keep the original look. I chopped off the rusty bottom 8" or so and will have to figure out a way to replace the rusted section. I measured and measured and then took my best wild ass guess as to how wide the door needed to be and where the pivot points for the mechanism need to go. I didn't get it right the first time--or the fourth or was it the fifth time? I cut a bit, welded a bit, cut a bit, welded a bit--cut, cut, cut, weld, weld, weld --peck, peck, peck and finally I have a pretty good idea where things should go.
I still have a long way to go before door beautiful, but at least I can see that the door will open and close slick as grease through a goose. Jack
I still have to figure out the radius rod which will keep the door flush along the body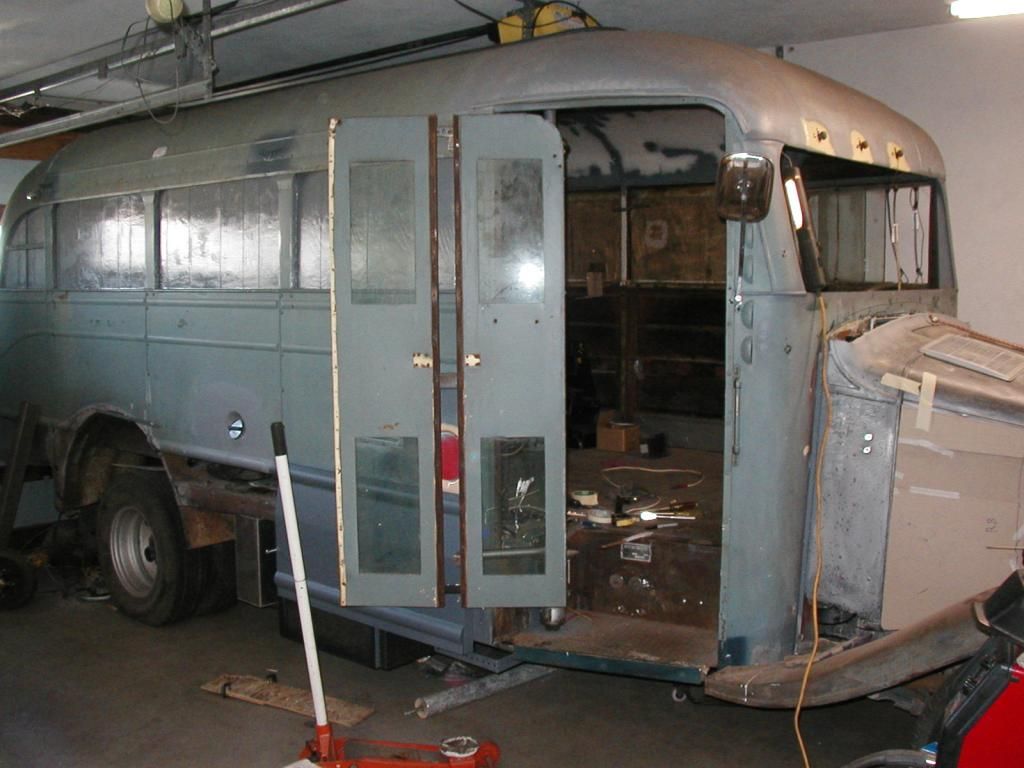 The basic geometry of the door finally came together.
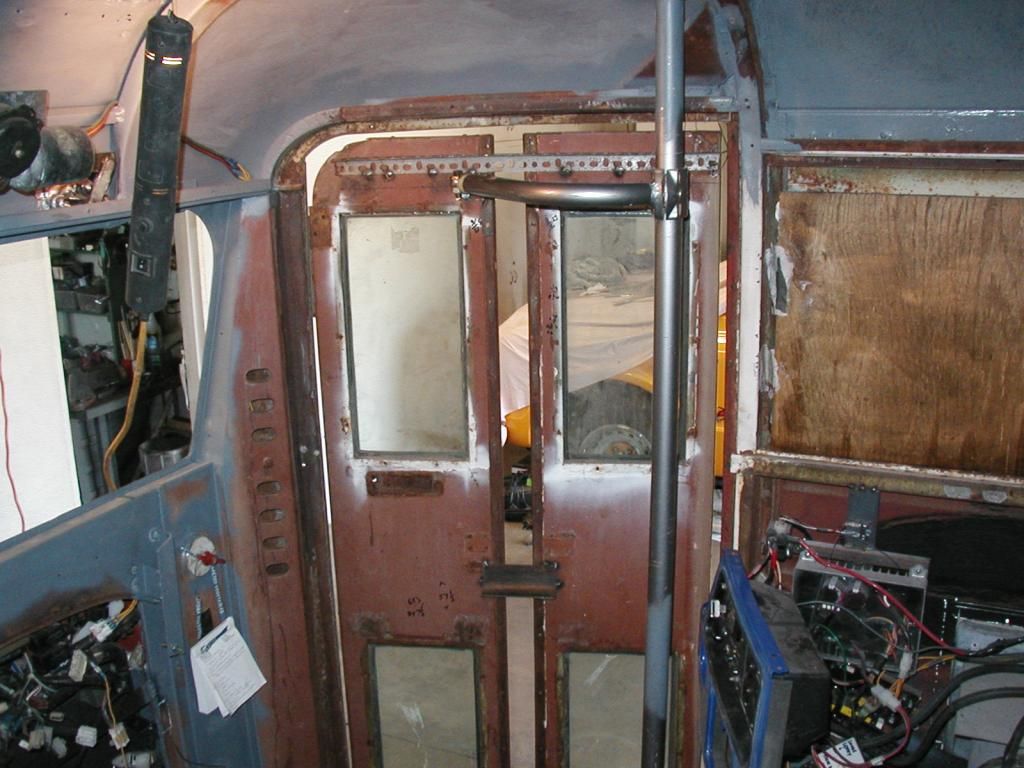 Again. I'll post more pics as I progress
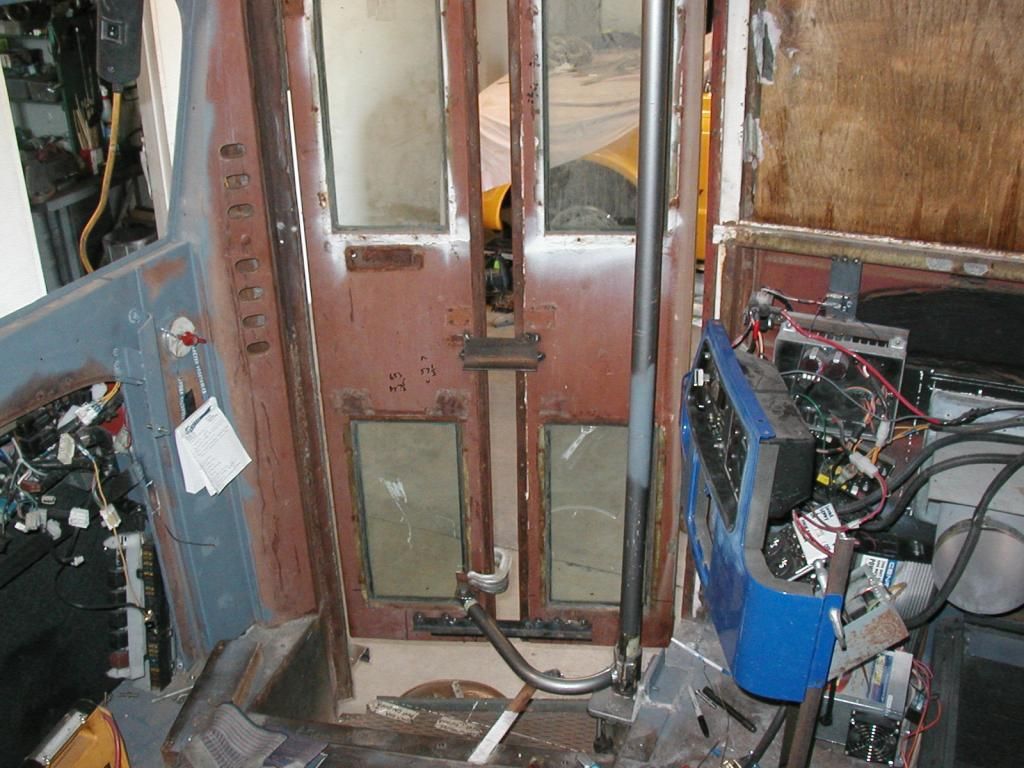
Re: 1935 Chevy school bus
Posted: Tue Apr 23, 2013 7:47 pm
by Dusty
Great build thread , thanks for all the interesting updates.
Na , hate the louvres ........
That door looks a mission , well done

Re: 1935 Chevy school bus
Posted: Wed Apr 24, 2013 7:36 am
by Mark R. Obtinario
Was there a reason outside of the cool factor why you decide to go with an air powered door opener/closer?
I would have thought a one piece, outward opening sedan type door would have been a lot easier to build.
In addition to easier, not having any door opening/closing hardware intruding into the step well would make ingress and egress easier. Or at least not be hindered in any way.
Re: 1935 Chevy school bus
Posted: Wed Apr 24, 2013 9:09 am
by tango
Hey Jack --- Been away for a few days and see now that you've been busy. Lookin' good mate! One thought did occur though...the extended panel for the genny looks so good, why not just fab the remaining 3 to have the same side contour? It would look absolutely correct given nothing else at different levels and hey, you'd pick up an extra inch & a half in underbelly space. I know...just what you needed...more possibilities to ponder.
Re: 1935 Chevy school bus
Posted: Wed Apr 24, 2013 1:36 pm
by ol trunt
Hello all. Thanks for the input. Dusty, I'll have to see if I can find louvers that are "just right" or I'll go with the flat panel (maybe) Ha.
Mark, these old school bus conversions are all cool and having someone come up to you and say "Wow, thats cool" has to be an important part of why we do them--so to answer your question, yes
. That being said, lots of cool stuff like full solar and biodiesel just don't make the practical list for this tiny conversion. The door does because it actually gives more entry and exit room than the original dual in-swing doors and has the advantage over a out-swing door in that I have to be able to open it in tight quarters and the parallelogram plug door opens and slides along the body out of the way. I have to admit that I admire all the engineering that went into the mechanism to say nothing of the click of a relay and the hiss of the actuator as the door smothly glides open or closed--cool!
And as for you, Tango, you 'ol troublemaker (just kidding), I only have 24 or 25" in the next panel before it has to be flat again to accept the bolt on rear fender. I did consider a fade back to that point but it would take considerable effort AND wiffy said something about getting the bus done while I am still on the right side of the grass or something like that sooo.


