1935 Chevy school bus
Moderator: TMAX
Re: 1935 Chevy school bus
Hey Tango, as Lostranger would say, Tango, Tango, Tango---- And here I was just about to nick name us Itchy and Scratchy because of our nearly identical busses and because I just knew you were going to cut a hole in your floor to drop the bath into like I did and then you go and tell me that you AREN'T cutting the floor! Youv'e already used the pop up you made for the a/c so that is out as well. Looks to me like you will have to cut off your legs at the knees and reattach your feet so you'll be able to stand up in the bathroom. I guess it'll have to be Itchy and Stumpy--just doesn't have the same ring. Just say'n. Now that I've properly offended most of my fellow forum members I guess I'll go back out and inhale some more casting resin fumes. Jack
Re: 1935 Chevy school bus
Hey Jack --- you'll be able to stand up and do yer business. Just not INSIDE the toilet. Gonna be a sit down affair unless the Munchkins come on board. But then, I'm not much above Munchkin status so just maybe...
Times like these all those high-top 40 footers start to look good but I'll just roll with what I got and take some measure of satisfaction from being able to park it just about anywhere a big pickup will fit.
But wrapping a bunch of fiberglass around the wheel well and up the walls is not something I am looking forward to. Right now it looks like I'll do the woodwork outside, assemble it inside then glass it all up in place. Oh yeah, and did I mention it will be a combination toilet & shower?
Re: 1935 Chevy school bus
Hey Tango. A few years ago I helped a buddy do a custom job on his '56 chevy pick up. He wanted to build in 10" speakers behind the seat and yet have the pu contours preserved. He likes to work with wood so he built a frame to which we attached strips of cardboard (like package tray cardboard) to "round out" the contours. Next we stapled cotton (some of the synthetics won't work) bed sheets to the framework to further smooth the lines. To my delight, after a couple of coats of resin we had what looked like an "original factory" speaker console. We were able to get the thing very smooth by using just a little body filler here and there and then priming and painting.
BTW, I did a quick study of the compatability of casting resin and FRP. I bonded some fiberglass mat to a sheet of FRP with resin and now after several weeks the bond is still tight. Usually delamination takes place after a couple of days if the plastics and /or glue are not compatible. I like to glue stuff together, wait a few days and then hold one end in the vise and pry, twist and pull on the other end until the part fails or the glue lets go. A nice feature of FRP is that it can be shaped to a limited degree with a heat gun--more so than conventional fiberglass. I had thought about using FRP rather than cutting and pasting my fiberglass bathroom parts but ended up doing the latter.
Jack
Re: 1935 Chevy school bus
Mornin' Jack --- still doing research for that project so the info is much appreciated. I'd thought about building the basic (square) form out of marine ply, rounding some of the contours using Home Depot FRP glued on then back-filling the spaces with spray foam, then a few layers of fiberglass applied over the whole sheboodle. The idea of being able to use a heat gun to help with the contouring is very encouraging. Given the way water can find ways out of just about anything, I hope to wind up with a completely monolithic surface all around.
Have been looking around for someone who can spray gelcoat for a final finish instead of paint but no luck so far. Still have to check a few of the smaller boat repair places. The big shops had no interest at all. Not enough bucks involved I guess.
Onward!
Have been looking around for someone who can spray gelcoat for a final finish instead of paint but no luck so far. Still have to check a few of the smaller boat repair places. The big shops had no interest at all. Not enough bucks involved I guess.
Onward!
Re: 1935 Chevy school bus
As someone who had the bad sense to take a saw to fiberglass panels, let me say "I feel your pain." I itched for two days after attacking my bus side panels with a circular saw. 
Re: 1935 Chevy school bus
Hello All.
Hey Roach. Bus nut that you are I'll bet given the chance to haul out the old Skill saw you'd gladly go for seconds on the side of a bus --but then maybe its only me who never learns
  . Todays activity included grinding all the seams resultant from cutting and pasteing the bus bathroom. It was sort of like working in an old school phone booth with the door closed--even my eyelids itch. Probably the worst fiberglass experience of--but wait there was the time I reglassed the bottom of my 22' sail boat while lying under it on my back with resin dripping and soaking my clothes to the skin---and the full size fiberglass tub shower that I cut into four sections because it just wouldn't fit through the halls leading to the bathroom I was remodeling, and-- some times I think I just never learn
Tango, I'd suggest just standard plywood for your bath build. Once you have it all covered in resin, you won't have any leaks to worry about. I'd also recommend the bed sheet method for any of the non -structural areas. It will really make your life easier. I'd have used the technique had I not been gifted with the complete bath from the 5er.
I meant to take some pics today but after I got the fiberglass dust out of my eyes I no longer gave a rat's--- well you know. I'll try to post a few pics tomorrow if I can find a camera small enough to get into the bathroom.
Happy holidays to all and try to be safe. Jack
Hey Roach. Bus nut that you are I'll bet given the chance to haul out the old Skill saw you'd gladly go for seconds on the side of a bus
Tango, I'd suggest just standard plywood for your bath build. Once you have it all covered in resin, you won't have any leaks to worry about. I'd also recommend the bed sheet method for any of the non -structural areas. It will really make your life easier. I'd have used the technique had I not been gifted with the complete bath from the 5er.
I meant to take some pics today but after I got the fiberglass dust out of my eyes I no longer gave a rat's--- well you know. I'll try to post a few pics tomorrow if I can find a camera small enough to get into the bathroom.
Happy holidays to all and try to be safe. Jack
Re: 1935 Chevy school bus
Since I was never very good at being Politically Correct...
Merry Christmas to all of you Nomads!
Merry Christmas to all of you Nomads!
Re: 1935 Chevy school bus
Hello All, and again what Tango said!
Santa came a day early to my house and dropped off a special little gift of kidney stones to deal with. What fun.  Needless to say I never even set foot in the shop so no pics again today. I should be fine tomorrow as thats how these things seem to go. Jack
Santa came a day early to my house and dropped off a special little gift of kidney stones to deal with.
Re: 1935 Chevy school bus
Kidney stones for Christmas? Damn...I feel so much better about the coal I got now.
Get to feelin' better bud!
Get to feelin' better bud!
-
Dennis The Bus Dweller

- Seasoned Nomadicista
- Posts: 1874
- Joined: Mon Nov 15, 2004 9:33 am
- Location: Southold N.Y.
- Contact:
Re: 1935 Chevy school bus
Hello All. Well, I'm back working on the bus though moving slowly. I completed the fiberglass work and "Bondo" work on the bathroom and will plan to prime the patches tomorrow. I'll block sand and spray epoxy as a final finish.
When I disassembled the sink faucet I was pleased to see that it was made of brass and other than being dirty and in need of replacement washers the thing was in excellent condition. That is a bit of good luck as the combination sink/shower faucets are quite pricy. The shower head and hose are a direct fit to the original faucet--also good luck.
Since I hate standing in a cold shower stall between the wet and rinse cycles of a Navy shower, I devised a simple forced air heater to keep the stall warm. I hung a temporary shower curtain, set the heat on low (1200 watts) and turned the heater on. The temp in the shower went from 70 degrees F to 80 degrees in just under three minutes. At the five minute mark the temp was over 100 degrees and I was burning up. I'll have to spend some playing with the thermostat in hopes of finding a happy medium. Jack
I combined a wall heater exhaust elbo with the cube heater. This should add extra safety as the bend will help keep stray splashes of water from entering the heater coils. I suppose one could have a problem if he bent down and shoved the shower head against the heater outlet--but then I guess it would be possible to drop a toaster in the bathtub as well
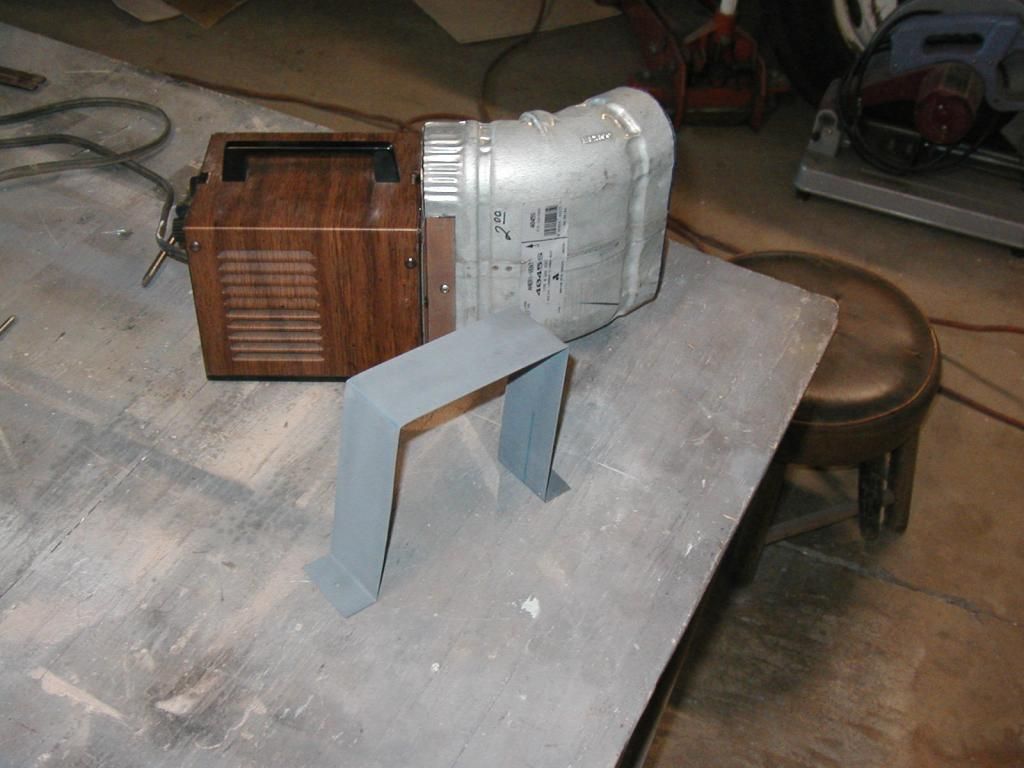
Pic of heater installed.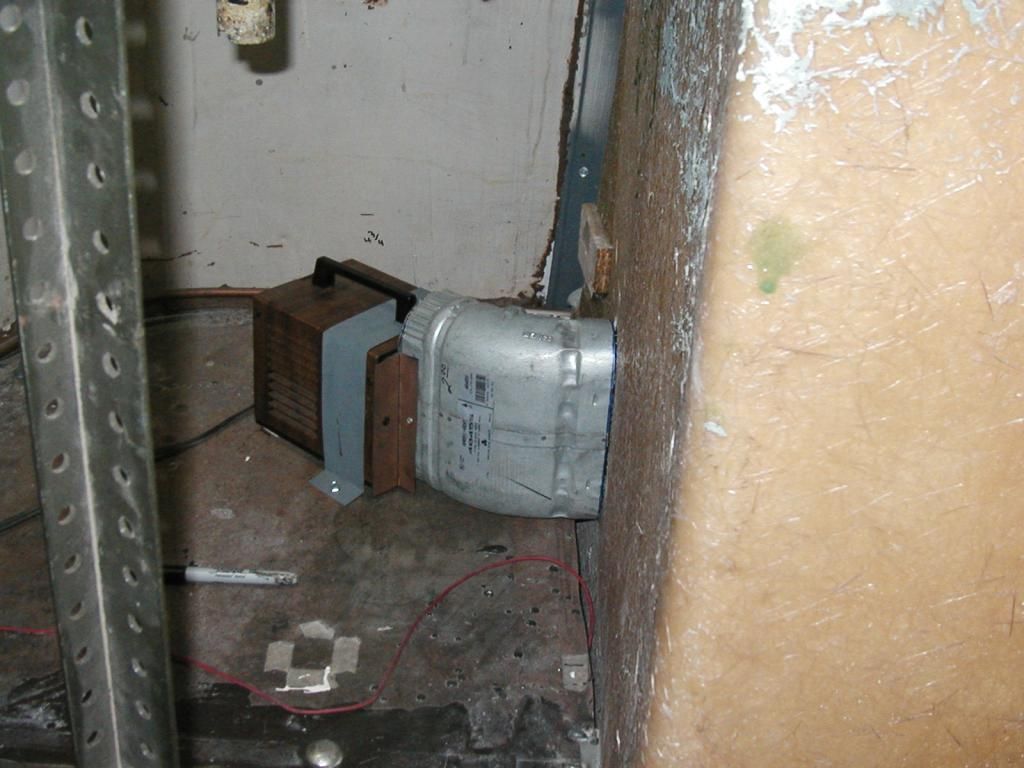
The heated air enters the shower stall at the base of and side of the toilet. This placement helps direct the air flow away from the bather's legs and makes for better overall air circulation.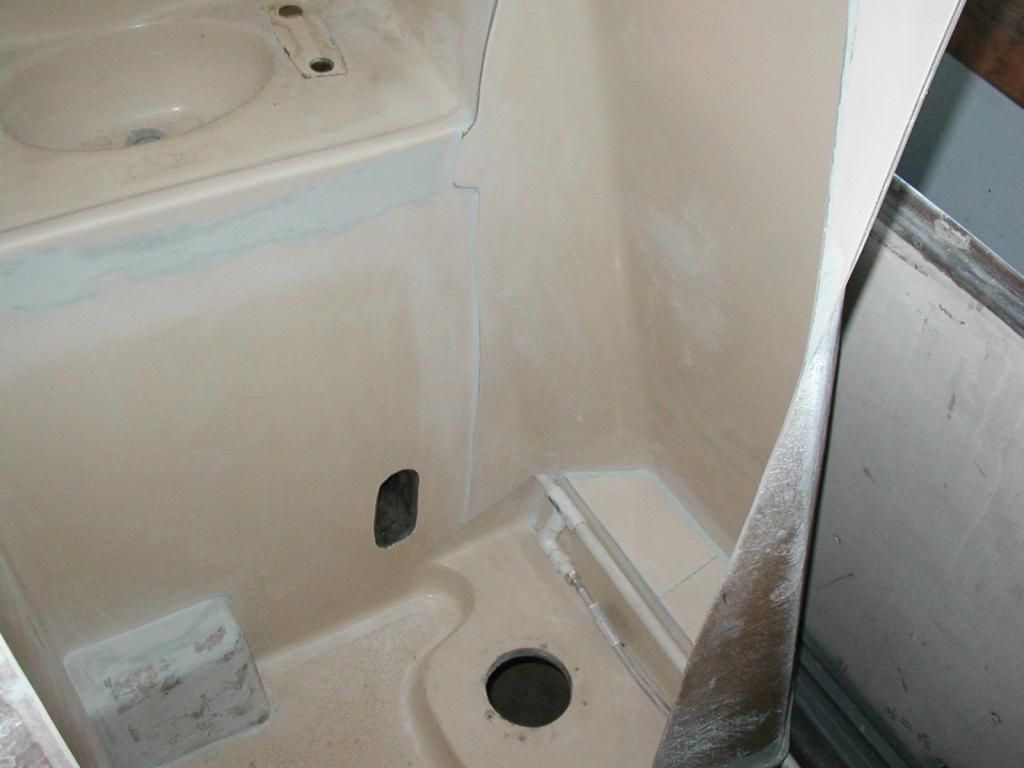
When I disassembled the sink faucet I was pleased to see that it was made of brass and other than being dirty and in need of replacement washers the thing was in excellent condition. That is a bit of good luck as the combination sink/shower faucets are quite pricy. The shower head and hose are a direct fit to the original faucet--also good luck.
Since I hate standing in a cold shower stall between the wet and rinse cycles of a Navy shower, I devised a simple forced air heater to keep the stall warm. I hung a temporary shower curtain, set the heat on low (1200 watts) and turned the heater on. The temp in the shower went from 70 degrees F to 80 degrees in just under three minutes. At the five minute mark the temp was over 100 degrees and I was burning up. I'll have to spend some playing with the thermostat in hopes of finding a happy medium. Jack
I combined a wall heater exhaust elbo with the cube heater. This should add extra safety as the bend will help keep stray splashes of water from entering the heater coils. I suppose one could have a problem if he bent down and shoved the shower head against the heater outlet--but then I guess it would be possible to drop a toaster in the bathtub as well

Pic of heater installed.

The heated air enters the shower stall at the base of and side of the toilet. This placement helps direct the air flow away from the bather's legs and makes for better overall air circulation.

Re: 1935 Chevy school bus
Clever idea!
Re: 1935 Chevy school bus
Hey Jack --- glad to hear you're feelin' better and back on the job. That little heater oughta' do a jam up job of taking the chill out of the shower.
I have one of the exact same units but I'm really disappointed with it. For some reason it doesn't do a lot to warm up my 40 x20 x16 shop when it's down near freezin'.
go figger...
I have one of the exact same units but I'm really disappointed with it. For some reason it doesn't do a lot to warm up my 40 x20 x16 shop when it's down near freezin'.
go figger...
Re: 1935 Chevy school bus
Hello All and HAPPY NEW YEAR! Just a quick update on my little test of compatability between FRP and casting resin/fiberglass mat. Just for fun today I stood on a sheet of FRP I had done a couple of test strips on. I bent over and grabbed the tab of resin soaked fiberglass mat with a vicegrip and pulled as hard as I could. Under one tab I sanded the FRP with 80 grit sandpaper and under the other I did no sanding. The tab on the unsanded patch pulled away clean from the FRP while the tab on the sanded patch did not pull off before breaking off itself. I was able to chip away the rest of the resin from the sanded area without damaging the underlying FRP. I have never been able to separate a standard fiberglass/resin/fiberglass mat repair without total destruction.
I am glad I didn't use the FRP after all as it would have left me with an uneasy feeling. While this was just a quick and dirty study, my conclusion is that I wouldn't use FRP with fiberglass without some mechanical reinforcement--just in case.
Jack
I am glad I didn't use the FRP after all as it would have left me with an uneasy feeling. While this was just a quick and dirty study, my conclusion is that I wouldn't use FRP with fiberglass without some mechanical reinforcement--just in case.
Jack
Re: 1935 Chevy school bus
Eve'nin Jack --- I just remembered a seat I built for my formula racebike many moons ago. I wanted it to taper at the top but flare out at the bottom into small winglets (a trick Yamaha discovered that would prevent any drafting advantage to someone on your tail without impacting drag). Anyhow, after looking around for something I could easily cut & form into a base for the fiberglass, I wound up using perforated aluminum. Much like you see at the bottom of screen doors and comes in a lot of patterns. Was easy to cut & shape but sturdy enough to hold its' shape while the glass went on. And since it was perforated, it was easy to work both sides and completely encase it all in the glass. Turned out light but surprisingly rigid. Survived a few crashes. One at over 150. Might make a decent base for a shower if backed and built up right.
What'cha think?
What'cha think?
Who is online
Users browsing this forum: No registered users and 19 guests