'Morning Tango. I like your idea about using aluminum as a base though I don't see any need to embed both sides. I wonder how hard it will be to find aluminum sheets that are soft enough to work. When I was building the Toad I needed to replace the original aluminum 1/4 panels where the wood is and I found it hard to find soft aluminum to work with. The readily available sheets of aluminum around here are very hard and springy and therefore dificult to form. I ended up special ordering soft materal at an outrageous price.
Your bike tale reminded me of a repair I did on a VW bug back in the 60's. Seems that a trash truck saw fit to run one of its tines through the side of my girlfriends bug just behind the drivers door. I made a repair involving aluminum window screen, casting resin and Bondo. It seemed to work just fine as even years later I saw the car running around town patch still intact. Hrump, bet you can't even buy aluminum screen anymore.
Now that the bathroom is mostly complete I'm going to work on bracketry for the flat screen LED tv that will adorn the outside wall of the bath--can't wait to watch Lucy in "The Long Long Trailer" while relaxing in my little rolling home. Ha! Jack
1935 Chevy school bus
Moderator: TMAX
Re: 1935 Chevy school bus
Hey Jack --- the aluminum I'm referring to is very lightweight and easy to form. Different patterns and mostly used for decorative purposes or as a kick plate at the bottom of a screen door. Big boxes like the Depot & Lowe's have it. Looks like this (from McNichols)...

I just brushed a light coat of resin on, let it stiffen a bit then laid on wetted cloth. And since the resin flows through it, it does seem to lock the cloth in place well. No need to finish the back in this case. I'm thinkn something like this to form the curves, build up the glass, then back fill behind it with foam for support plus insulation.
?
Re: 1935 Chevy school bus
Hello All. I spent yesterday and today working on the wall mount for the t/v. I fit a 1/2" sheet of plywood on the isle side of the bathroom to level things out and to provide a backing on which to mount the LED t/v. Because the angular side of the bathroom (sink side) cozys up to the side of the A/C and the microwave I knew I'd have to be careful where I placed the t/v so as not to have the view blocked. I made up brackets and installed the plywood, marked where the t/v should go and then realized that the slot for placement of DVD discs in the t/v was completely blocked by the A/C. Since I sized the t/v to fill all the remaining available space on the plywood I could see I had a problem. What started as a simple 3 point wall mount for the t/v (KISS) turned into an all day project. Jack
I ended up mounting my "simple" 3 point bracket on a ball bearing double action drawer slide. This allows me to slide the t/v far enough to one side that I can insert a disc--and then slide the t/v back for viewing.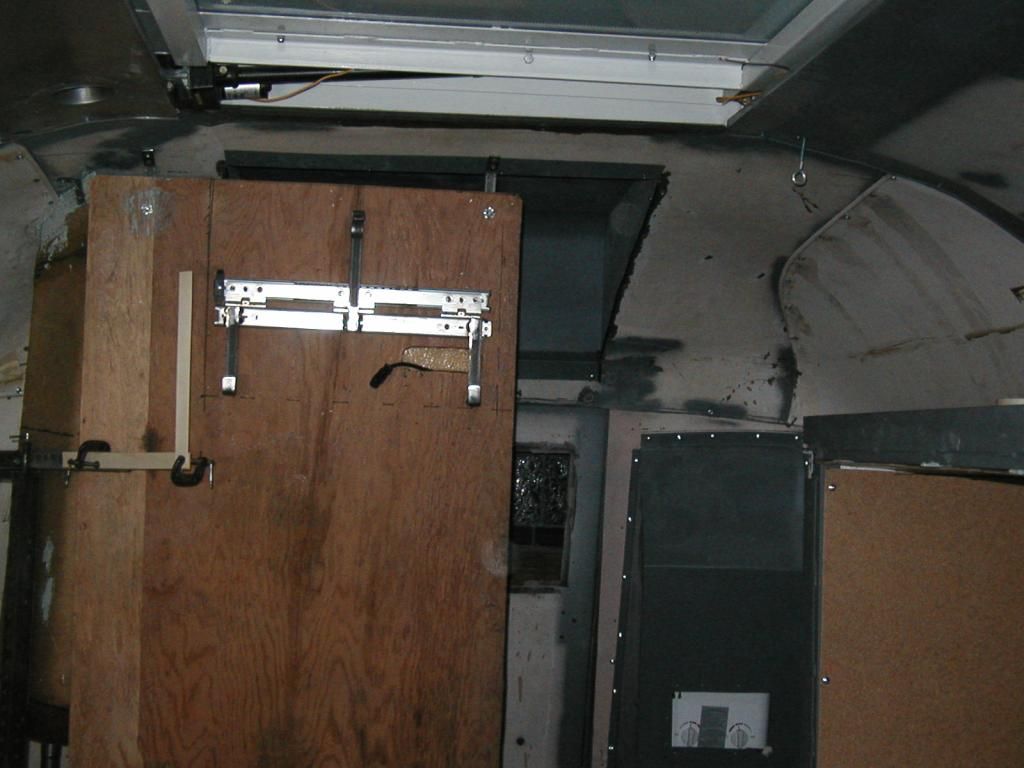
Pic of slide moved to the side. I cut a mouse hole in the plywood to allow the power cord to track with the t/v.
Side view of t/v brackets.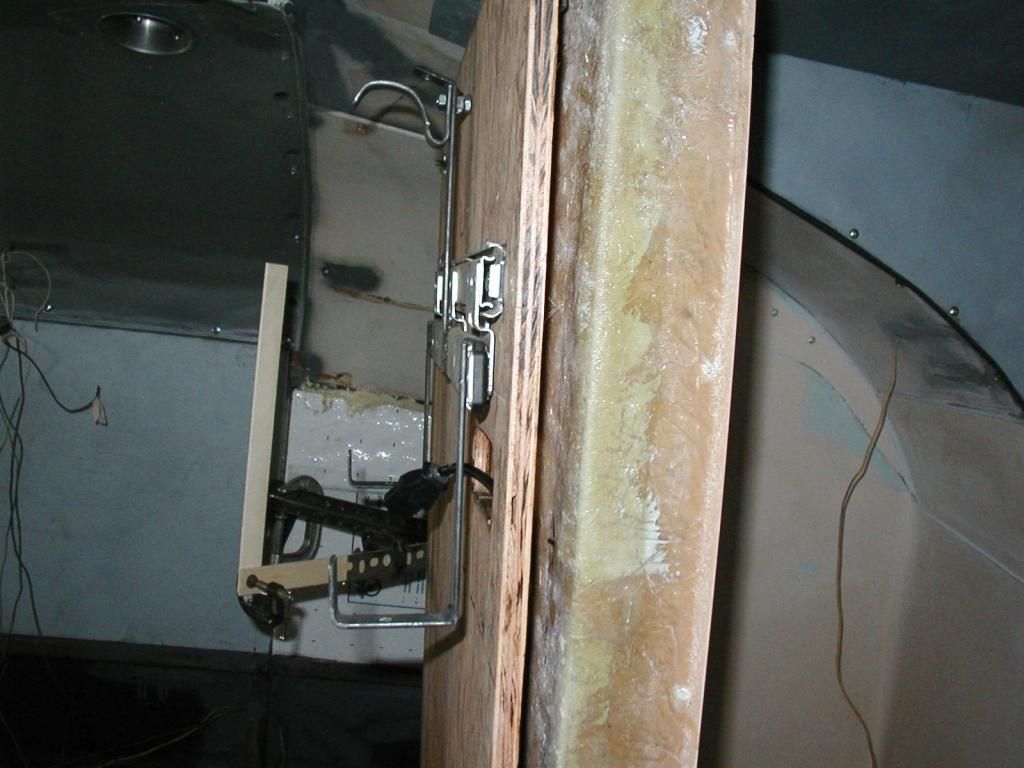
Same pics with t/v mounted. The paint stir sticks represent the limits of the A/C relative to the t/v.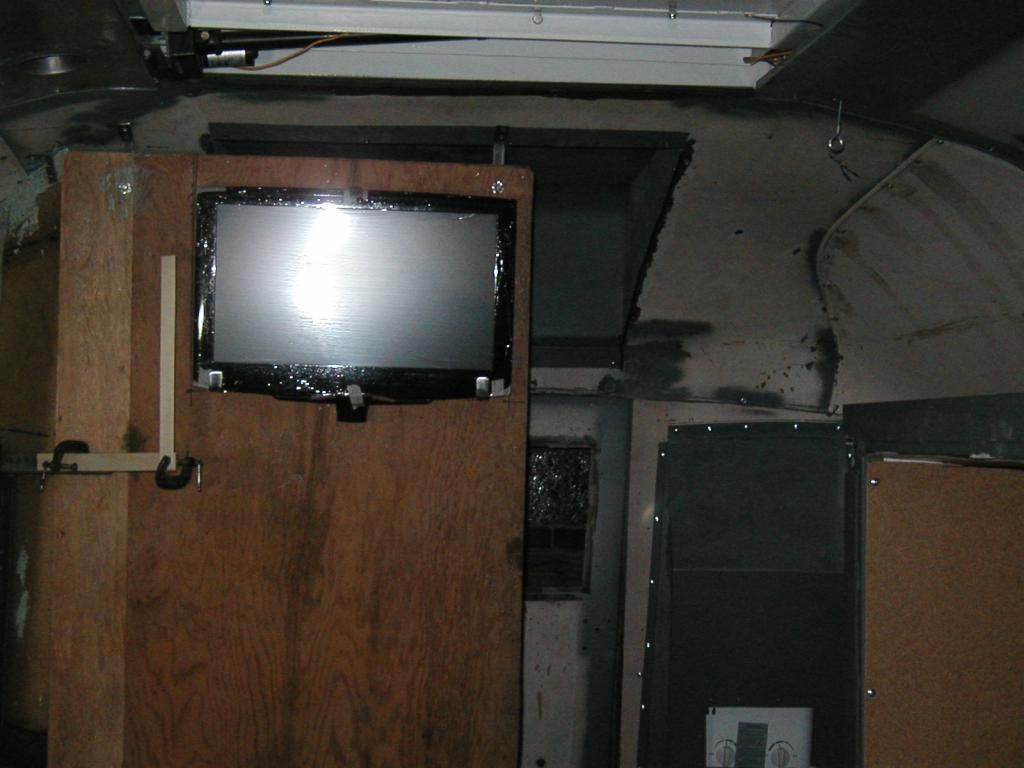
Again but moved to allow for DVD placement.
I ended up mounting my "simple" 3 point bracket on a ball bearing double action drawer slide. This allows me to slide the t/v far enough to one side that I can insert a disc--and then slide the t/v back for viewing.

Pic of slide moved to the side. I cut a mouse hole in the plywood to allow the power cord to track with the t/v.

Side view of t/v brackets.

Same pics with t/v mounted. The paint stir sticks represent the limits of the A/C relative to the t/v.

Again but moved to allow for DVD placement.

Re: 1935 Chevy school bus
Added benefit --- Won't have to worry about the TV overheating with that arrangement!
Re: 1935 Chevy school bus
Hello All. With the bathroom more or less complete I need to do the final installation of the black tank. But to do the BT I need first to place the rest of the subfloor insulation but I can't do that until I've welded up a trailer hitch because the foam insulation is somewhat flamable. Now the hitch must be designed for easy removal as much of it passes under both the black and grey tanks. Therefore the tanks must be temoporaly reinstalled so I can build the hitch. Where is Rube Goldberg when I need him?  I showed my hitch design to my engineer budy who owns a local steel fab shop and he assured me that 120 wall would be plenty to tow my 2600 pound TOAD--so I used 125 (1/4 ") just to be sure. 1/4" is what most light truck hitches are made of. After a couple of days of concrete back massage I have a well tacked together hitch which I will now weld up while standing up like a man. The tanks are all back out and I'm finishing the insulation--feels like progress. Yippie! Jack
I welded (and bolted with a 1/2" grade 8 bolt) a flange on the rear frame rail. I also cross braced the flange with 1/4" strap welded in position to help control lateral movement. The hitch proper will bolt to the flange which will serve to support the almost non existant verticle load of the reciever.
I will add 1/4" triangular plates to the forward end of the hitch to control lateral movement (see cardboard) I used angle iron to control movement of the single- bolt -supported front bracket.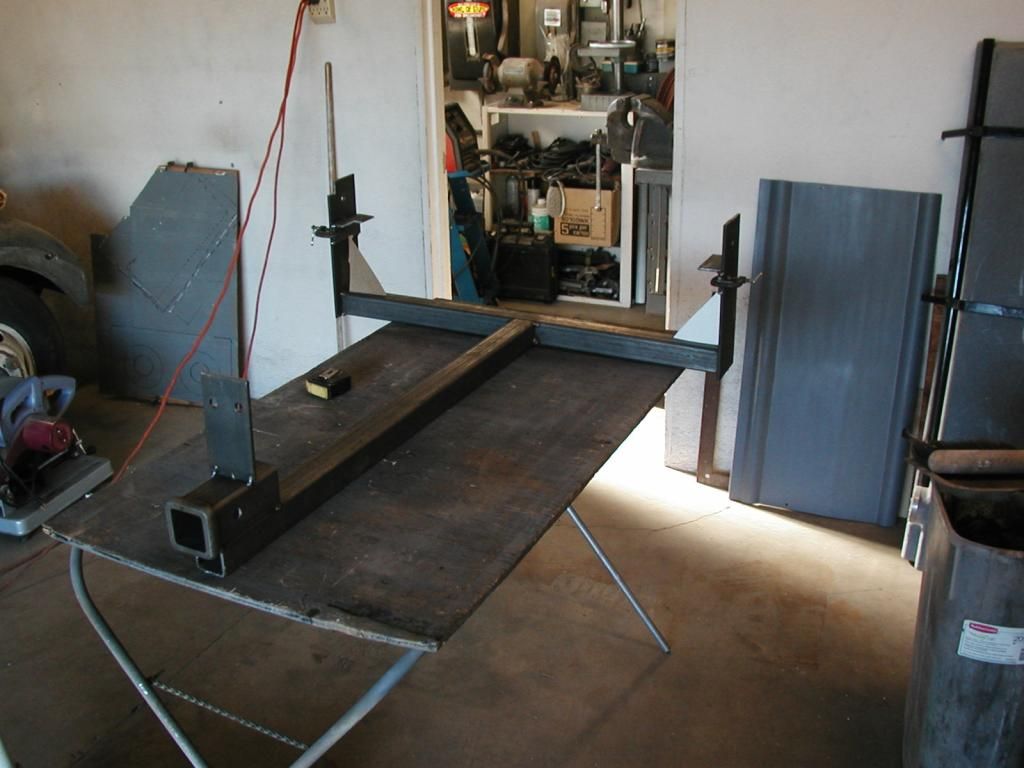
I welded (and bolted with a 1/2" grade 8 bolt) a flange on the rear frame rail. I also cross braced the flange with 1/4" strap welded in position to help control lateral movement. The hitch proper will bolt to the flange which will serve to support the almost non existant verticle load of the reciever.

I will add 1/4" triangular plates to the forward end of the hitch to control lateral movement (see cardboard) I used angle iron to control movement of the single- bolt -supported front bracket.

Re: 1935 Chevy school bus
Hey Jack --- I've heard of people having a "hitch in their get'a'long" before but never actually saw one. Always wondered what they looked like. That one looks pretty doggone good.
Re: 1935 Chevy school bus
Hello All. From the slow work takes time file----  . I burned up most of the week figuering and fitting the fresh water distribution system, sink drains and the last grey water tank. Amazingly I used 50' of water line and 90 fittings in an area where the longest run of pipe was 52"! Of the 90 fittings I only forgot to glue two
  I also found a gas leak in a fitting deep in the water heater cabinet which took hours to R&R and seal. You know what they say about doing it yourself--its hard to get good help
Most of today was spent filling the several tanks with water, hooking the water heater to a temporary propane tank (this allowed me to try the water heater and leak test for gas) and then testing the several componets for function. I flipped every combination of the half dozen switches that control the on demand water heater, the fresh water pumps, the shower floor drain transfer pump, the forced air heater in the shower stall, and the two "hall way" switches which operate the hot water shunt and illuminate a couple of really cool looking blue guide lamps (that must mean something but by the time I got done I couldn't remember what) and it all works. COOOOOOOOOL! The only plunbing that remains is the instalation of the kitchen faucet and drain (once I build a kitchen) and what could go wrong with that? I know, I know but I just don't want to hear about it so just go away
Sorry about the lack of pics but then we've all seen plumbing I guess. I might get this thing done in time for this years trip to Yosemete yet. Jack
-
somewhereinusa

- Posts: 324
- Joined: Sat Feb 12, 2011 2:44 pm
- Location: Andrews, Indiana
- Contact:
Re: 1935 Chevy school bus
Well done, an important milestone has been reached. You know, the one where you feel like you have got something done and can now start on six more daunting projects. 
-
Lostranger

- Posts: 335
- Joined: Fri May 14, 2010 2:49 am
- Location: North Carolina
- Contact:
Re: 1935 Chevy school bus
Thrilled for your progress, Jack. Lately, most of our time and energy has been consumed by the effort to keep from freezing to death. So far, we've succeeded. Barely.
Re: 1935 Chevy school bus
Famous Quotes:
"Without pix, it never happened."
-- Ol' Trunt
"Without pix, it never happened."
-- Ol' Trunt
-
Lostranger
- Posts: 335
- Joined: Fri May 14, 2010 2:49 am
- Location: North Carolina
- Contact:
Re: 1935 Chevy school bus
I'm with Tango on this one.
Re: 1935 Chevy school bus
Ha! You want pics you get pics. Needless to say, all this piping will get support as the kitchen build progresses. Jack
Pics start at the sink area and progress back to the bath.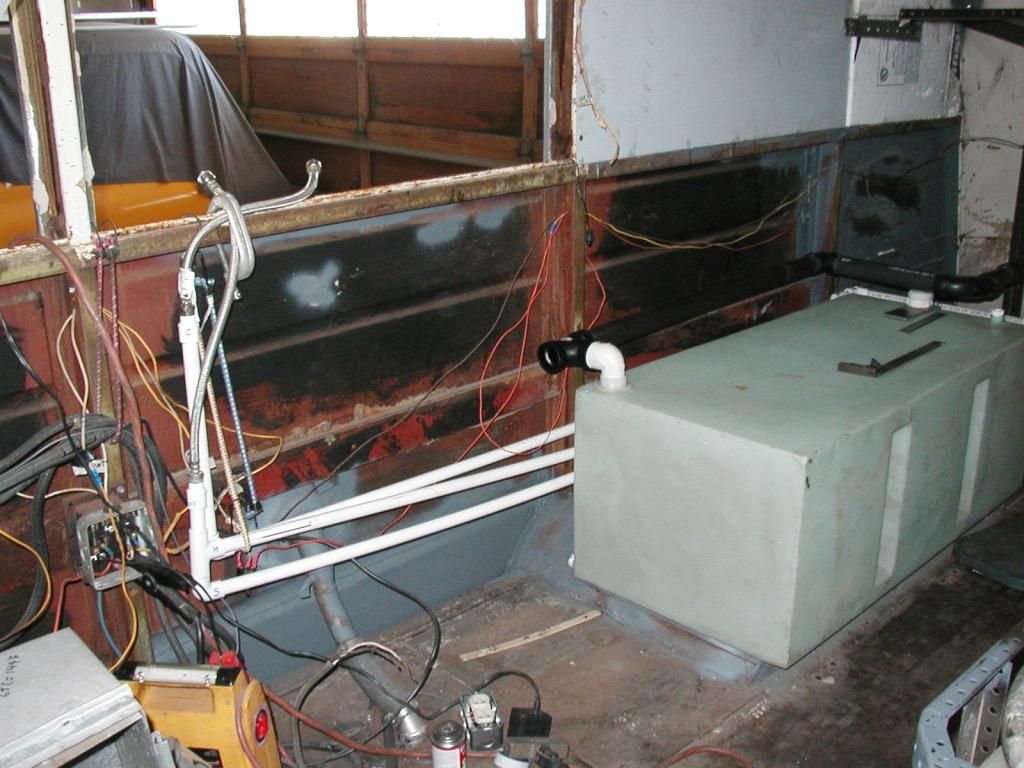
More.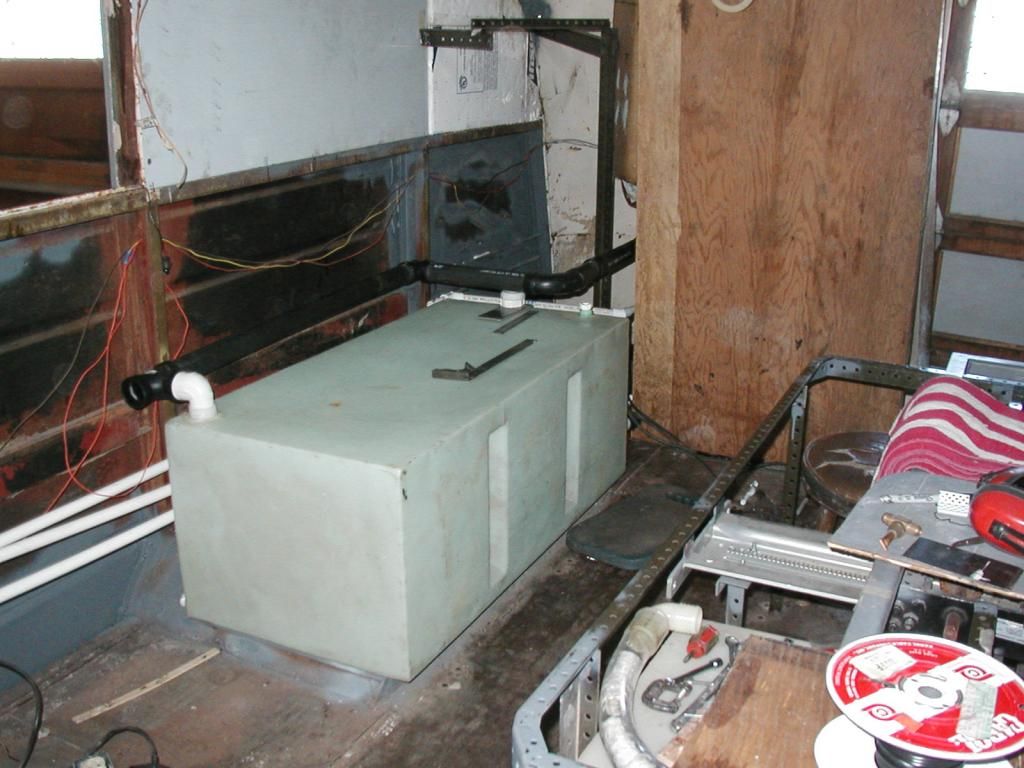
Ditto. The drain for the grey tank dumps the grey water into the black tank via the black tank vent.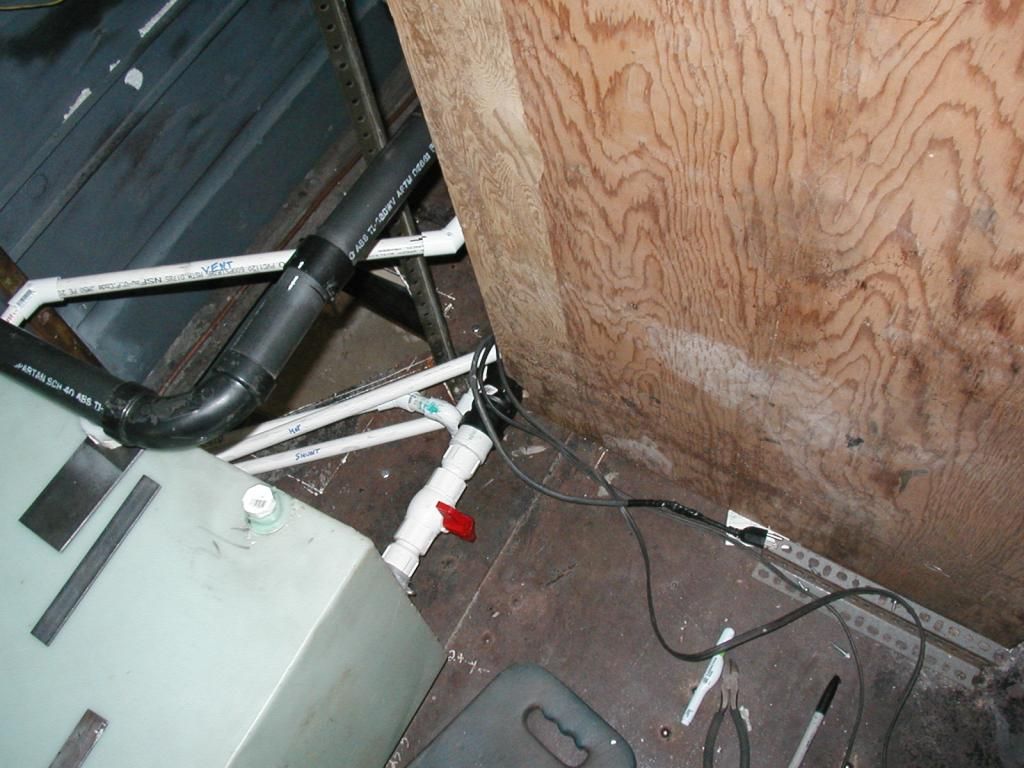
I'll instal a roof over the shower heater to deflect water in the event of a plumbing failure.
Last but not least and my favorite view as seen lying on my back under the bus and looking up through the A/C duct to the top of the bus. Sure hope I don't have to fix anything in there.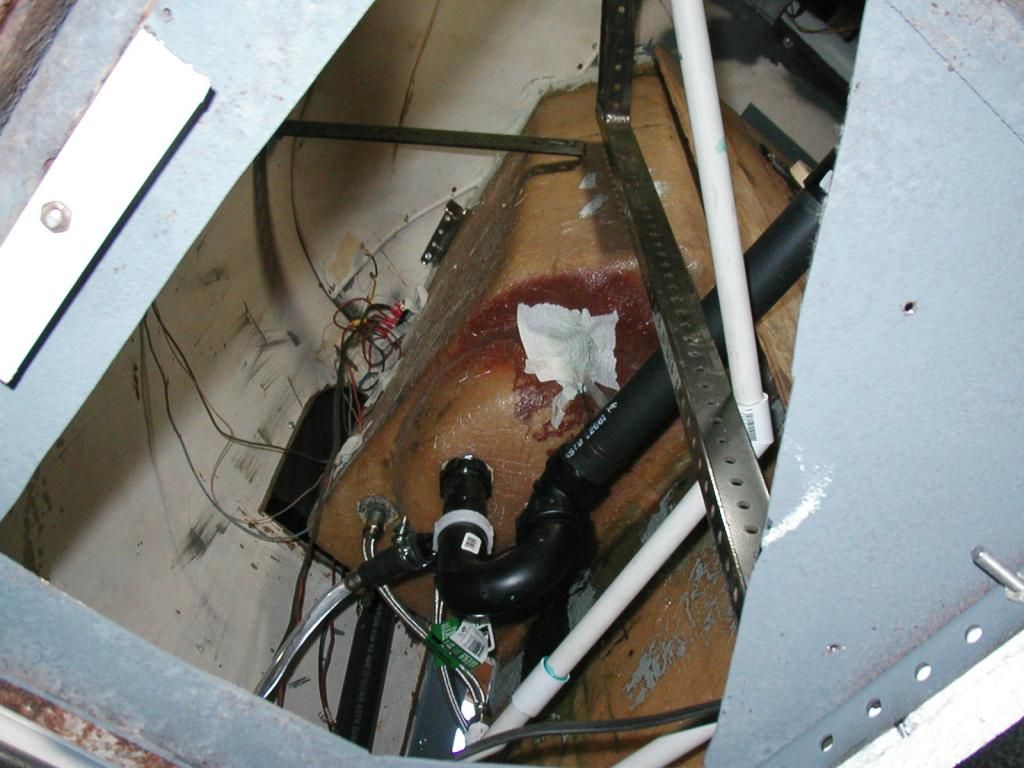
Pics start at the sink area and progress back to the bath.

More.

Ditto. The drain for the grey tank dumps the grey water into the black tank via the black tank vent.

I'll instal a roof over the shower heater to deflect water in the event of a plumbing failure.

Last but not least and my favorite view as seen lying on my back under the bus and looking up through the A/C duct to the top of the bus. Sure hope I don't have to fix anything in there.

Re: 1935 Chevy school bus
Hello All. Well today I completed the entire bus conversion by noon so I drove to Ensenada for mid afternoon fish tacos --but wait, I forgot to take the camera so I guess you know what that means
I made up a detachable frame to secure the grey water tank and serve as a base for the kitchen stove. I'll probably be able to hang other stuff on it as I continue the kitchen build out. Things went along smoothly until I tried to lift the stove into the bus. Despite the door opening being a full 24" wide and the stove only 21" wide, I could not get the stove to fit through the door opening. The bus body narrows at the front right where the door is and creates a crazy angle with the verticle pole the door hinges on leaving exactly 21" of clearance. With the expert assistance of the little engineer and a couple of her tea towels as lubricant we were able to force the stove through the opening with no damage to the bus, the stove or ourselves. I had visions of having to take the whole pneumatic door off to get the stove in but I dodged the bullet this time . Overall a fun day though. Jack
I don't know what I'd have done without the 1/8" hole punched angle iron I scored at the Restore a while back, it sure makes the project simpler.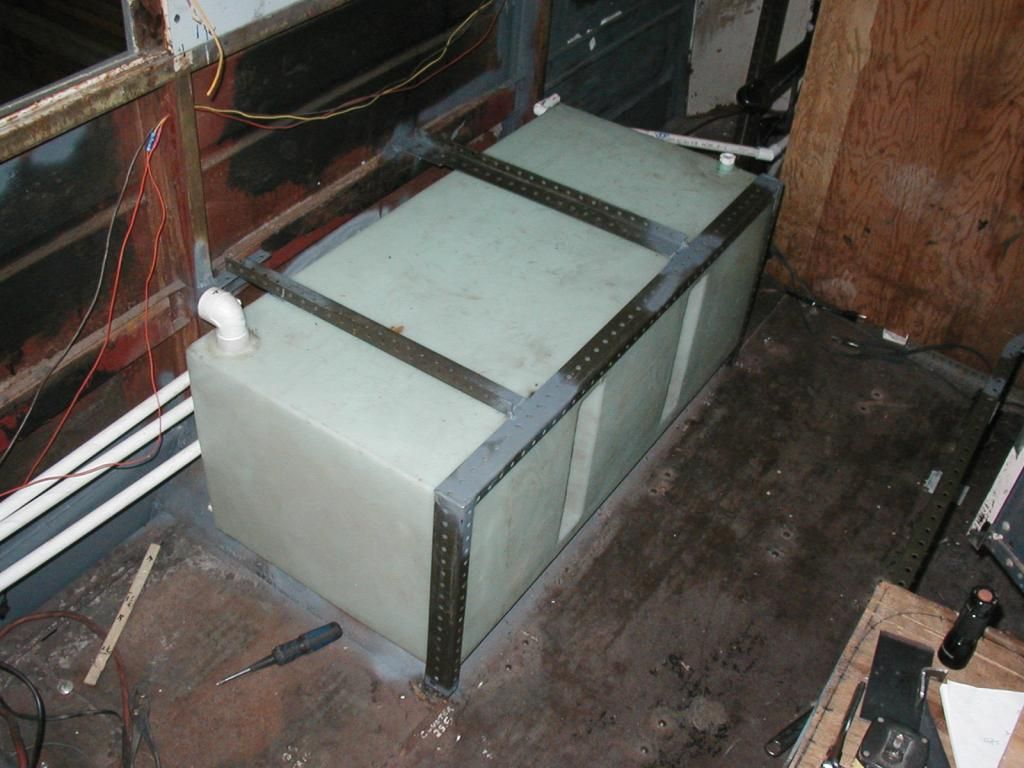
I thought the stove sat a little high but wiffy says it is just right--what do I know?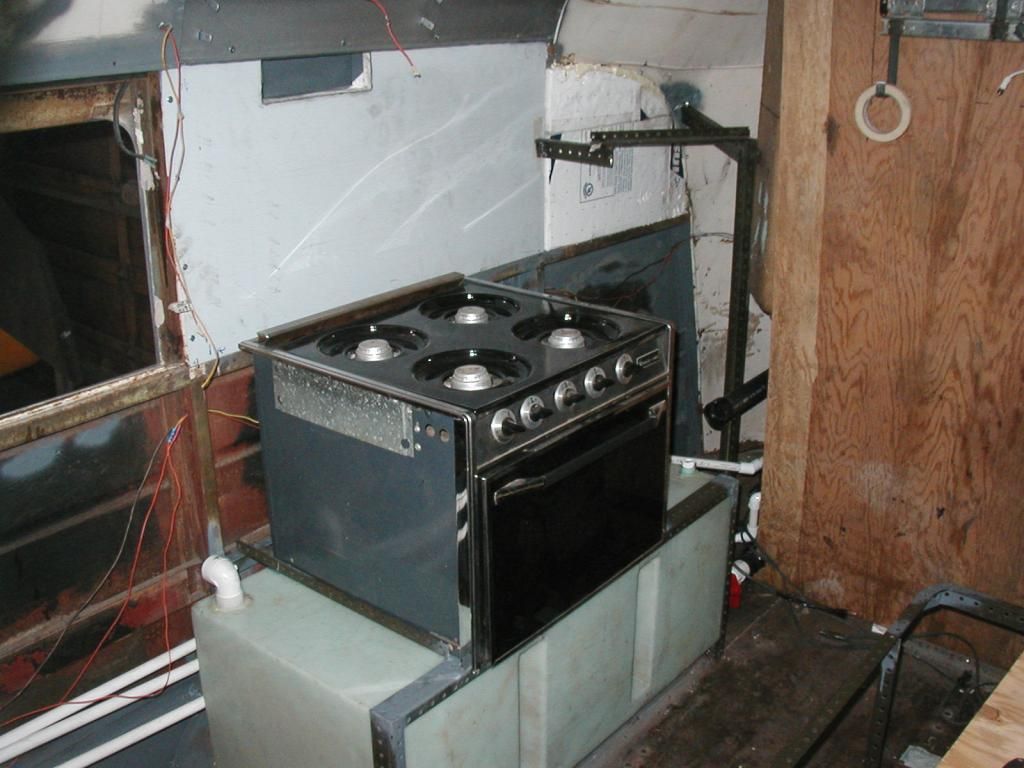
I made up a detachable frame to secure the grey water tank and serve as a base for the kitchen stove. I'll probably be able to hang other stuff on it as I continue the kitchen build out. Things went along smoothly until I tried to lift the stove into the bus. Despite the door opening being a full 24" wide and the stove only 21" wide, I could not get the stove to fit through the door opening. The bus body narrows at the front right where the door is and creates a crazy angle with the verticle pole the door hinges on leaving exactly 21" of clearance. With the expert assistance of the little engineer and a couple of her tea towels as lubricant we were able to force the stove through the opening with no damage to the bus, the stove or ourselves. I had visions of having to take the whole pneumatic door off to get the stove in but I dodged the bullet this time
I don't know what I'd have done without the 1/8" hole punched angle iron I scored at the Restore a while back, it sure makes the project simpler.

I thought the stove sat a little high but wiffy says it is just right--what do I know?

Re: 1935 Chevy school bus
Hello All. I've finally worked my way out of the right rear corner of the bus. I took the grey water tank and the stove out along with some ABS drain pipe to make it easy to finish up the corner. I used 1/2" pipe foam to insulate the water lines. added a roof to the shower heater, secured the water lines and completed the 2" of foam insulation on the RR 1/4. Finally I installed the hot air exhaust flu for the A/C. I made the flu from hard board fully coated in shellac to provide a water resistant and slippery coating for air to move through. I used 1" of foam on the inside surface of the flu to combat condensation from the "ice tea" effect as well as to prevent heat from the hot exhaust transfering back into the bus.
I wasn't sure that the down draft hot air exhaust would work so I was careful to slightly oversize the flu and to avoid any sharp angles for the air to get hung up in. I installed the A/C and tried it out. At the start of my test the temp in the bus was 82 degrees F which promptly dropped to 74 degrees and dropping. The air comming out of the flu under the bus was quite warm and seemed not to be suffering from impediment. So far so good. The final evaluation will have to wait until the windows are installed and the rest of the insulation is in. Jack
This pic shows how the flu was made. Not very exciting to look at but easy to construct.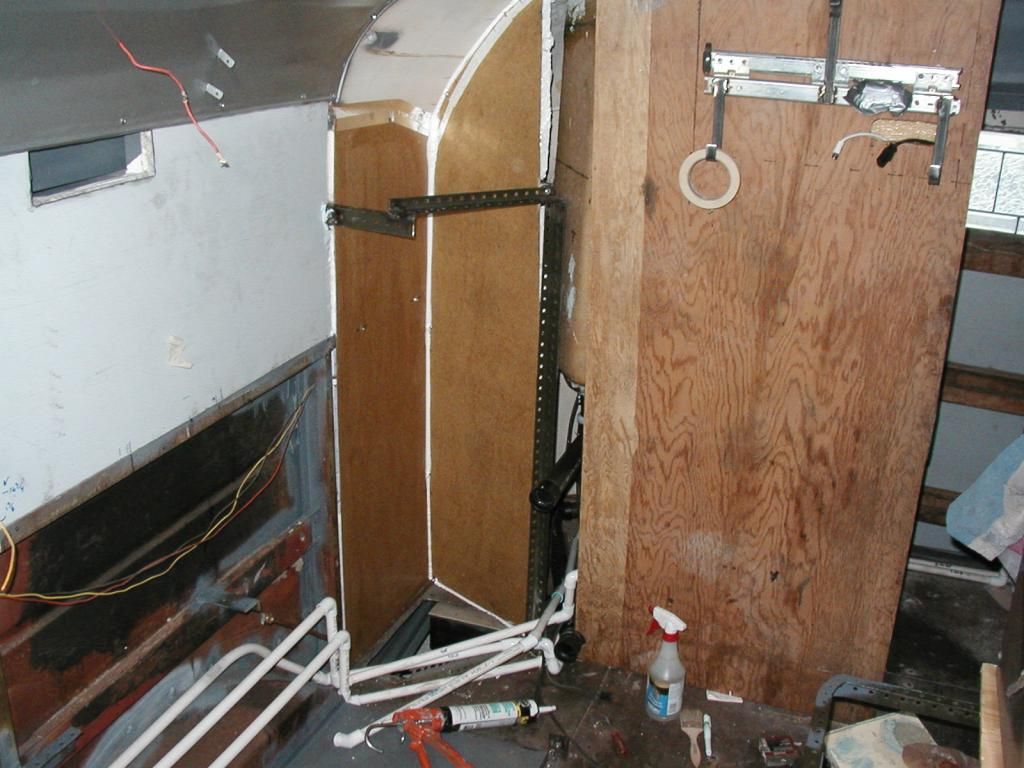

Re: 1935 Chevy school bus
Hello All. We're suffering the learning curve on a new computer--Windows 8. Not very intuitive for a non computer guy like me but I'll get used to it I 'spose 
I completed the a/c duct and did the final install on the a/c. The a/c is much quieter now that it is firmly installed and insulated. Sort of at the last minute I realized that there was no provision for the water condensation from the a/c to run out of the bus and since I didn't want a wet floor I had to come up with a drain. I ended up modifying a small plastic paper clip holder to act as a drain. I threaded a barbed fitting into the clip holder, attached a drain tube and stuck the tube into the hot air exhaust flu--not very pretty but it works.
Next I finished both the 120 volt and 12 volt systems. Since the AC system is only 30 amps, I had to do a little figuring to spread the load over two 15 amp breakers. My good friends in China supplied me with a plug in volt meter for $2.99 delivered and I hooked it up to read the voltage on either the house batteries or the genny battery. Jack
Jack
Final a/c install.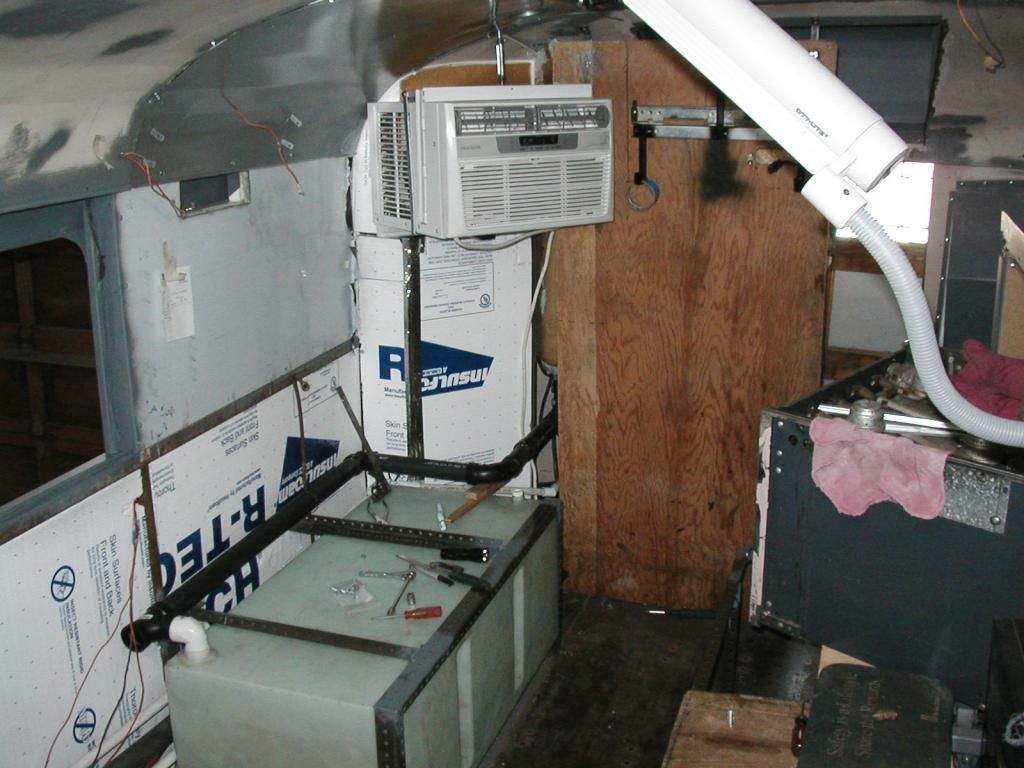
A bunch of AC boxes. I added a splash shield just in case the grey water drain blows out--hopefully the water winn be directed out of the bus rather than into the elect boxes!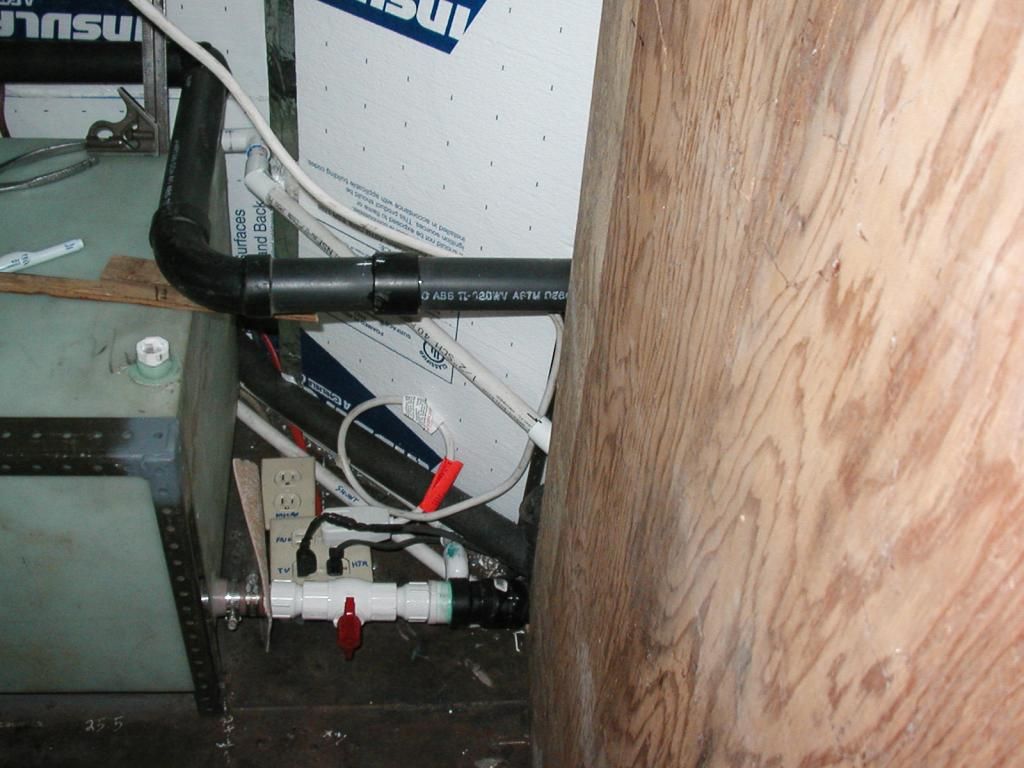
A couple of pics of the a/c water drain dealie under the rear of the a/c.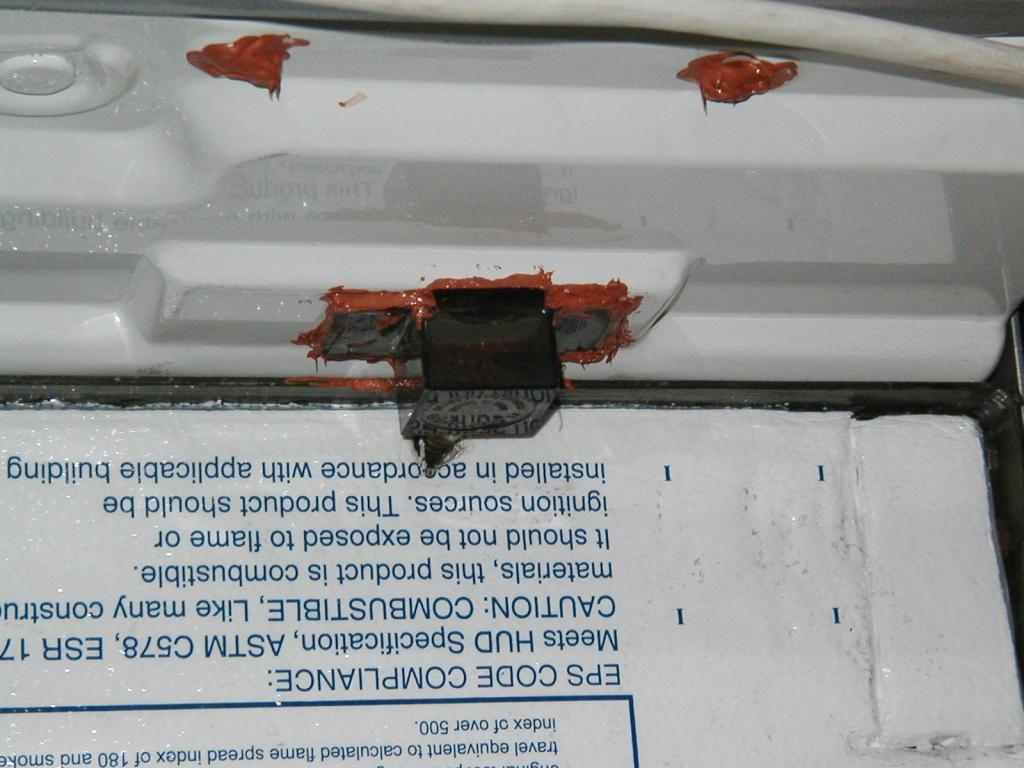
Drain tube.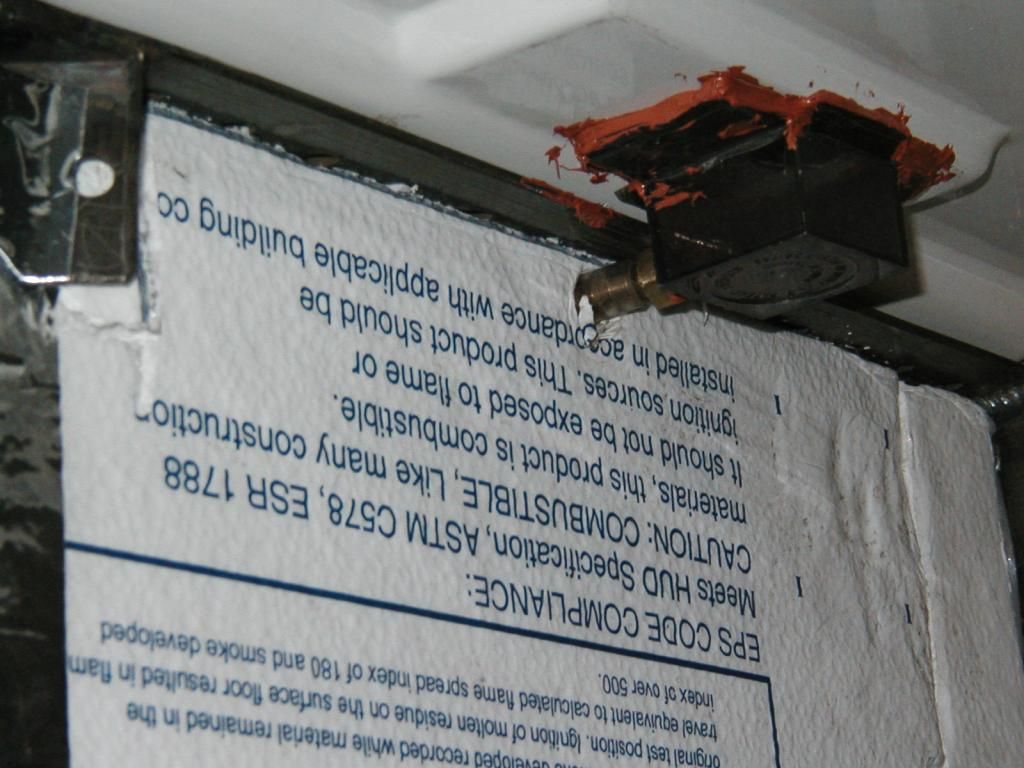
A pic of the little volt meter.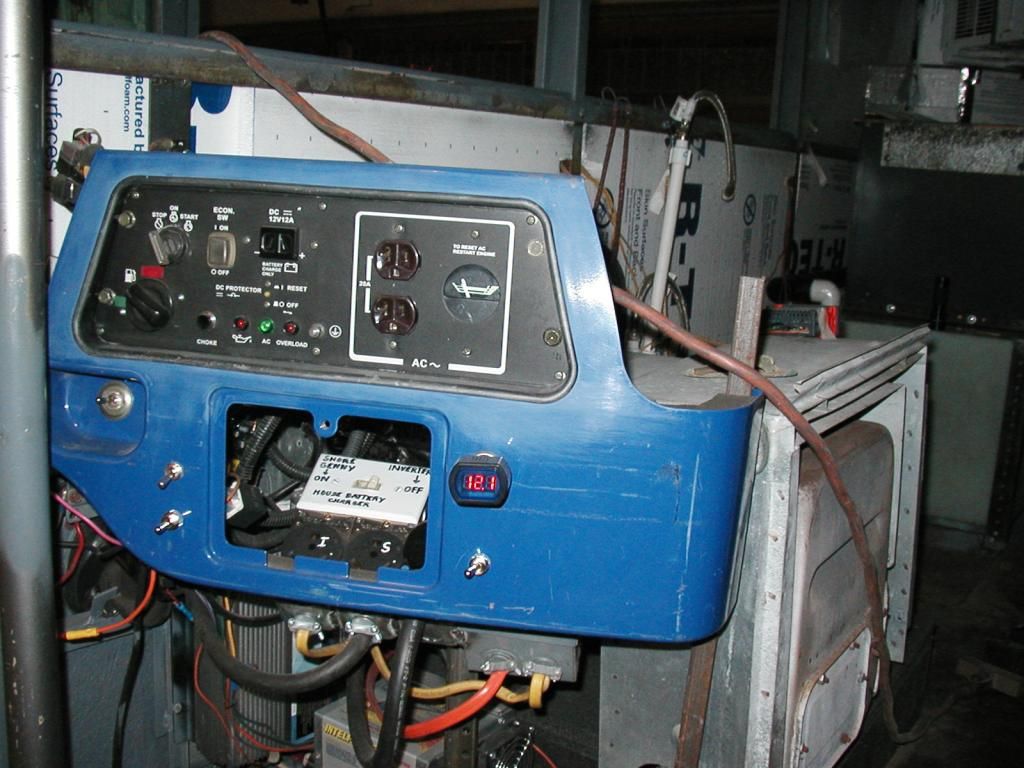
I completed the a/c duct and did the final install on the a/c. The a/c is much quieter now that it is firmly installed and insulated. Sort of at the last minute I realized that there was no provision for the water condensation from the a/c to run out of the bus and since I didn't want a wet floor I had to come up with a drain. I ended up modifying a small plastic paper clip holder to act as a drain. I threaded a barbed fitting into the clip holder, attached a drain tube and stuck the tube into the hot air exhaust flu--not very pretty but it works.
Next I finished both the 120 volt and 12 volt systems. Since the AC system is only 30 amps, I had to do a little figuring to spread the load over two 15 amp breakers. My good friends in China supplied me with a plug in volt meter for $2.99 delivered and I hooked it up to read the voltage on either the house batteries or the genny battery.
Final a/c install.

A bunch of AC boxes. I added a splash shield just in case the grey water drain blows out--hopefully the water winn be directed out of the bus rather than into the elect boxes!

A couple of pics of the a/c water drain dealie under the rear of the a/c.

Drain tube.

A pic of the little volt meter.

Who is online
Users browsing this forum: No registered users and 3 guests