1935 Chevy school bus
Moderator: TMAX
-
stuartcnz

- Site Admin
- Posts: 875
- Joined: Fri Dec 19, 2008 8:05 pm
- Location: Aotearoa, New Zealand
- Contact:
Re: 1935 Chevy school bus
Thats really starting to take shape now. 
https://stuartcrawfordmedia.com/
https://nomadichome.org/
https://ethicallogistics.com/ Challenging the way you think.
JID:stuart@nomadicista.nz
https://nomadichome.org/
https://ethicallogistics.com/ Challenging the way you think.
JID:stuart@nomadicista.nz
Re: 1935 Chevy school bus
Hey Jack --- just checking in to see what you came up with regarding doubling up on the Manchester LP tanks. Meanwhile I'll be out the country for a month after the 4th so it may be a while before I touch base or get anything done on my rig again. Keep up the good...no...make that "Excellent" work my friend.
Re: 1935 Chevy school bus
Hey Tango, good to hear from you. How about coming out to sunny and cool So Ca rather than "the country" (unless it is somewhere really special like where all you secret agents go for R&R)--I could really use the help. I've sort of worked my way to the front bumper and I haven't got a clue what to do with it. The original FB was a straight channel across the front. With the new long nose and the short front fenders I'd have people making left turns into the space between the flat bumper and the front fender 
In my effort to make the front end parts easily removable for repair etc. I added studs to the inside of the (red) cheeks that cover the turbo hardware so they now bolt to the hood wings and the extended radiator shroud. I also followed Henry Ford's lead and made sheet metal covers to hide the corners of the front frame and the spring hangers. It doesn't look great but it at least looks like I tried.
I haven't forgotten about the propane tanks but they are on the side of the bus I can't get to until I turn the bus around so out of sight is out of mind.
Speaking of turning the bus arround, once I get the F bumper figured out and the non existant lower cowl (rust) completed I'll be ready to start on the pop out--Oh boy! I can hardly wait! Jack
This is how the front end looks with only the original sheet metal.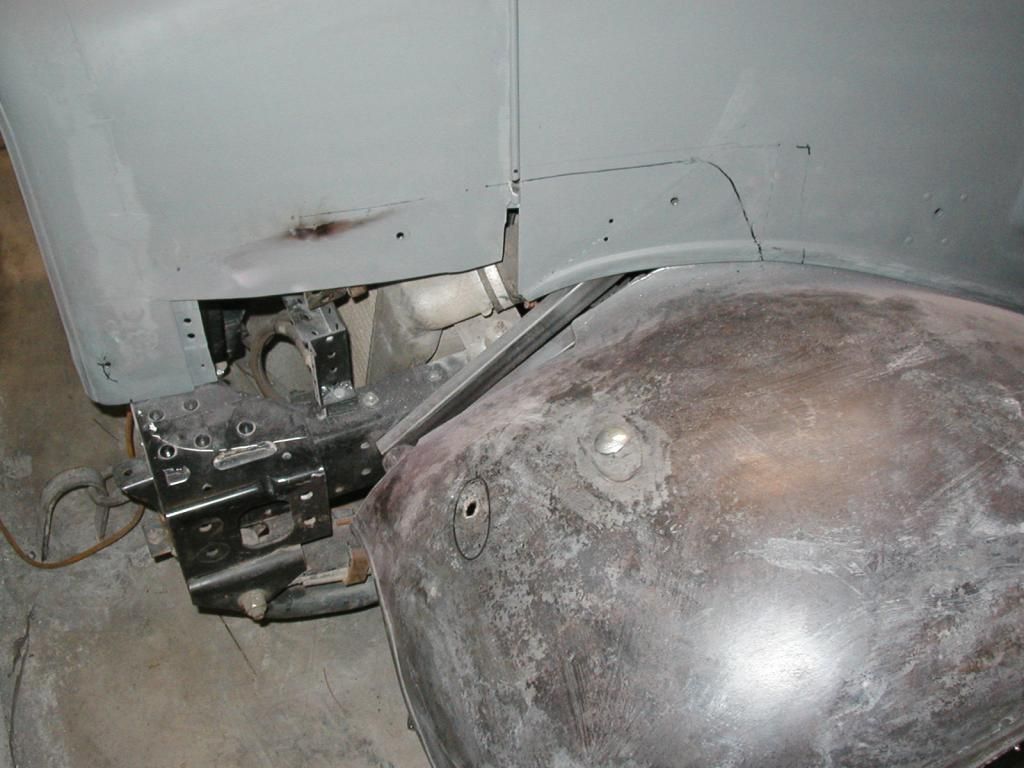 [/]
[/]
This is what I ended up with. The cheeks will have a narrow gaslet on their edges where they mate up with the sheet metal. This pic shows both the cheek and the frame/spring cover. I made the bull nose bends on the covers by splitting the shaft of a steel broom handle and welding it to flat sheet metal .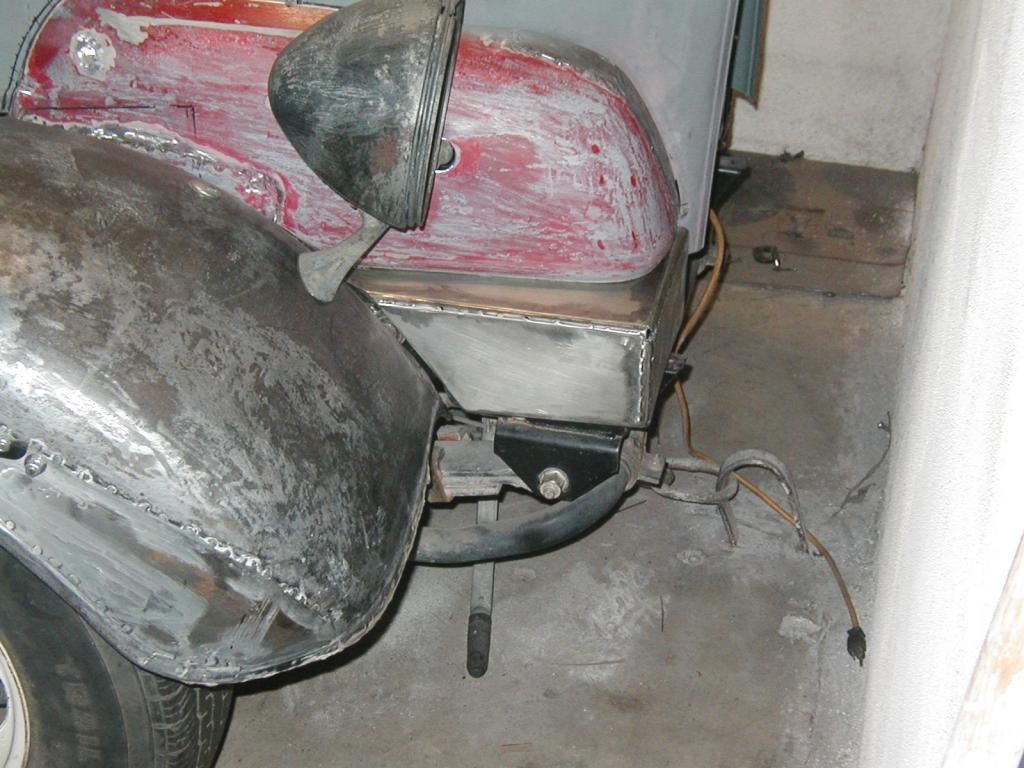
A pic of the studs that hold the cheeks on.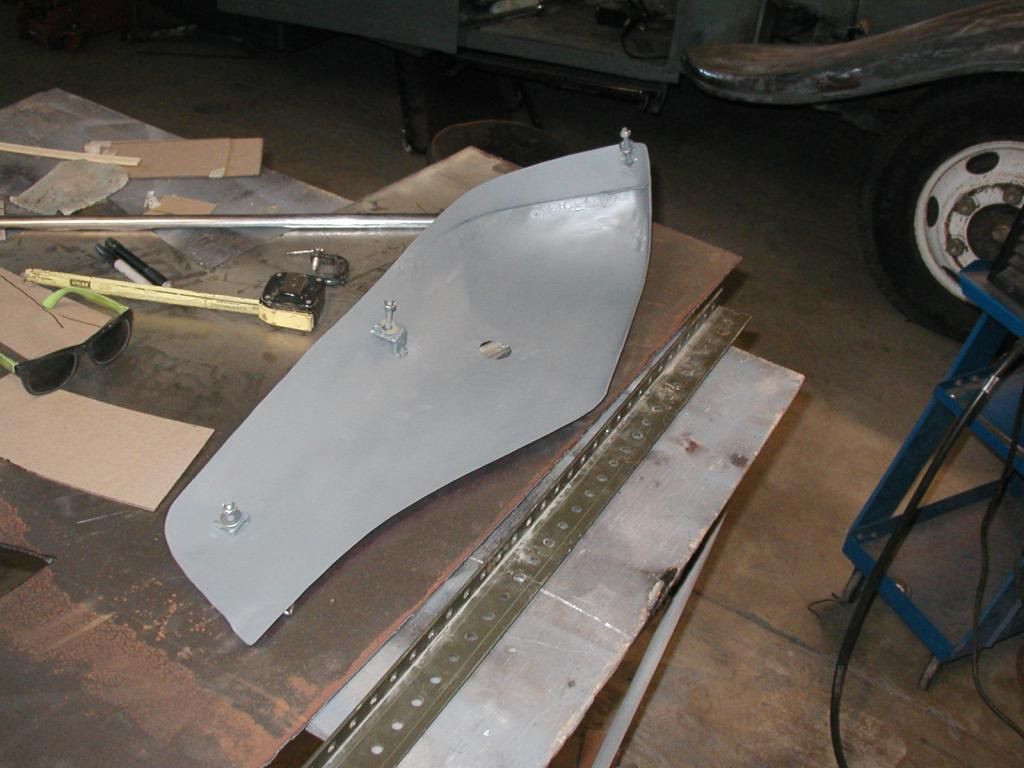
In my effort to make the front end parts easily removable for repair etc. I added studs to the inside of the (red) cheeks that cover the turbo hardware so they now bolt to the hood wings and the extended radiator shroud. I also followed Henry Ford's lead and made sheet metal covers to hide the corners of the front frame and the spring hangers. It doesn't look great but it at least looks like I tried.
I haven't forgotten about the propane tanks but they are on the side of the bus I can't get to until I turn the bus around so out of sight is out of mind.
Speaking of turning the bus arround, once I get the F bumper figured out and the non existant lower cowl (rust) completed I'll be ready to start on the pop out--Oh boy! I can hardly wait! Jack
This is how the front end looks with only the original sheet metal.
 [/]
[/]This is what I ended up with. The cheeks will have a narrow gaslet on their edges where they mate up with the sheet metal. This pic shows both the cheek and the frame/spring cover. I made the bull nose bends on the covers by splitting the shaft of a steel broom handle and welding it to flat sheet metal .

A pic of the studs that hold the cheeks on.

Re: 1935 Chevy school bus
Jack --- Awesome work! --- I can see a stepped back bumper in your future that wraps back around everything. The one I'm picturing is VERY Art Deco with maybe (chrome) guards right at the back step. As Mr. Natural would say...Keep on Truckin'. (or is it "Bussin' ?)
As for me, I have to spend all of August in Paris & the South of France (Avignon). Tough work but somebody's gotta' do it, right?
Bon soire mon ami! Le bus devra attendre.
As for me, I have to spend all of August in Paris & the South of France (Avignon). Tough work but somebody's gotta' do it, right?
Bon soire mon ami! Le bus devra attendre.
Re: 1935 Chevy school bus
A true work of art, Jack. Wonderful to see. Thanks for all your posts and ideas.
Rufus
Rufus
Re: 1935 Chevy school bus
Hello All. Well, the tilt front end is mostly under control now and since I had a couple of friends available to help guide turning the bus around I decided I'd work on the other side for a while. I've talked about building a slide out ever since I bought the bus and I guess now is as good a time as any to begin---I cut a BIG hole in the side 
Most slide outs are either floor to ceiling or mid wall to ceiling and both lend themselves to typical roller or tube slide systems. Because I need a combination of floor and mid wall to allow for a bed (lengthwise) and foot room beside the bed (bed is over the rear wheel well), I am going to have to come up with some other slide out mechanism to accomplish this. Oh Well! Here we go! Jack
The first cut is always the most painful.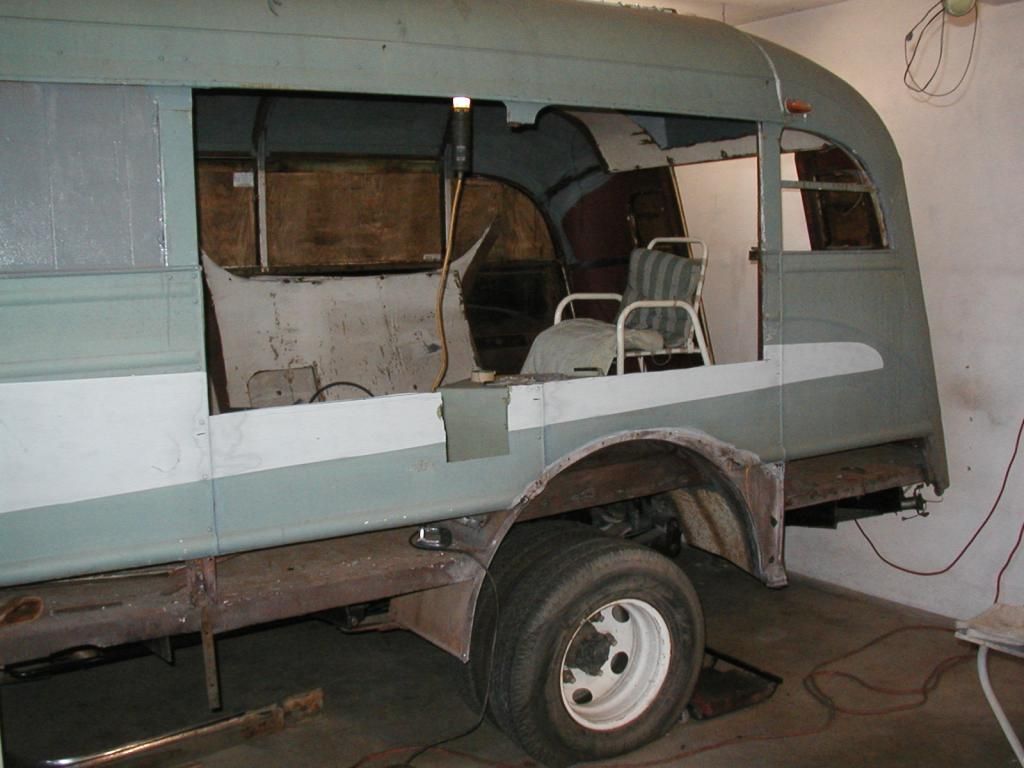
I'm not sure whether I should tin over the old window openings or try to retain them to preserve the original appearance.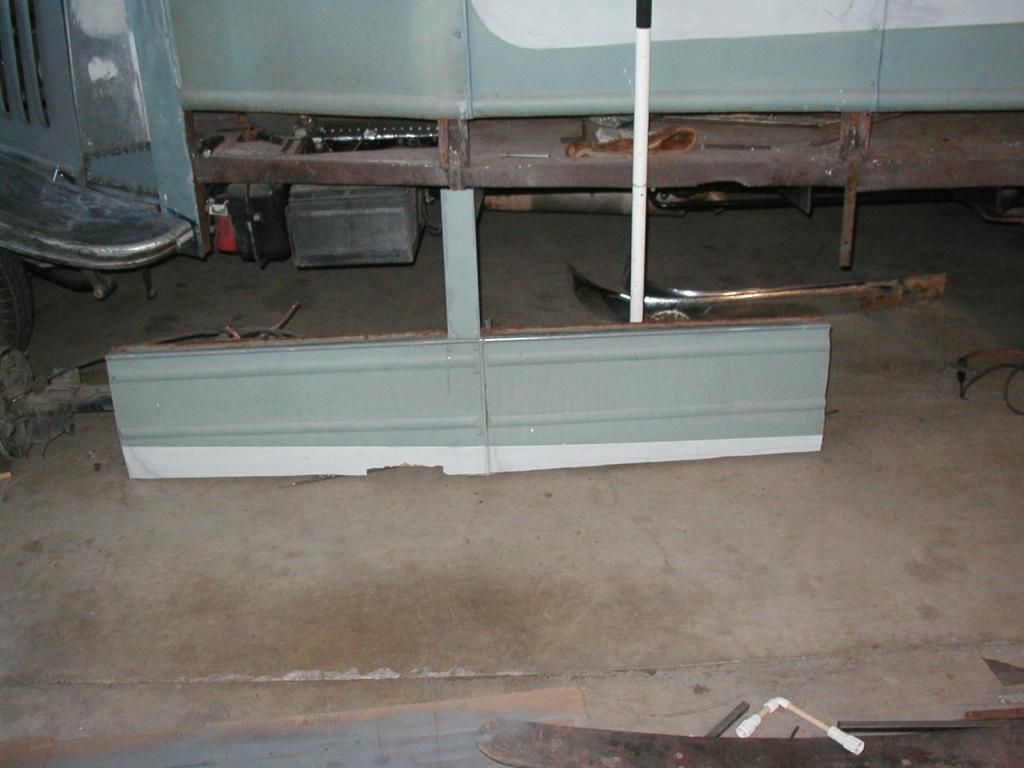
A pic of the opening from the inside. A water tank will be placed on either side of the slide drive motor as this area will be under the bed.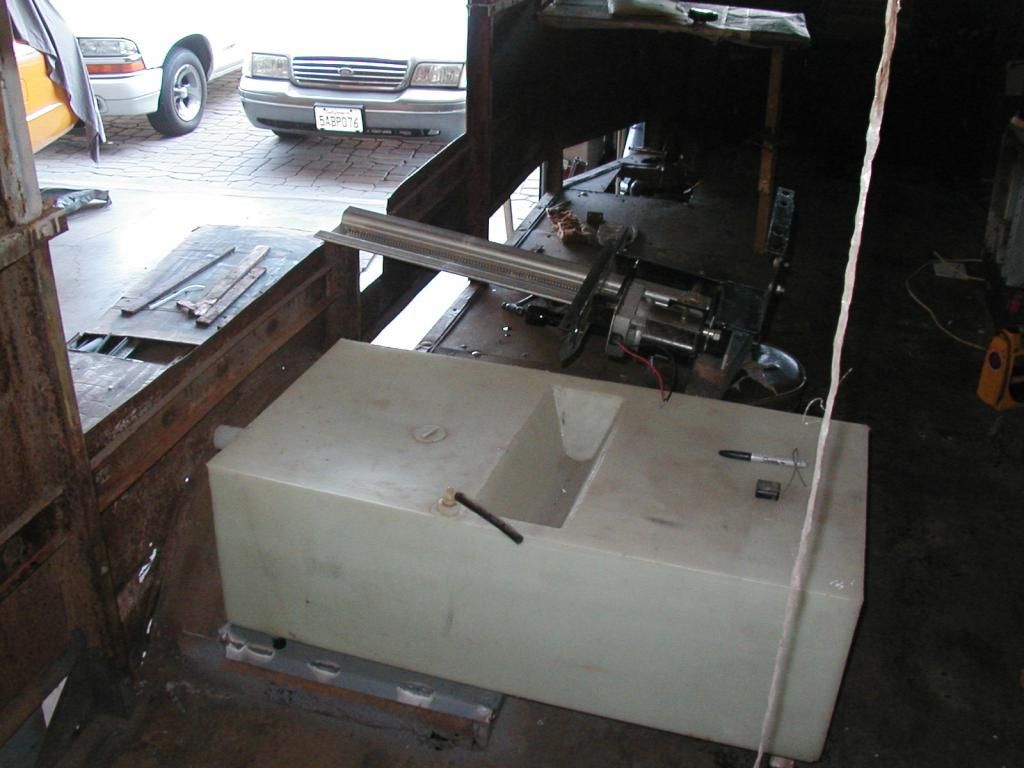
Most slide outs are either floor to ceiling or mid wall to ceiling and both lend themselves to typical roller or tube slide systems. Because I need a combination of floor and mid wall to allow for a bed (lengthwise) and foot room beside the bed (bed is over the rear wheel well), I am going to have to come up with some other slide out mechanism to accomplish this. Oh Well! Here we go! Jack
The first cut is always the most painful.

I'm not sure whether I should tin over the old window openings or try to retain them to preserve the original appearance.

A pic of the opening from the inside. A water tank will be placed on either side of the slide drive motor as this area will be under the bed.

Re: 1935 Chevy school bus
Is there no end to this madness!!!???
And BTW Jack...it should read..."Here we go...AGAIN". This unit will no doubt capture the title of "Most Modified 1935 Chevy Bus" in history. Somebody get Guinness on the line!
And BTW Jack...it should read..."Here we go...AGAIN". This unit will no doubt capture the title of "Most Modified 1935 Chevy Bus" in history. Somebody get Guinness on the line!
-
somewhereinusa

- Posts: 323
- Joined: Sat Feb 12, 2011 2:44 pm
- Location: Andrews, Indiana
- Contact:
Re: 1935 Chevy school bus
As always looking good.
What about covering them and then painting to look like there are still windows there?
I'm generally a fan of skinning over the windows, but in the case of your "classic" I would think at least keeping the appearance of being somewhat original might be the way to go.I'm not sure whether I should tin over the old window openings or try to retain them to preserve the original appearance.
What about covering them and then painting to look like there are still windows there?
Re: 1935 Chevy school bus
> keep windows.., for appearance...
If it would be _just_ for appearance _and_ you'd rather tin over the openings you might get 85%+ of the appearance with a faux window paint job...
Just an idea. <g>
Rufus
If it would be _just_ for appearance _and_ you'd rather tin over the openings you might get 85%+ of the appearance with a faux window paint job...
Just an idea. <g>
Rufus
Re: 1935 Chevy school bus
Hello All. Thanks for the suggestions and I'll try to maintain the "window" look. I had thought about sheeting over the windows and then painting a window and I may yet do that. When I asked the clerk at the local auto paint supply store what I might use, she mentioned the stuff used for vehicle wrap because it can be printed to look like just about anything. She said that the new wrap material has about a 20 year life expectancy--longer than I'll need I checked the price of good quality wrap and found it to be between $15 and $20 dollars per sq ft plus installation (which I can do). Because of the roll size of the wrap there is a lot of waste with my particular project so the price is about $500 for materials and I think I'd rather spend that money on a couple of new tires--we'll see.
Back to the project. I made up the inner and outer frames for the slide out and installed them. At least now I know what the measurements for the 5 sided box must be. Jack
View of the outside sealing surfaces for the slide out. I'll level out the areas on either side of the slide out to match the new surface at the top.
View of the inside sealing surface. This required welding many small pieces together to finally come up with a flat surface.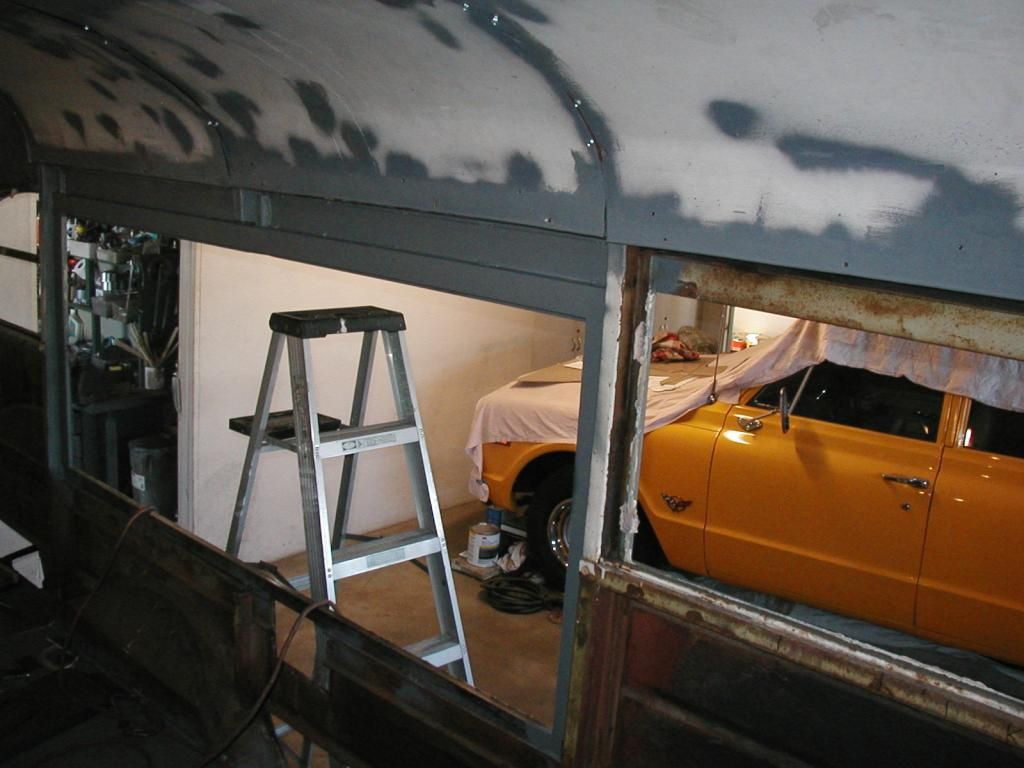
Back to the project. I made up the inner and outer frames for the slide out and installed them. At least now I know what the measurements for the 5 sided box must be. Jack
View of the outside sealing surfaces for the slide out. I'll level out the areas on either side of the slide out to match the new surface at the top.

View of the inside sealing surface. This required welding many small pieces together to finally come up with a flat surface.

Re: 1935 Chevy school bus
Hello all. I played almost all week on the slide out. I added 10" to the track and rack portion of the slide out mechanism. I was able to buy a length od rack gears just like the one used on the mechanism so it was only a matter of fabricating an extension for the 1/4" thick "W" shaped track and welding on the rack gear. I did a bunch of cutting and fitting and welding and got the mechanism bolted in. Next I made 3 sets of rollers for the slide out to roll on. I used 1 1/4" diameter sealed bearings mounted on 1/2" bolts. I will use another bearing on either side of the box to assure that the box rolls straight in and out without jambing. The bottom of the box is made of thin wall 1 1/4" square tubing and the 3 roller tracks are the same size but have a 3/16" wall. I had a devil of a time getting the bottom welded up as I was using the none too smooth garage floor as my work bench. Lots of spits and starts and shims but it looks like I finally got it close enough to plumb and square to work. Since I can build the rest of the box based on the bottom I'm hoping the rest won't be such a PITA. The little boy in me wants to lay a sheet of plywood on the contraption, roll out a sleeping bag and spend the night Jack
A pic of one of the rollers.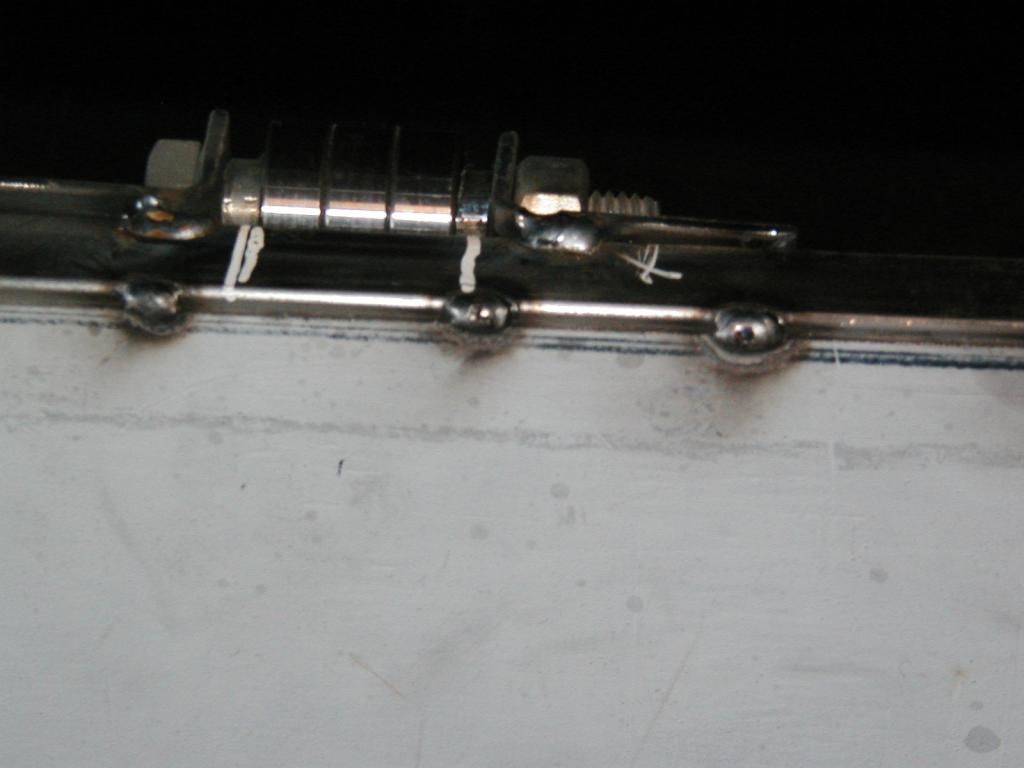
A pic of the slide out floor frame retracted.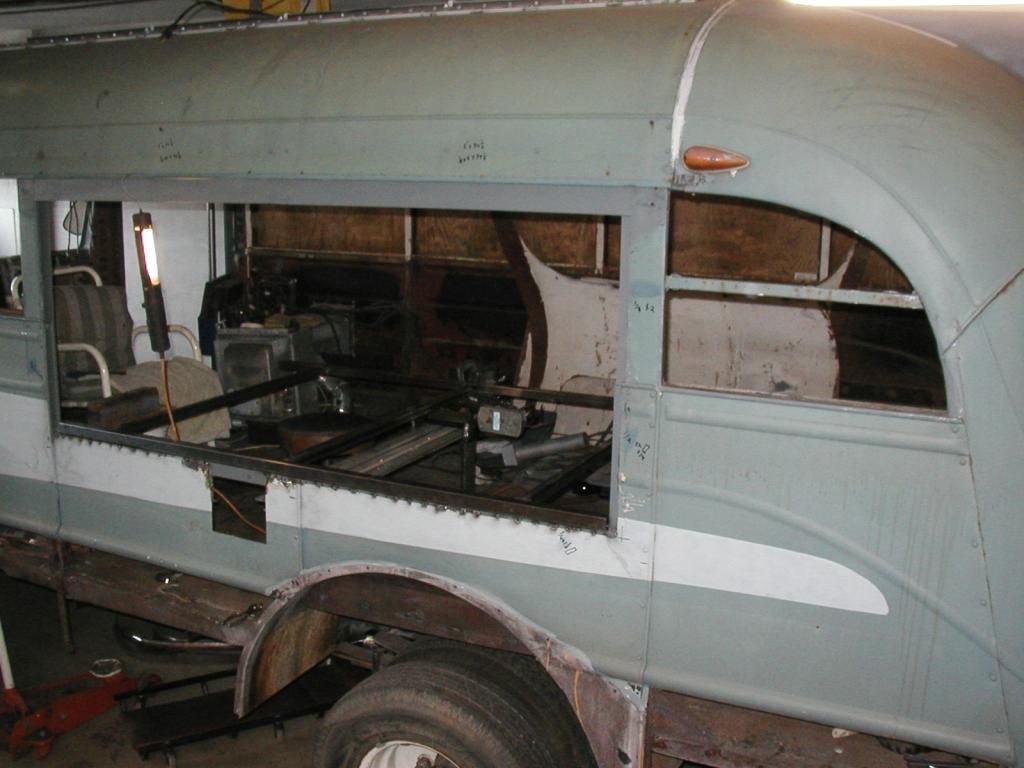
Close up pf drive mechanism.
A Pic of slide out bottom extended.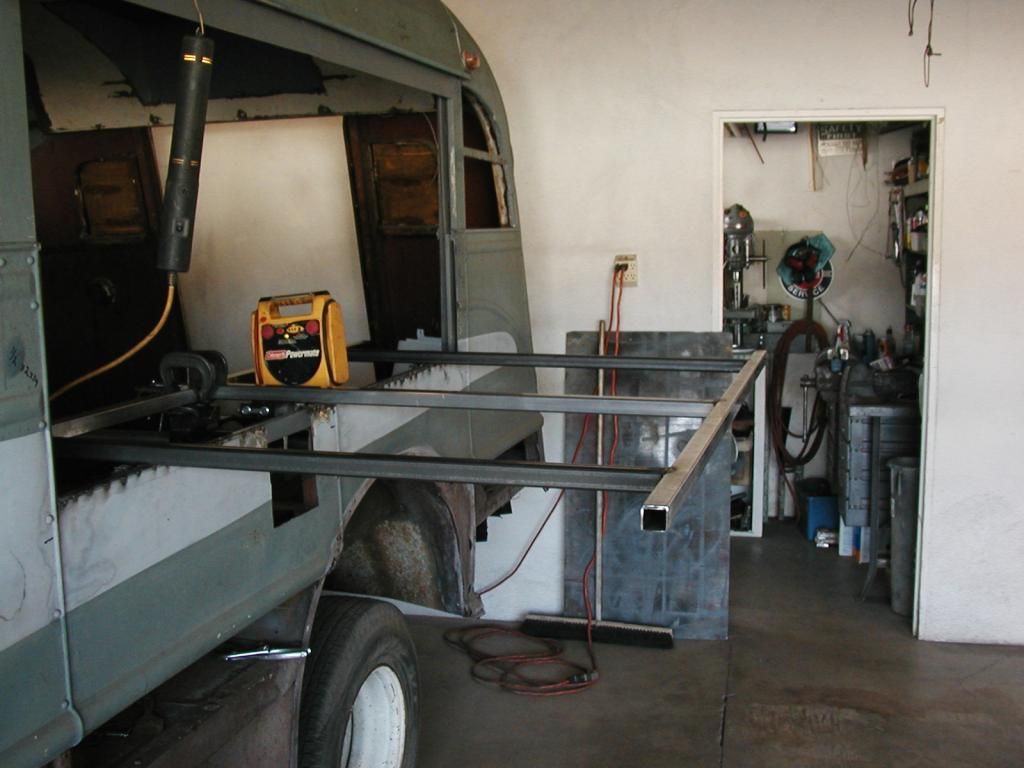
A pic of one of the rollers.

A pic of the slide out floor frame retracted.

Close up pf drive mechanism.

A Pic of slide out bottom extended.

-
somewhereinusa
- Posts: 323
- Joined: Sat Feb 12, 2011 2:44 pm
- Location: Andrews, Indiana
- Contact:
Re: 1935 Chevy school bus
Go for it, if we were "all grown up" would we be playing with school buses?The little boy in me wants to lay a sheet of plywood on the contraption, roll out a sleeping bag and spend the night
Re: 1935 Chevy school bus
Looking good, Jack. I just got to check the recent pages, haven't had time to go from the start yet. This is kind of a test post for just having registered. Your bus brings back memories. The coolest rod when I was in High School IMHO was a '35 Chevy pickup. Much cooler than the '55 '56 '57 Chevys that were popular then. It was all flat dark grey primer except for the chrome wheels. The side doors on the engine cover were left off so the chromed (312?) T-bird V8 engine would peek out. Of course, the "motorhead" who owned it started off on another project as soon as it was done . . . . .
I'm waiting to see how your bus looks all buttoned up and painted.
I'm waiting to see how your bus looks all buttoned up and painted.
Re: 1935 Chevy school bus
I'm IN!!!!!
Damn Jack, looks like you're building a transformer! It'll be pretty cool when you drive up in an apparently normal '35 Chevy then push a button that transforms it into the space shuttle which then blasts off to the moon.
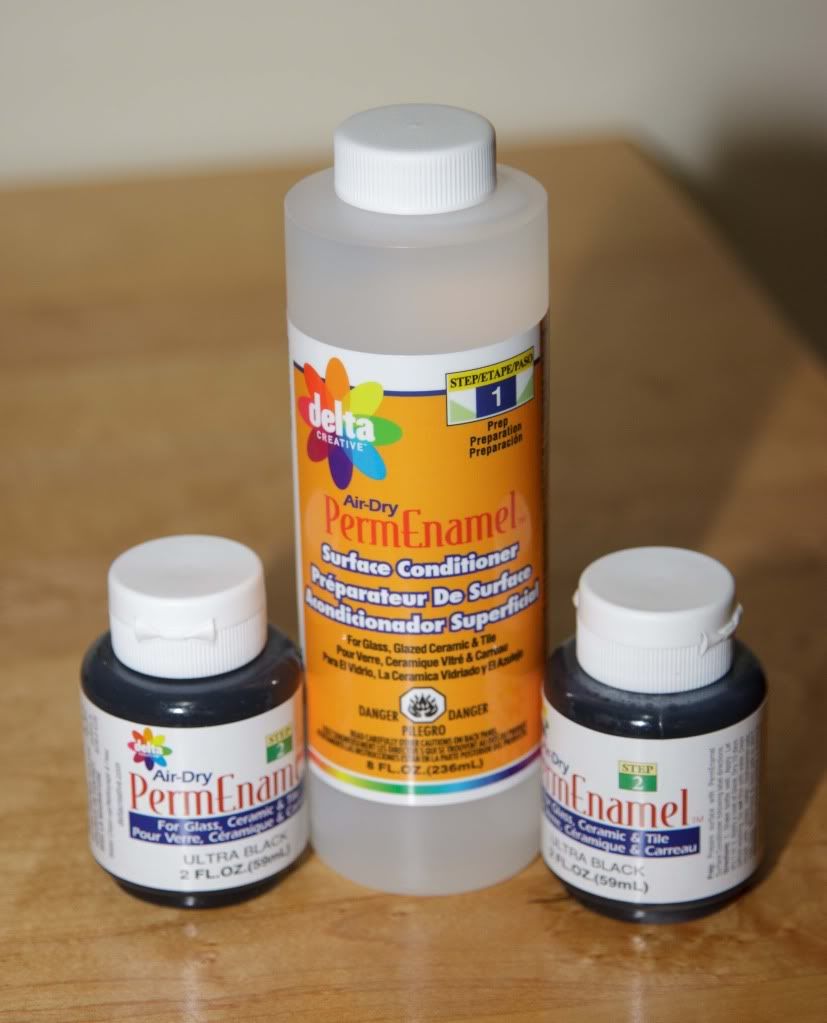
I'll chime in and vote you keep the windows. When I covered some of mine I painted the inside pane black then built over them. Got some paint made especially for glass at the local craft store. You brush on a primer then apply the color coat. One small bottle of paint covered one of my side windows if I was careful.
Damn Jack, looks like you're building a transformer! It'll be pretty cool when you drive up in an apparently normal '35 Chevy then push a button that transforms it into the space shuttle which then blasts off to the moon.
I'll chime in and vote you keep the windows. When I covered some of mine I painted the inside pane black then built over them. Got some paint made especially for glass at the local craft store. You brush on a primer then apply the color coat. One small bottle of paint covered one of my side windows if I was careful.

Re: 1935 Chevy school bus
Hello Roach711 and Redbear--glad to have you aboard and thanks. If you get a chance take a look at The homestead heading and Incorporation.. I'm using that pic as my screen saver--really cool. Also check out "A story of two road trips" in the Stuff forum. I worked again on the slide out today and hope to have more pics by tomorrow. Jack
Who is online
Users browsing this forum: No registered users and 20 guests