Ya Jack...i built a little gable into the rear roof for my A/C (aka; a "headbanger").
As for the electrical...I'll never even begin to get my head around anything you just said. Best of luck my friend. The only thing I do know for sure about anything electrical is...never stick bobby pins into the little holes in the wall. Ask me how I learned that one.
PS...Mothers should all know better than to tell their kids anything that specific!
1935 Chevy school bus
Moderator: TMAX
-
somewhereinusa

- Posts: 323
- Joined: Sat Feb 12, 2011 2:44 pm
- Location: Andrews, Indiana
- Contact:
Re: 1935 Chevy school bus
Hey Jack,
Could you share a wiring diagram for what you are doing? Someone might be able to shed some light on the subject. I've been playing around with led circuits. Are your lamps on the switched or load side of the relay?. No one told me hooking them up backwards would hurt them, I do it all the time and haven't had any fail because of that. I've only toasted one and that was because it got 12v.They just don't work when hooked up backwards.
Apparently they don't have any smoke in them that can escape, but if you let the light out all at once you will never see it again.
Could you share a wiring diagram for what you are doing? Someone might be able to shed some light on the subject.
Apparently they don't have any smoke in them that can escape, but if you let the light out all at once you will never see it again.
Re: 1935 Chevy school bus
Hello All. Tango, I think our mothers were sisters--the specific instructions were the same only I used a two prong kitchen fork rather than a bobby pin--blew the socket out of the wall and shut down the whole house--guess I showed her! 
I spent the day rigging brackets to hold the a/c. I asked wiffy (AKA the little engineer) to give me a hand while I grunted the a/c into the bracketry. I'll need to be especially nice to her because she was a good helper and never once tried to re-engineer my work (perhaps a first?) Anyway, we got the thing installed and I imediately saw a way to improve the design. The new design will allow one person to install the a/c and the installation will look less like boiler room and more like old Skoolie. I think I might be able to come up with a more modern looking instalation if I spent anothet 30 days working on it, but I really want to make my June '14 Yosemite deadline so I guess I'll opt for function over form.
Somewhere, I don't have a clue how to post a wiring diagram--wish I did. I'm not using a relay: the load (solenoid) is direct wired to the "hallway switches" as is the LED. Jack
Pics to follow---sometime. Jack
Re: 1935 Chevy school bus
it's coming along nicely
Re: 1935 Chevy school bus
Hello All. Not much to report but I did take a few pics. Now that I have the a/c roughed in I'll be able to finish out the RR corner and roof. Then I'll build the ducting for the a/c condensor. Jack
I made a simple bracket that supports the front of the a/c from a roof frame member. It is adjustable by means of a turn buckle. The rear bracket supports from the floor and outside wall.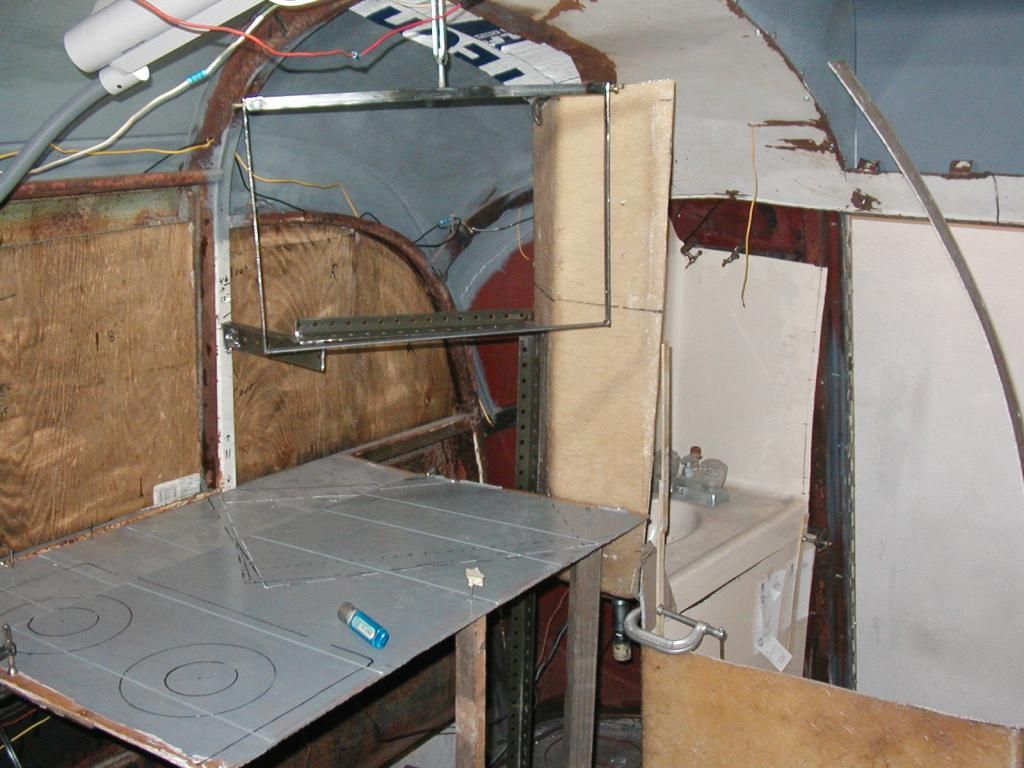
The a/c mounts directly above the microwave. The microwave is supported by the counter top. The angluar position helps with cold air circulation and allows the microwave door to be opened 90 degrees without blocking the entire aisle.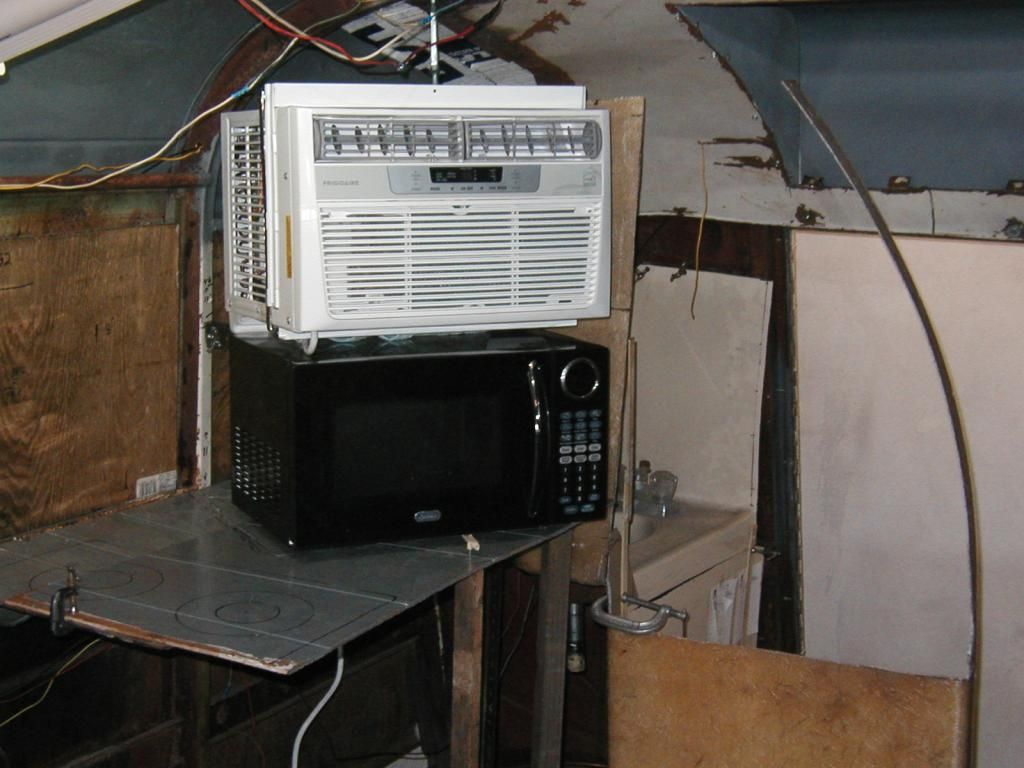
This pic shows the stationary portion of the bed frame and the water tanks below. The walkway between the counter and the bed remains at chair width--16".
Another view.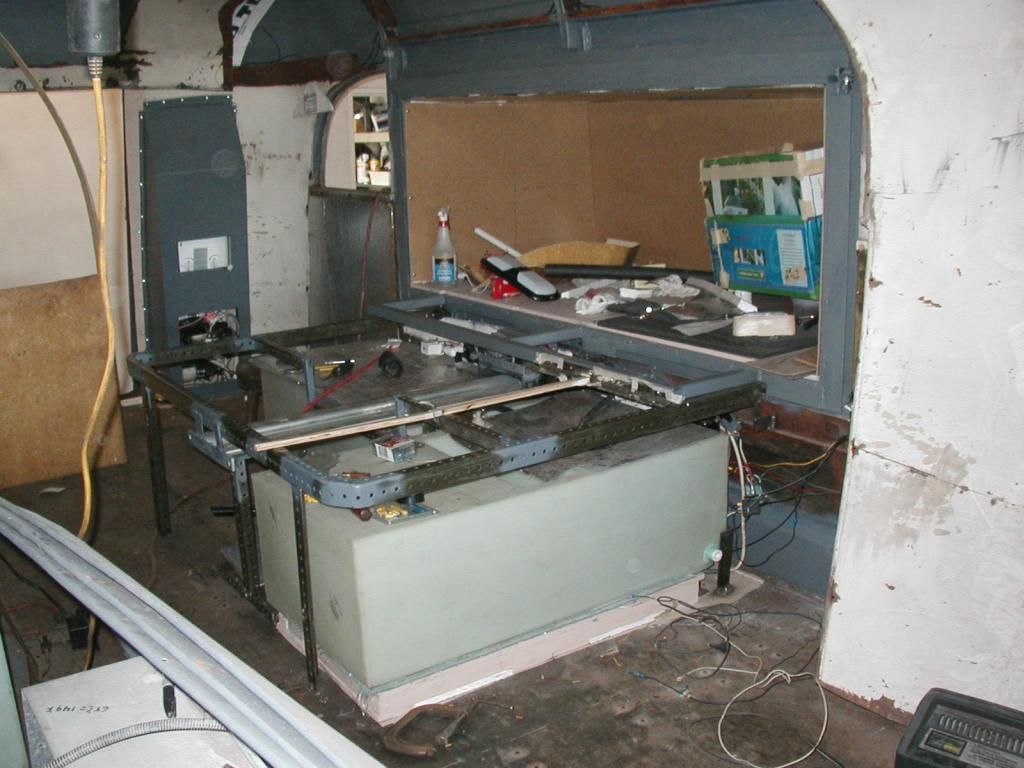
I made a simple bracket that supports the front of the a/c from a roof frame member. It is adjustable by means of a turn buckle. The rear bracket supports from the floor and outside wall.

The a/c mounts directly above the microwave. The microwave is supported by the counter top. The angluar position helps with cold air circulation and allows the microwave door to be opened 90 degrees without blocking the entire aisle.

This pic shows the stationary portion of the bed frame and the water tanks below. The walkway between the counter and the bed remains at chair width--16".

Another view.

Re: 1935 Chevy school bus
Them Shorties sure do fill up fast, don't they?
-
Mark R. Obtinario
- Seasoned Nomadicista
- Posts: 340
- Joined: Mon Jun 13, 2005 12:19 am
- Location: Winlock, WA
- Contact:
Re: 1935 Chevy school bus
What Tango said!
We moved up to a 1981 Avion 34V, a 34.5' long three axle trailer this last summer.
When you are a person who would be considered among the large economy sized and is married to another person who also would be considered among the large economy sized, small spaces just don't work. Add in a 5-year old and a dog and small spaces fill up very quickly.
She is 5'10" and I am 5'12". We also do not like short overheads.
So as nice as your little school bus is it wouldn't work for us.
Which is part of the fun of the hobby--if you can't find what you want off the shelf you can make something to fit your needs.
Re: 1935 Chevy school bus
"if you can't find what you want off the shelf you can make something to fit your needs." - Mark
Well said. That's the whole idea here!
Well said. That's the whole idea here!
Re: 1935 Chevy school bus
Jack,I plan to redo my front AC this winter,the air out the back of the unit is about 150* and is super heating the side/top cold air ducts and the walls around my install.
The roof vent is not enough exhaust with the "rain cover" maxair vent cover on it.
I am going to stick the back out the front(flush) and make like a cowl induction forhead over roof hood scoop did that make since?
How are you planning to exhasut the very hot air?
The roof vent is not enough exhaust with the "rain cover" maxair vent cover on it.
I am going to stick the back out the front(flush) and make like a cowl induction forhead over roof hood scoop
How are you planning to exhasut the very hot air?
Re: 1935 Chevy school bus
Hey Bansil, I went to your build pics and studied your front a/c install. In the pic of the roof vent it looks like the exhaust opening is about 4" in diam. Did that get enlarged to about the same area as the condensor--if not it may be the cause of the heat build up. Actually, anything that impeeds air flow through the condensor will cause the condensor to heat up..As cool as those vented orange lights up front are they may be restricting air flow. The 150 degree exhaust temp is unusually high. I'd expect to see about 30 to 35 degrees above ambient outdoor air temp at max. When I built my generator box I had a similar air flow problem. The genny would stay cool under light load but slowly began to heat under max load. I installed a second fan on the exhaust side to assist the inlet fan (after a certain temp was reached) and that seems to have solved the problem. A puller fan on your a/c exhaust might help.
Bla Bla Bla--all that said, I know the most logical place to vent my a/c would be out the RR side window but I don't want anymore louvers-in-window-holes than I allready have. My plan at the present is to build a phlenum to duct the exhaust out the floor of the bus. I plan to have the phlenum expand to a larger cross sectional area than the comdensor as it moves away from the a/c and I may need a fan under the bus to keep the hot air from pooling there and heating the floor. We'll see. What are your thoughts?
Jack
Re: 1935 Chevy school bus
14 x 14 hole but I didn't duct it!!! I thought  that a 9inch fan would create some magic vortex and expel the heat...ugh..nope
The whole area 3 feet deep and 8 feet wide gets "super heated" and the fan is not enough with the max air cover on (take the rain cover off so there is a huge 14 x 14 hole with a 9 inch fan and it works great) except for the huge hole there crap speaking of big hole...I need to seal that off...crap..crap...no wonder it feels like an ice box now, all the heat is flowing outside
The whole area 3 feet deep and 8 feet wide gets "super heated" and the fan is not enough with the max air cover on (take the rain cover off so there is a huge 14 x 14 hole with a 9 inch fan and it works great) except for the huge hole there
Re: 1935 Chevy school bus
Hello All. I hope you all had as pleasant a Thanksgiving as we did. I'm not much good at sitting around so I did play with the bus some despite the holiday. I completed as much as I could with the a/c etc. until I had the new sheet metal installed on the right side. Most of the welding has to be done from the inside of the bus before reinsulating and the installation of the inner panels. I also needed to fab up the lower mounts for the awning--the upper ones were completed much earlier. Those items completed I should be able to return to working on the interior. Jack
Many motor homes have their awnings attached directly to the outter skin--often not a very secure attachment. I built a frame which attaches to the bus body frame and has a "tongue" that passes through the outer body to hold the awning mechanism.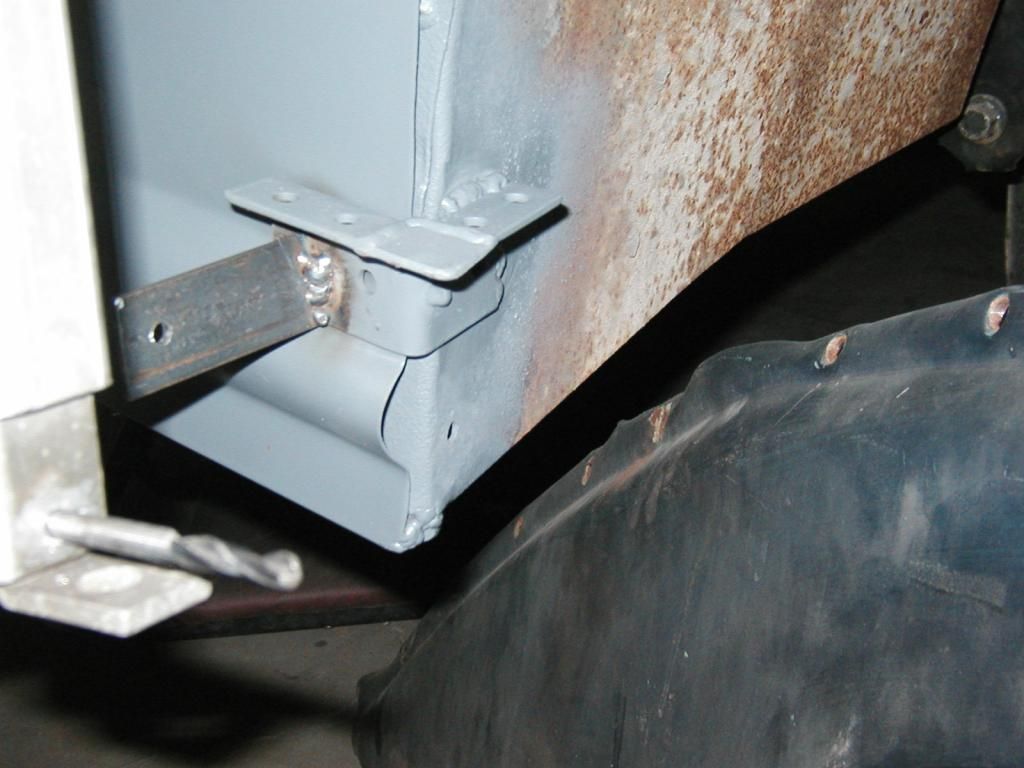
Front mount.
I slotted the outer skin for the "tongue" to pass through.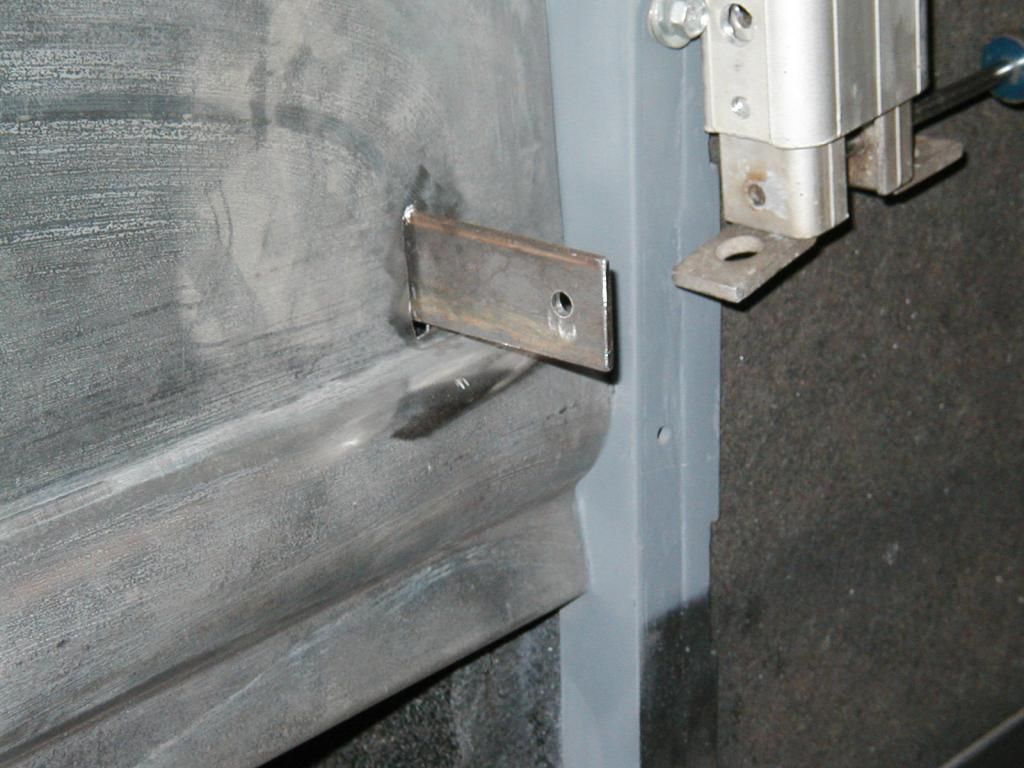
Rear mount.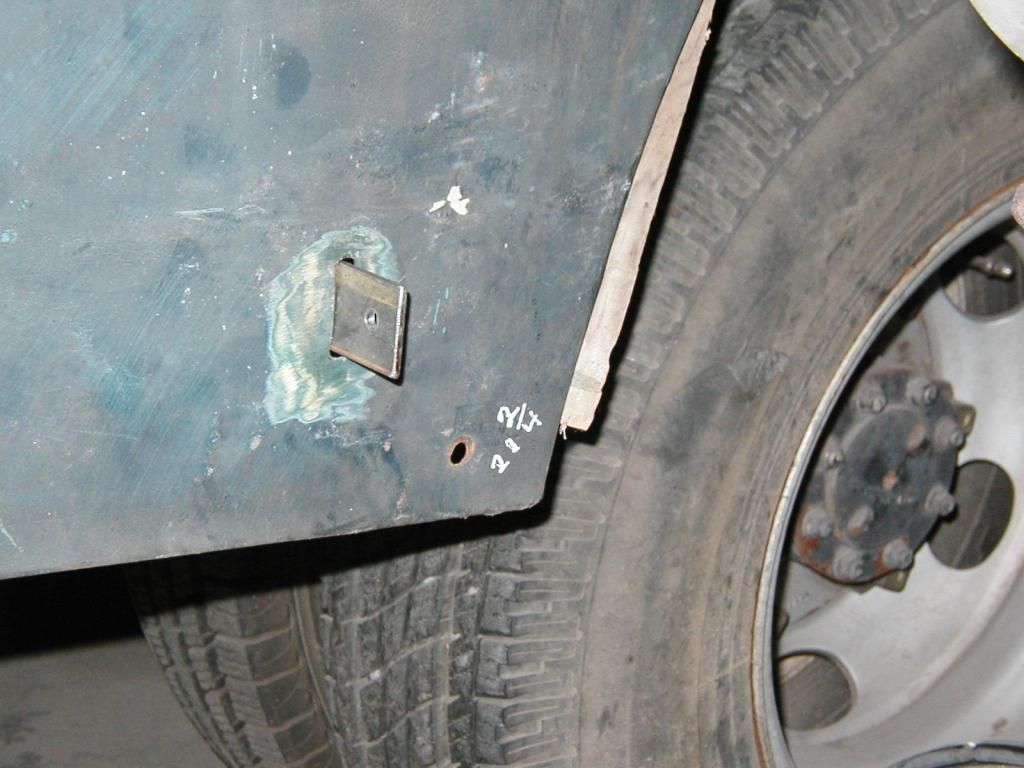
Lower rear awning bracket installed.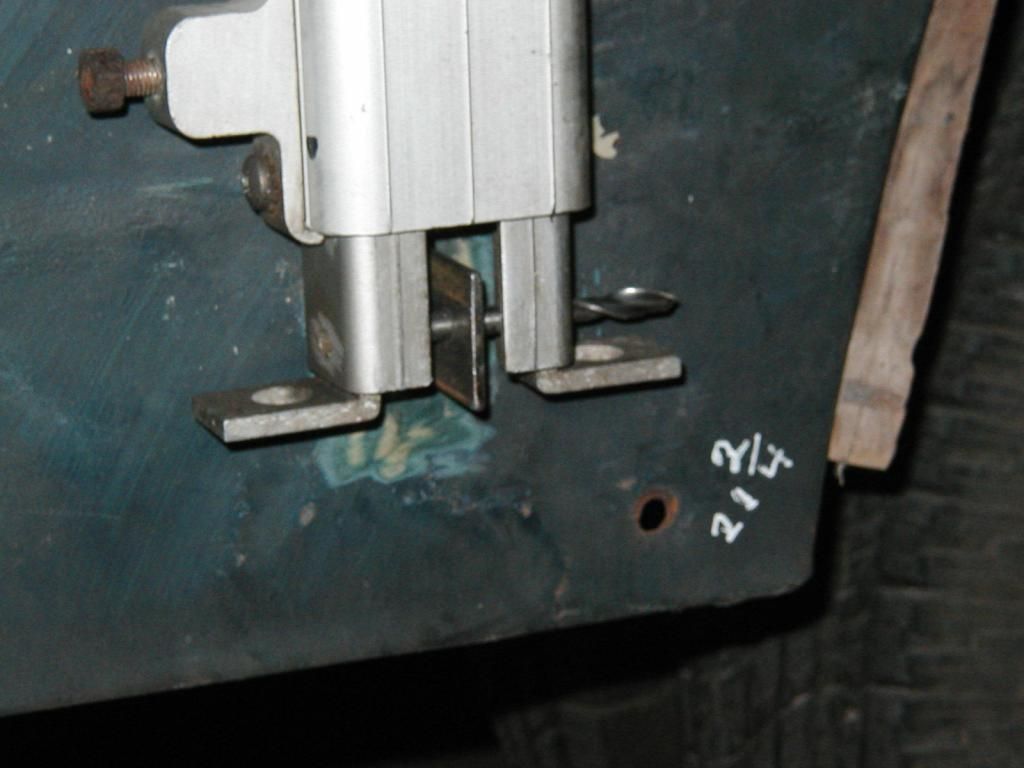
Front.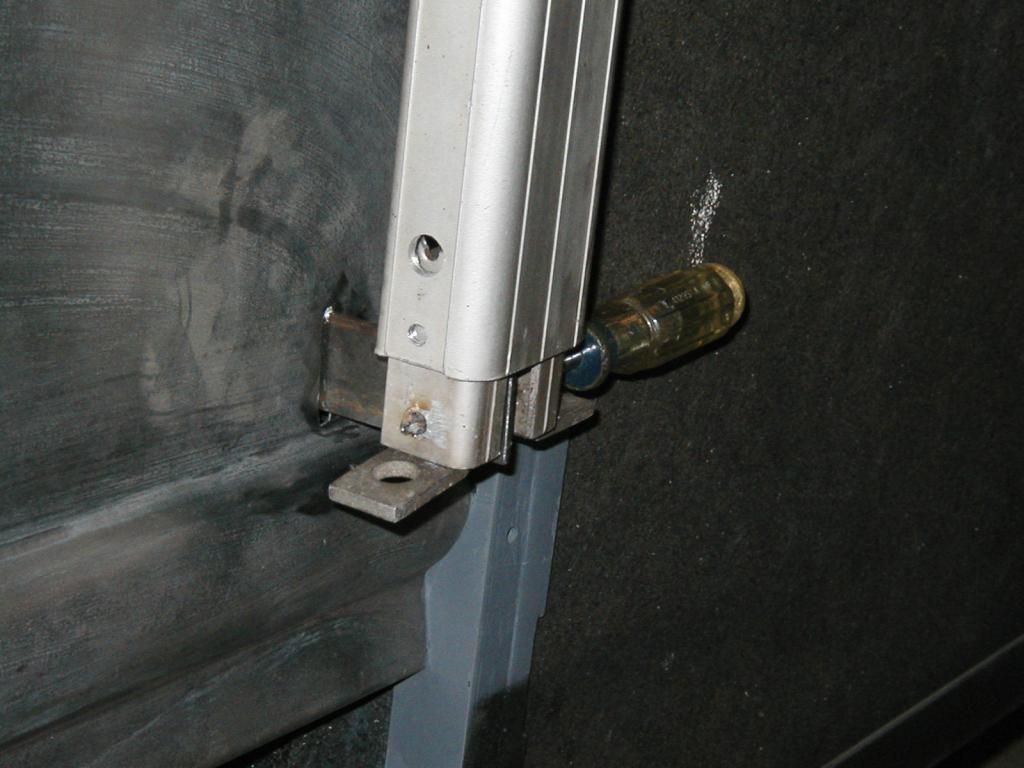
Many motor homes have their awnings attached directly to the outter skin--often not a very secure attachment. I built a frame which attaches to the bus body frame and has a "tongue" that passes through the outer body to hold the awning mechanism.

Front mount.

I slotted the outer skin for the "tongue" to pass through.

Rear mount.

Lower rear awning bracket installed.

Front.

Re: 1935 Chevy school bus
Excellent idea Jack --- just don't forget to weld that screwdriver and drill bit in place before you close everything up.
-
Mark R. Obtinario
- Seasoned Nomadicista
- Posts: 340
- Joined: Mon Jun 13, 2005 12:19 am
- Location: Winlock, WA
- Contact:
Re: 1935 Chevy school bus
I know one of the places that Avion RV's are prone to leak is where the awnings mount.
In order for the mounting brackets to sit flush with the skin of the trailer a couple of the skin rivets are removed. Over time the loss of those rivets allows the skin to move and to work the sealant between the panel ends to fail. Lack of sealant=water leak.
The other concern I have had about awnings on most RV's is the same one you identified. If the hardware is only screwed into the wall panel and not connected to the frame of the RV you have to know that over time the mounting is going to work itself loose or not hold through a wind storm.
It doesn't appear as if either issue will be a problem for your awning.
The pictures and accompanying descriptions make it easy to follow your build.
Keep up the good work!
Re: 1935 Chevy school bus
Hello All. There just has to be a better way to insulate these old busses than cutting and pasting foam board--but wait! there is!--SPRAY FOAM!!!! It's just that I can't afford to do it that way so I spent the entire day hand cutting strips of 1" foam board so they fit like puzzle pieces to match the round corners of my bus. I did two layers and made sure the seams didn't overlap between the layers. What a PITA! Oh well, I only have 3 more corners to do
Yesterday I cut a hole in the floor and made up the plenum (sp?) for the a/c. I used fiber board which I sealed with shellac and is now drying. I think I mentioned this before but shellac is made from beetle droppings and has been used for centuries the world over for waterproofing--Google "shellac",an interesting read. Jack
A days labor--sure glad I don't have to make a living doing this Ha!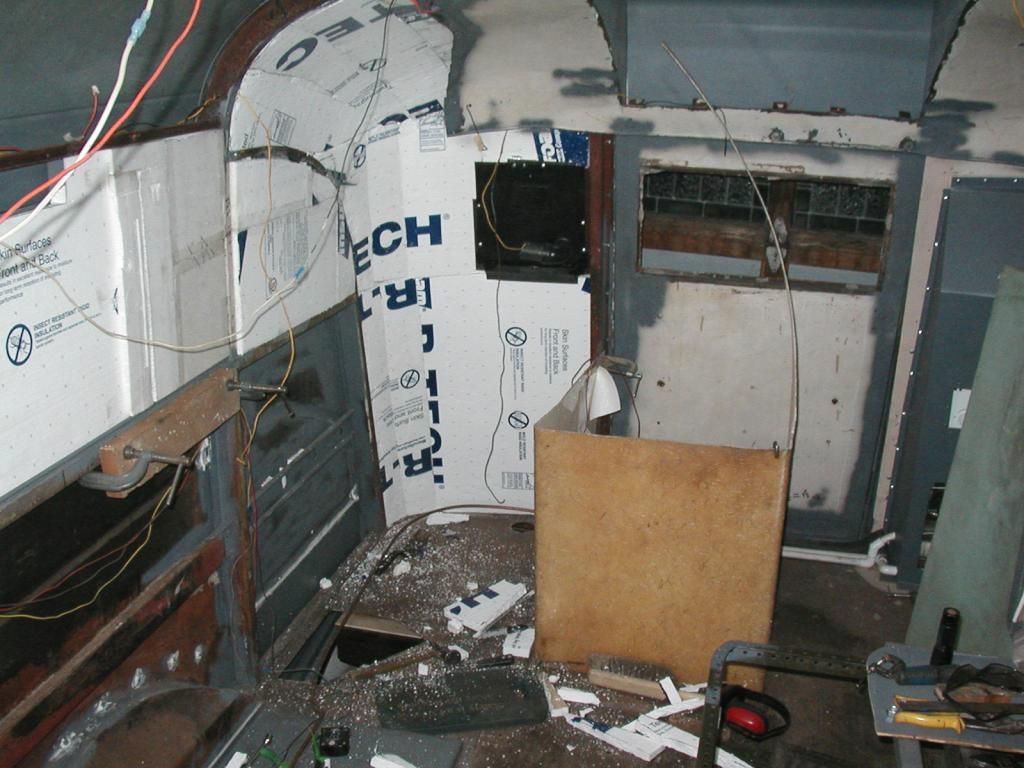

Who is online
Users browsing this forum: Bing [Bot], Google [Bot] and 81 guests