Page 2 of 55
Re: 1935 Chevy school bus
Posted: Thu Jan 24, 2013 1:57 pm
by splummer
so whats the plan once she is done , any trips in your future
Re: 1935 Chevy school bus
Posted: Fri Jan 25, 2013 2:09 pm
by ol trunt
Ah splummer, you made my night last night with your question. I went to sleep dreaming of driving my bus and Toad to Glacier National Park. Health, time and diesel $ willing I will do that some time. For starters I'll just travel to local spots until I get the bugs worked out--besides, there is still a heck of a lot of work to be done to get her ready for even an "overnighter". It's all good and I love working on the bus.
Re: 1935 Chevy school bus
Posted: Sat Jan 26, 2013 2:34 pm
by splummer
glad to make your night, yep i love working on my bus too, cant wait to use it , she sits all winter just waiting for warm weather
Re: 1935 Chevy school bus
Posted: Fri Feb 15, 2013 3:00 pm
by ol trunt
Hello All, While working on the pneumatic door I suddenly realized that I'd have to get the front seat hardware installed before I hung the compressor and air tank as they go right below the front passenger seat and would be in the way if i did them first.
I'm trying to squeeze two front seats into the original cockpit where there was only a drivers seat. To make this work the right passenger seat needs to move not only front to back but forward at a 45 degree angle to allow entry from the door. My captains chairs came with front to back movement (also swivel) so all I had to do was build the 45 degree slide. I used a couple of Ford Taurus power seat frames for parts and both narrowed and lengthened one by 8". I'll mount the passenger seat on the power platform (at a 45 degree angle) and I'll be all set.
I finished the power platform today and did a trial mock up to see if it works. It looks like the seat will move out of the way enough to allow entry and exit via the front door.
Mock up showing the RF passenger seat in the "drive" position. Mock up with RF passenger seat rotated facing back and moved along the 45 degree track.
 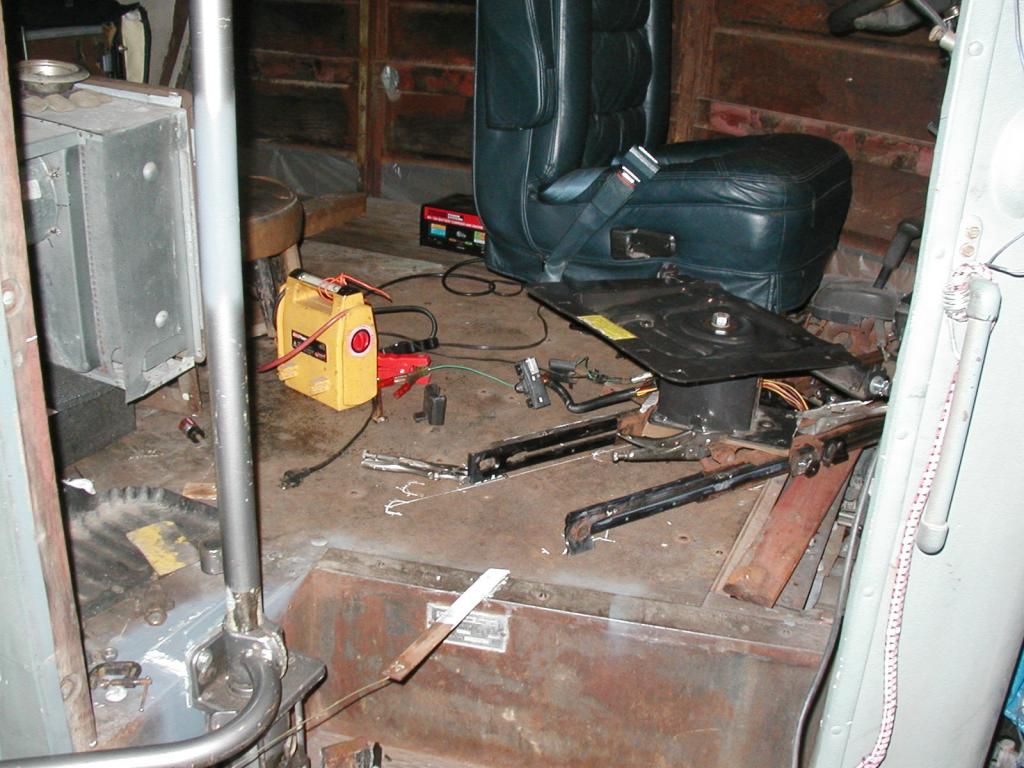 Mock up as seen from the bus looking out the entry door with the rear forward along the 45 degree track.
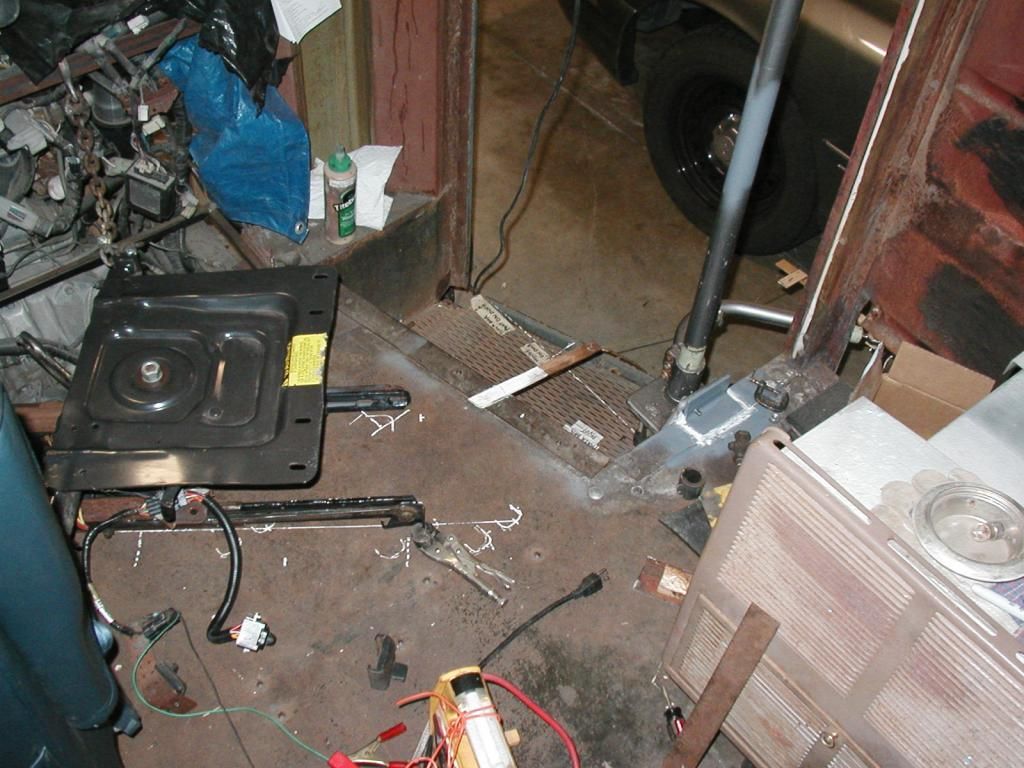
Re: 1935 Chevy school bus
Posted: Fri Feb 15, 2013 11:22 pm
by stuartcnz
With creative twists like this, I can see this will be a very interesting build to follow. Thanks for the update.
Re: 1935 Chevy school bus
Posted: Mon Feb 18, 2013 3:29 pm
by ol trunt
Hello all, I finished up the seat build today. I welded up a box for the drivers seat to sit on so it would be the same height as the passenger seat. I can now actually see the front of the bus when I drive it and my knees are no longer higher than my shoulders- Ha Ha. Once both seats were in I did a mock up of the dinette which the drivers seat services and wiffy and I had afternoon tea in the bus--very civilized. I sort of like the old oak kitchen chair I used for the other dinette seat and will be looking for one that I can keep in the bus. I'll tie it down with seat belts when I drive.
The rest of the day was spent hanging the air compressor--sort of like six pounds of you-know-what in a five pound bag, but after one failed attempt (I had to weld up the holes I drilled and move 'em where they should have been) it fits real snug and makes about the same amount of noise as an RV water pump. I'll probably get the air tank installed tomorrow and begin hooking up plumbing and wiring for the pneumatic door. I still like playing with cars as much as I did when I was forty, but I don't remember the crawling around on the cement wearing me out like it does now

.
Tea is served.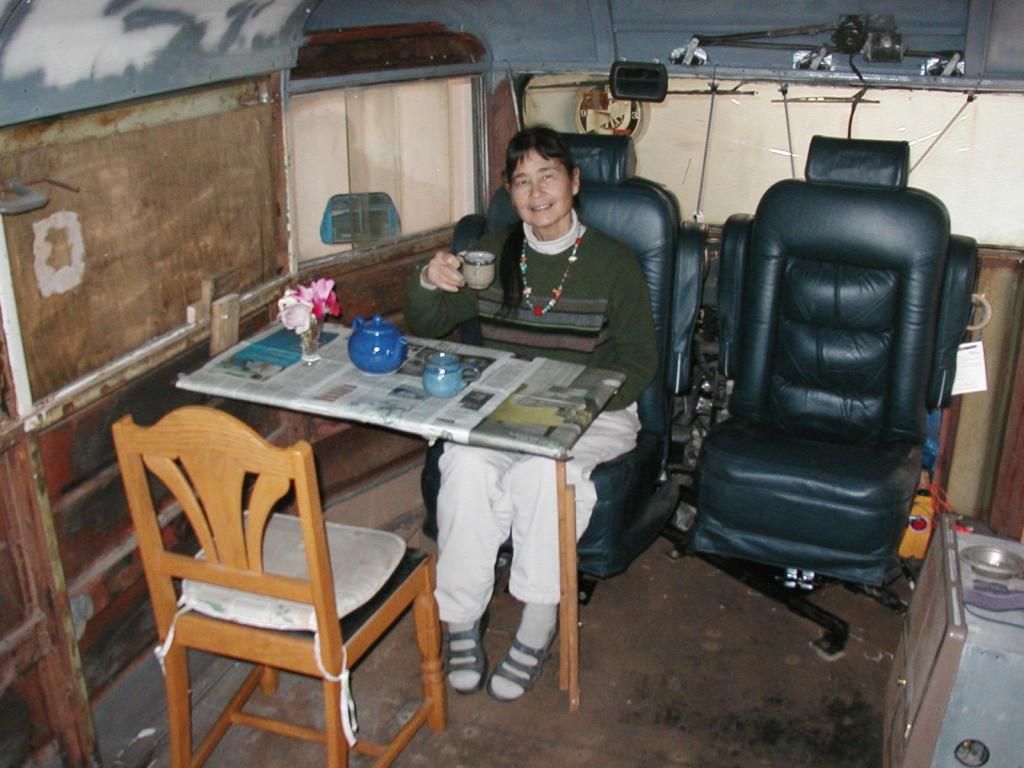 [b/]
[b/]
Here is a pic of the compressor all tucked in between the frame and the entry step. 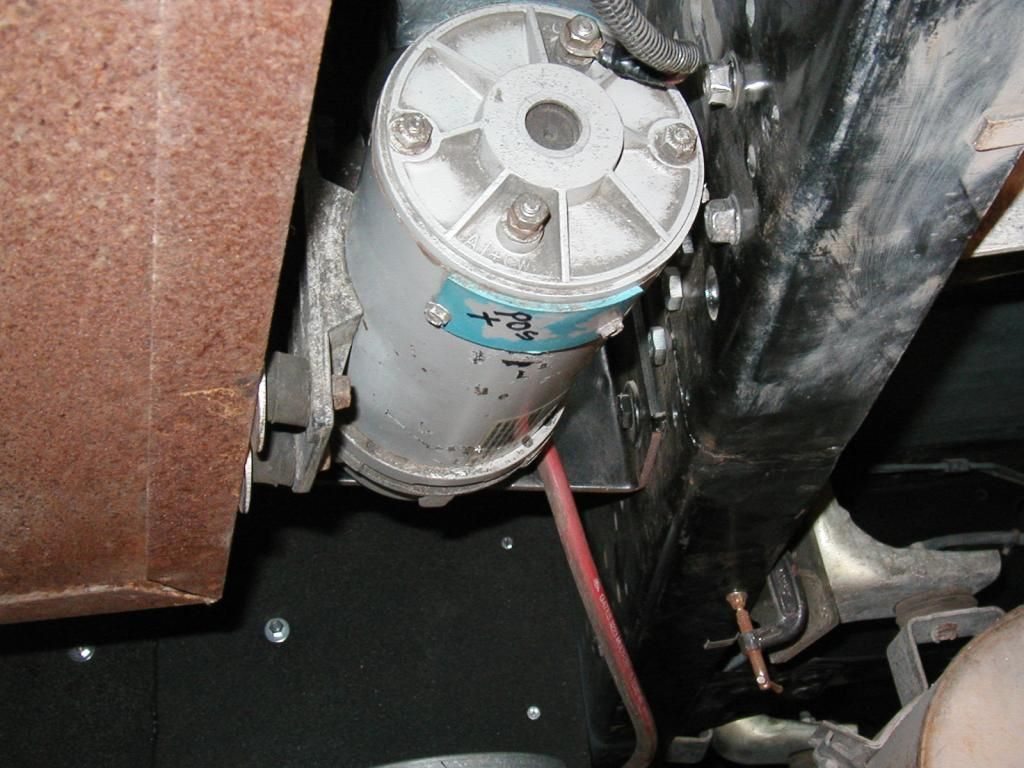
Re: 1935 Chevy school bus
Posted: Mon Feb 18, 2013 4:42 pm
by Dusty
Thanks for the updates , its great to see how you are doing things.
The seat swivel base is identical to the ones I have used in my bus . I find that interesting 'cause we are on the opposite sides of the world

and we are using some of the same stuff.
Re: 1935 Chevy school bus
Posted: Tue Feb 19, 2013 11:20 am
by rlaggren
I guess it must of have been a bit of a challenge to mark it like that - POS+. <g>
Re: 1935 Chevy school bus
Posted: Tue Feb 19, 2013 3:14 pm
by ol trunt
Hello All, riaggren, yup it was easy to mark--I just got out my sharpie and---just kidding. Although it isn't visible in the photo there is an arrow sticker on the pump that reads "wire motor so it rotates this direction". The pump came with two red leads and no + tive or - tive markings so I figured it out the empirical way--trial and error.

I knew I'd never remember which terminal was which so I marked it. Glad I did because I didn't

Today I got the air tank mounted and leak checked. The picture makes it look like the tank is rubbing the drive shaft but there is about 4" separation between the two. If the tank holds pressure overnight I will be ready to complete the door (someday).
I know others have hooked up a port for an air line for tires and such and I may follow their lead.
The flex tube in the foreground is the exhaust pipe for the generator. The bright silver above the tank is 2" of foil backed closed cell foam insulation. 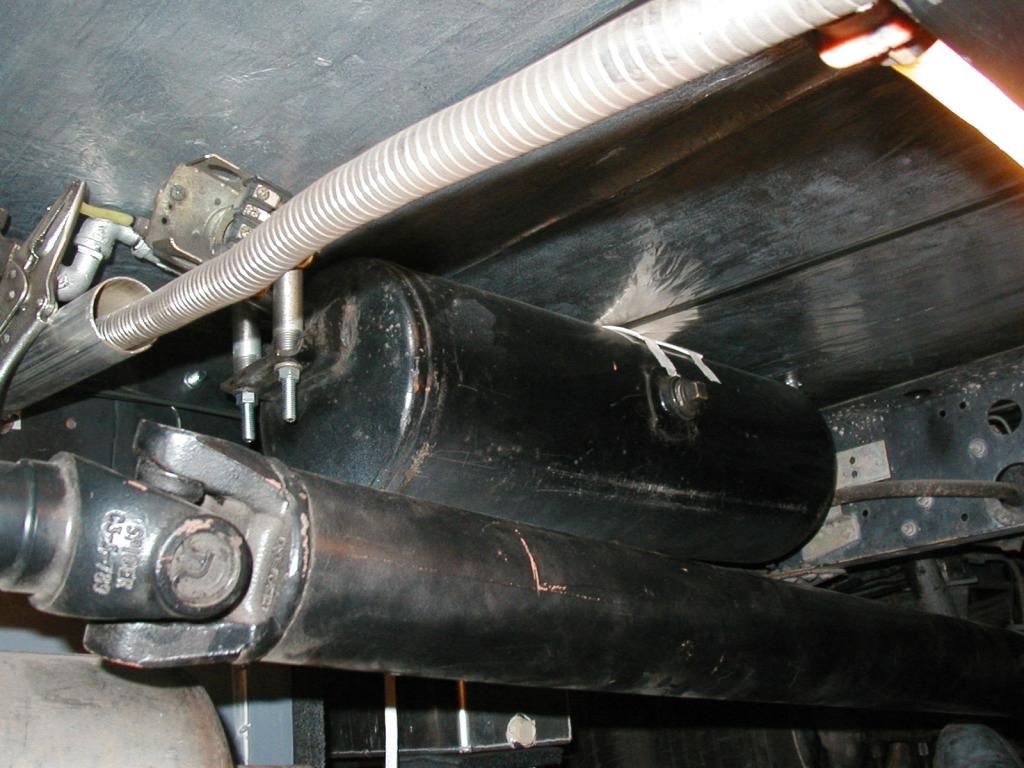 [b/]
[b/]
Re: 1935 Chevy school bus
Posted: Fri Feb 22, 2013 10:29 am
by tango
Hey Jack...don't forget to weld those Vise-Grips in place before yer done!
Re: 1935 Chevy school bus
Posted: Fri Feb 22, 2013 2:31 pm
by ol trunt
Hey Tango, I made a note to weld the vise grips on along with the "C" clamps holding the 100# muffler (see air pump pic) HA! My bus must have been a Friday build as the guys who put it together 75 odd years ago left a wrench for me
The wrench is stuck to a 7/16 nut that holds the bottom stair tred--I intend to leave it where it rests. Thanks for the response. Jack
The wrench is a 3/8 x 7/16 box. The 3/8 end is either broken or rusted away--I missed it in the pic. 
Re: 1935 Chevy school bus
Posted: Sat Feb 23, 2013 2:46 pm
by ol trunt
Thanks stuartcnz for the technical advice. I'm mostly an old wrench puller and haven't had much training on the computer so anything you would care to teach me will be greatly appreciated. I tried to respond to your PM but had no luck hence this note. I did noticed the bold type on some of my pics and not others and wondered why and now I know!

I'll try to keep my posts bus related in the future. Thanks again, Jack
Re: 1935 Chevy school bus
Posted: Sun Feb 24, 2013 7:40 am
by tango
Hey Jack...check and see if that wrench is a Craftsman. You could trade it in for a new one!
But me (and I suspect like you)...I'd leave it right where it is. Just way too cool to mess with. And way better than finding out years later that a surgeon left his tools in yer gizzard!
Re: 1935 Chevy school bus
Posted: Sun Feb 24, 2013 1:27 pm
by ol trunt
Hello all, Another Saturday is over and I managed to get a little done on my bus. The "house" battery tray is done less a piece of plywood to fit under the batteries. There will be two GC 6 volters for interior lights and inverter and one group 24 12 volt to start the generator and run the air compressor. I did a lot of reading regarding out gassing of auto type batteries and I'm confident there is enough air circulation to disipate any hydrogen gas given off by the batteries--hope I'm right!
Battery tray bolted and welded in place. 
Re: 1935 Chevy school bus
Posted: Mon Feb 25, 2013 9:09 am
by splummer
nice work, been following this thread, very interesting, kind of wish i could be working on my bus, but she just sits and waits for warmer weather, one thing i did for her was replaced a window that i broke while sno blowing my drive way, well anyways , keep up the good work , hope to see you on chat later, steve